


BIM BCF Panel - Benutzerdefinierte Anmeldung Dialog
Wird über das Panel BIM BCF geöffnet
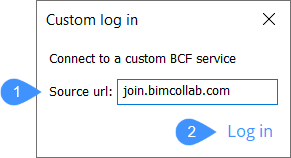
Im Dialog BIM BCF Benutzerdefinierte Anmeldung können Sie eine Verbindung zu einem Cloud-Dienst herstellen, um mit der Zusammenarbeit an Problemen in den Zeichnungen zu beginnen.
- Quell-URL
- Anmelden
Quell-URL
Es ist im Allgemeinen einfacher, Cloud-Dienste zur Verwaltung von BCF-Aufgaben zu verwenden. Wenn Sie eine Verbindung zu diesen Diensten aus BricsCAD® BIM heraus herstellen möchten, benötigen Sie zunächst ein Konto für diese Dienste. Auf diese Weise können Sie Ausgaben erstellen und sie in Echtzeit von überall aus verwalten.
Um eine Verbindung zu einem Cloud-Dienst herzustellen, geben Sie die URL in das Feld Quell-URL ein.
Anmelden
Verbindet Sie mit dem Cloud-Dienst. Geben Sie die E-Mail-Adresse und das Passwort ein, um sich zu verbinden.
Schließen Sie nach der Anmeldung das Browserfenster und starten Sie die Zusammenarbeit an Problemen in BricsCAD®.