Allows you to easily create X-axis or Y-axis aligned walls.
Note: The command only works if there is already a wall in the drawing. A red cross next to the cursor is displayed if the command is launched in a drawing without walls or when you click in the wrong place in a drawing to indicate the command cannot be used.
Methods
There are five methods to draw a wall using the BIMQUICKWALL command:
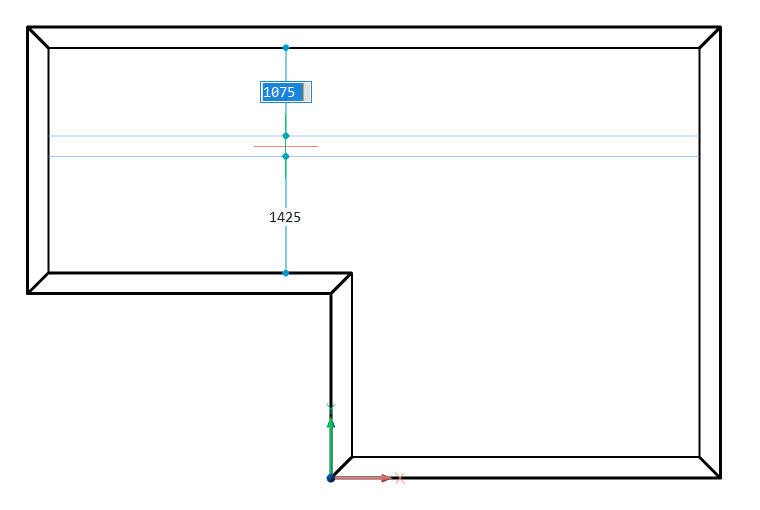
Between two parallel walls (both ends of the newly created wall are
connected to the perpendicular walls).
Note: If dynamic input
(DYN) is set to On,
the distances to the parallel walls are displayed. Tap
TAB key to switch between the dimensions
and set them manually.
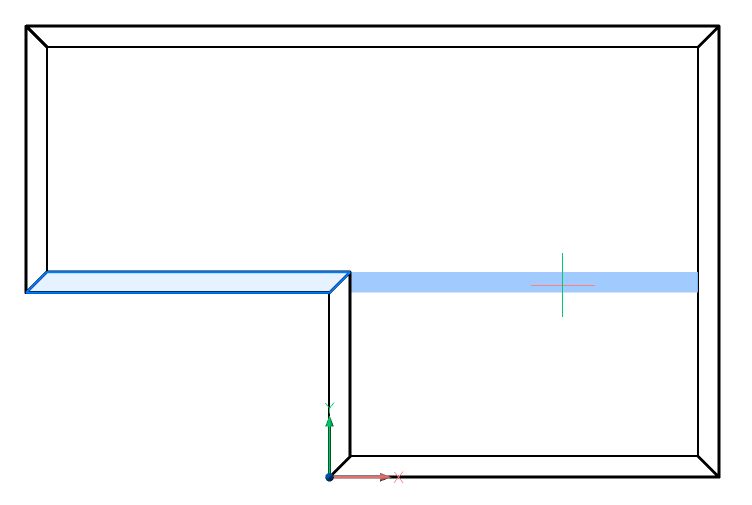
As an extension of an existing wall, where both ends of the newly created
wall are connected to walls (one to the existing wall being extended and the
other to the perpendicular wall).
As an extension of an existing wall, where only one end of the newly created
wall is connected to the existing wall being extended (the other wall end is
free).
As a free wall with a configurable fixed length (the ends of the newly
created wall are not connected to other walls).
While in Top View Mode (TVM), by automatically detecting wall width
from an underlying point cloud and setting it as the wall width value in the
command context panel. The wall preview cursor adopts this width as well and
sticks to the wall location.
Note: To enter the TVM, open the Story Bar by
setting the STORYBAR system variable to 1 or 2, then click a story
disk to activate a story.
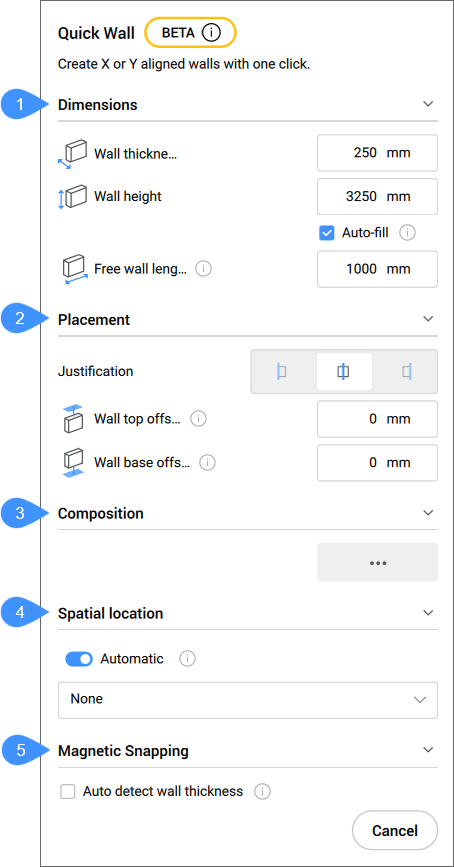
The Quick Wall command context panel opens when the BIMQUICKWALL command is launched, as well as the Hotkey Assistant widget.
Dimensions
Placement
Composition
Spatial location
Magnetic Snapping
Dimensions
Allows you to define the walls dimensions.
Wall thickness
Sets the thickness of the walls being created.
Wall height
Sets the height of the walls being created.
Auto-fill
Automatically fills in the Wall
height field by searching for solids above
the wall to connect to.
Free wall length
Sets the length of the free walls being created.
Placement
Allows you to define the walls placement.
Justification
Allows you to select the wall justification.
Wall top offset
Sets the top offset from the slab detected above the walls
being created.
Note: This option becomes unavailable
when the Auto-fill option is set
to Off.
Wall base offset
Sets the base offset from the slab detected bellow the walls
being created.
Composition
Click the browse button () to
open the Compositions dialog box that lets you
select a wall composition.
Spatial Location
You can accept the automatically assigned spatial location or define a
new one by selecting an option from the drop-down menu.
Automatic
Assigns the detected building and floor to the walls being
created.
Note: Selecting a different spatial location than
the one automatically assigned toggles the
Automatic option to
Off.
Magnetic Snapping
Auto detect wall thickness
Controls whether the wall cursor should snap to existing walls thickness.
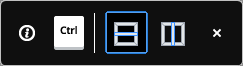
The Hotkey Assistant widget lets you change the direction of
the walls to be created. You can press Ctrl key to switch
between X-aligned wall and Y-aligned
wall options.
Note: The Hotkey Assistant widget is
displayed if the HOTKEYASSISTANT system variable is set to 1 and the
Display Hotkey Hints for BIMQUICKWALL options
checkbox is ticked in the Hotkey Assistant Configuration
dialog box.


 ) to
open the Compositions dialog box that lets you
select a wall composition.
) to
open the Compositions dialog box that lets you
select a wall composition.