


Edit dimensioning dialog box
Description
The Edit Dimensioning dialog box allows you to edit the properties of a dimension. It can be launched by the AMPOWEREDIT command if you select a dimension.
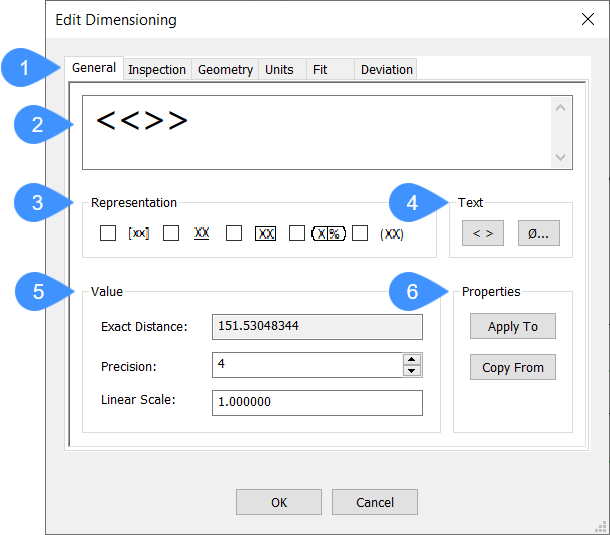
- Editor tabs
- Graphical representation
- Representation
- Text
- Value
- Properties
General
- Graphical representation
- Represents how the dimension text will look like.
- Representation
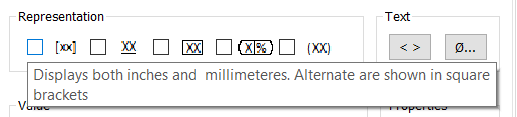
- Defines how the dimension is represented.Note: A tooltip with explanation about the representation appears when you hover over the checkboxes of the options.
- Text
- Adds text elements to the displayed dimension text. The left symbol toggles on and off whether the dimension value will be displayed and you can select Special Characters from the Special Characters dialog box if you click the character box.
- Value
- Specifies the settings of the value that is displayed.
- Exact Distance: displays the exact distance of the selected dimension.
- Precision: specifies the number of decimal digits that are displayed. By default this is set to 2.
- Linear Scale: specifies the linear scale of the dimension value. By default this is set to 1.
- Properties
-
- Apply to: allows you to apply the specified properties to other entities. Click the Apply to button, then select the entities you want to apply the dimension settings to. The Properties dialog box opens, where you can select the properties that you want to apply to the selected entities.
- Copy From: allows you to copy properties from a selected entity to the Edit Dimensioning dialog box. click the Copy From button and select an entity you want to copy properties from. This opens the Properties dialog box, where you can select the properties that you want to copy to the Edit Dimensioning dialog box.
Inspection
- Shape
- Label/Inspection Rate
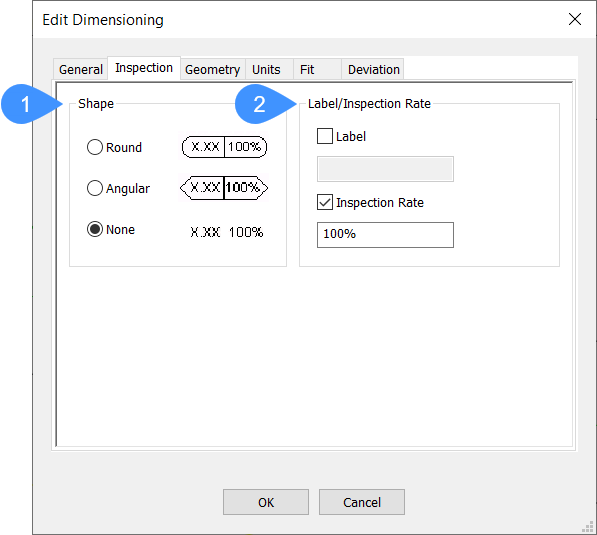
- Shape
- Defines the shape of the frame around the dimension text. You can toggle between the options.
- Label/Inspection Rate
- Specifies the settings for the inspection dimension.
- Label: toggles the label on or off which identifies individual inspection dimensions. You can type a label in the Label box if Label is toggled on.
- Inspection Rate: toggles the display of the Inspection Rate on or off. You can enter an inspection rate, this is the frequency the part is inspected with.Note: The inspection rate is expressed as a percentage.
Geometry
- Geometry
- Text offset
- Center Mark
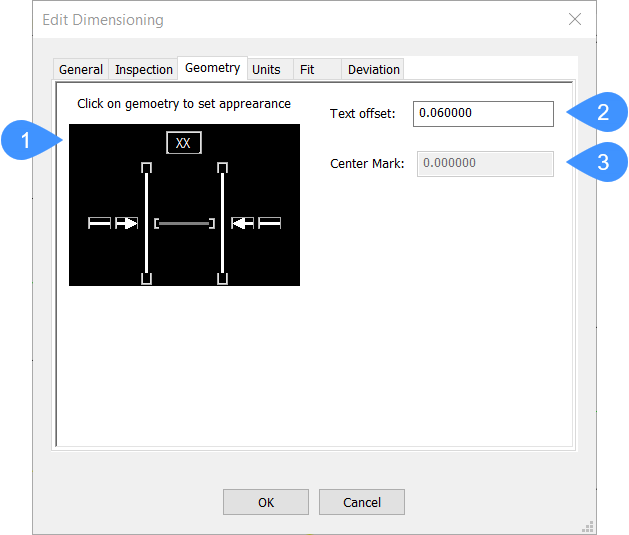
- Geometry
- Displays how the dimension will look like. You can toggle on and off the First Dimension line, the First Extension Line, the Second Extension Line, the Second Dimension Line, Display Center and Force Line Inside.
- Text offset
- Specifies the text offset from the dimension line.
- Center Mark
- Specifies the size of the Center Mark. This option is only enabled with a radius or diameter dimension, when the Display Center option is toggles on in the Geometry box.
Units
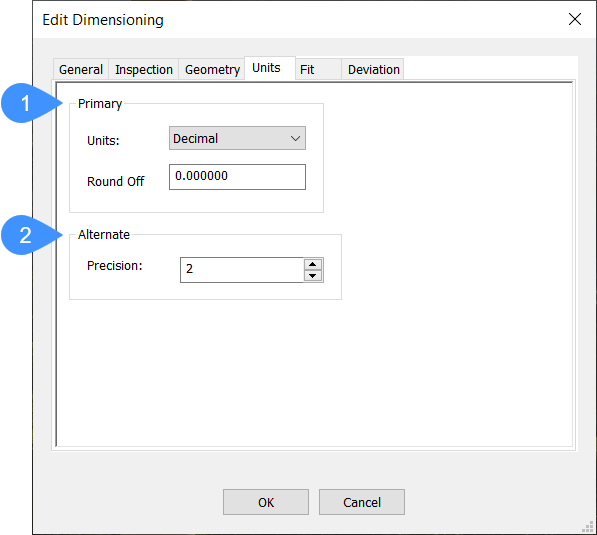
- Primary
- Alternate
- Primary
- Specifies the properties for the primary units.
- Units: opens a drop-down list where you can select the unit type. By default this is set to Decimal.
- Round Off: specifies the number of decimals to round off the dimension values.
- Alternate
- Specifies the properties for alternate units. The precision sets the number of decimals for the alternate units.
Fit
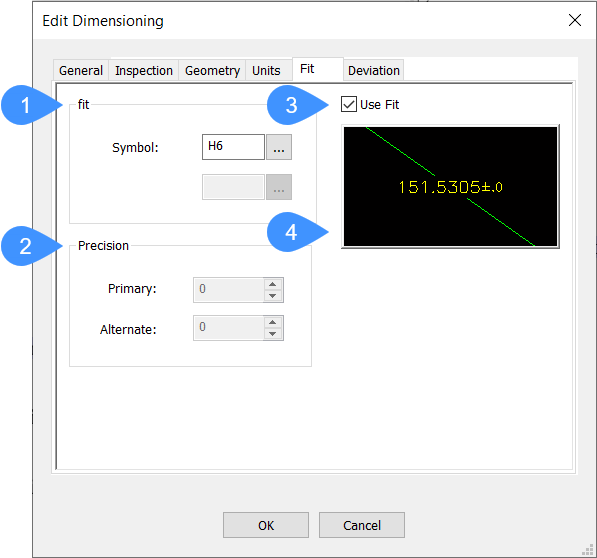
- Fit
- Precision
- Use Fit
- Preview
- Fit
- Sets the symbol to display the fit. This is only displayed if the Use Fit option is toggled on. Click the three dots to open the Fits dialog box to add fits to dimensions.
- Precision
- Sets the number of decimals of the Primary and Alternate units.
- Use Fit
- Toggles on and off whether the fit is displayed in the dimension text.
- Preview
- Displays how the fit is displayed in the dimension text.
Deviation
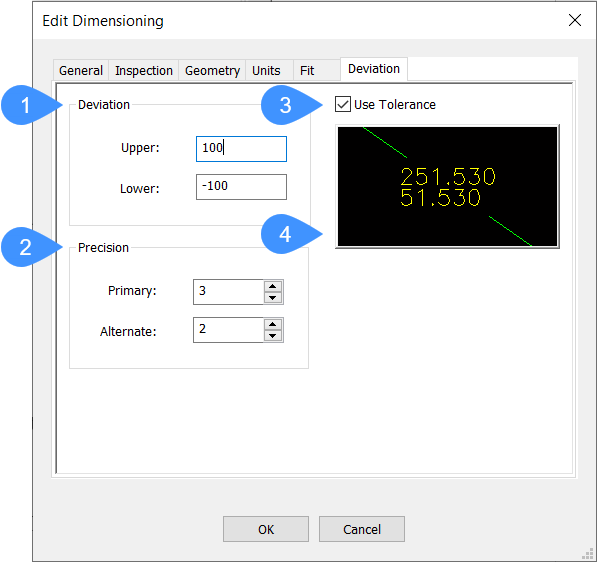
- Deviation
- Precision
- Use Tolerance
- Preview
- Deviation
- Sets the upper and lower deviation limit between the nominal value and the lower and upper tolerance value that are displayed.
- Precision
- Sets the number of decimals of the Primary and Alternate units.
- Use Tolerance
- Toggles on and off whether the dimension text is displayed as a tolerance value.
- Preview
- Displays how the tolerance values are displayed as dimension text.