


Working with Symbols and Labels
Creating a user-defined Symbol block
- Open a new drawing.
- Create the Symbol block with the BricsCAD® Draw group of commands.Note: Place the block base point to coordinates (0,0,0) or define the base point with the command WBLOCK.
- Save the drawing or write block to file with the command WBLOCK.
Creating a user-defined Label block
-
Open a new drawing.
-
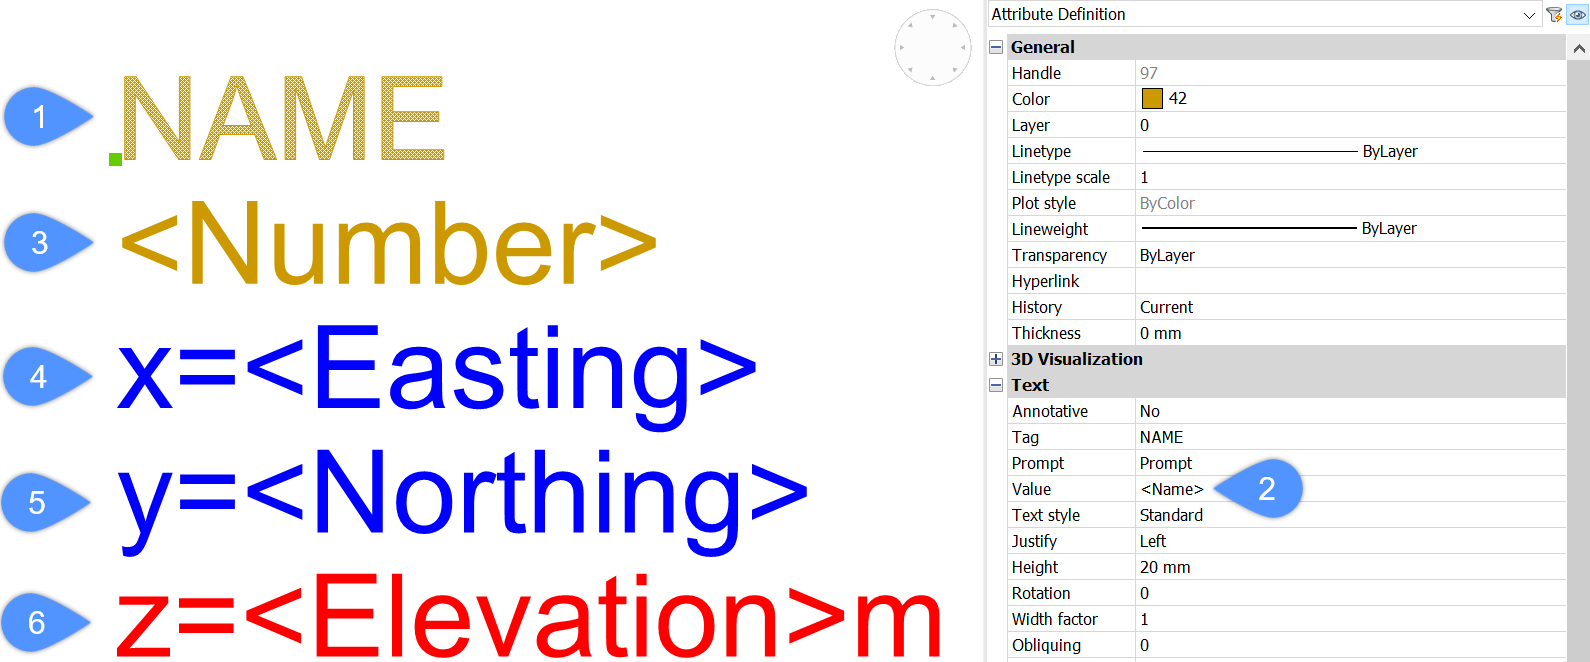
Insert Texts and Attribute Definitions to display attributes for the selected Civil points. The following attributes are used for this example: Point Name, Point Number, Easting, Northing and Elevation.
-
Insert a new Attribute Definition (1). Type <Name> (2) in the Value field in the Attribute Definition properties, to display the point name in a drawing.
-
Insert a new Text with the content <Number> (3), to display the points numbers in a drawing.
-
Insert a new Text with the content x=<Easting> (4), to display the points X coordinates. To add a prefix, type the text: x = before the < character.
-
Insert a new Text with the content y=<Northing> (5), to display the points Y coordinates. To add a prefix, type the text: y = before the < character.
-
Insert a new Text with the content z=<Elevation>m (6), to display the points elevations. To add a prefix, type the z = before the < character. To add a suffix, type m after the > character.
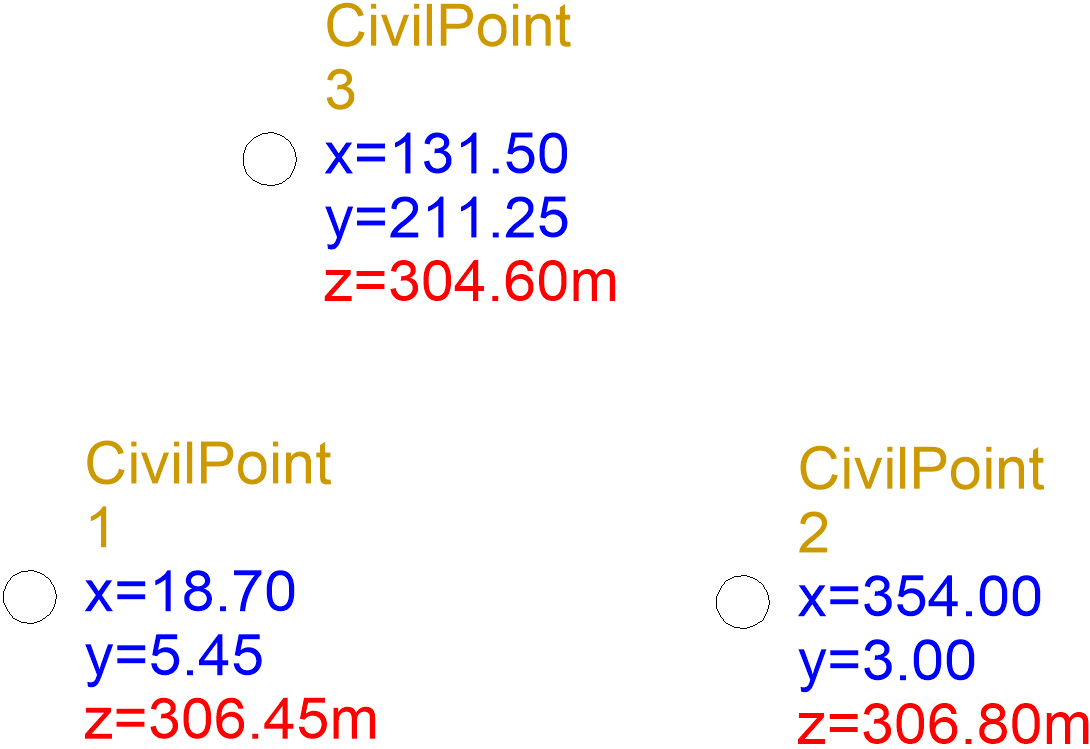
User-defined point attributes assigned to the selected Civil Points in a drawing
-
-
Edit the Text and/or Attribute definition parameters, such as Color, Text Style, Height, Rotation, etc. in the Properties panel.
-
Change the attribute position by moving the desired Text/Attribute definition using the MOVE command, or edit its position in the Properties panel.
Note: The position of attributes in a Label block determines their offset from the Symbol block insertion point, which is located at the coordinates (0,0,0). -
Save the drawing.
-
Launch the INSERT command and insert the block saved in the previous step into the drawing.
-
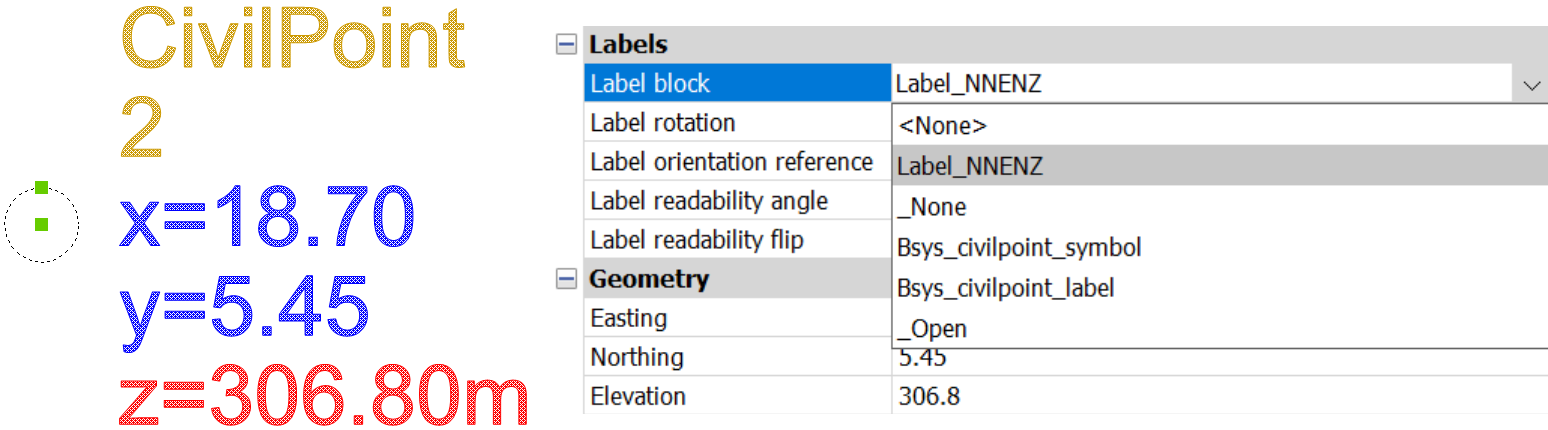
Select the desired Civil points in the drawing and choose the appropriate Label block from the Label block drop-down list in the Civil Point Properties panel.
Assign Label block to the selected Civil point
Editing Civil point Symbol block
This section describes the procedure for editing a pre-defined Symbol block. It can also be used to edit user-defined Symbol blocks.
-
Launch the BEDIT command.
-
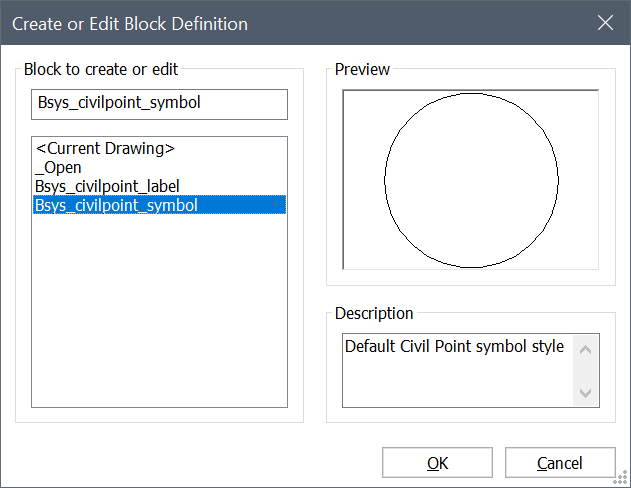
Select the pre-defined Symbol block Bsys_civilpoint_symbol and click OK.
List of available blocks in a drawing
-
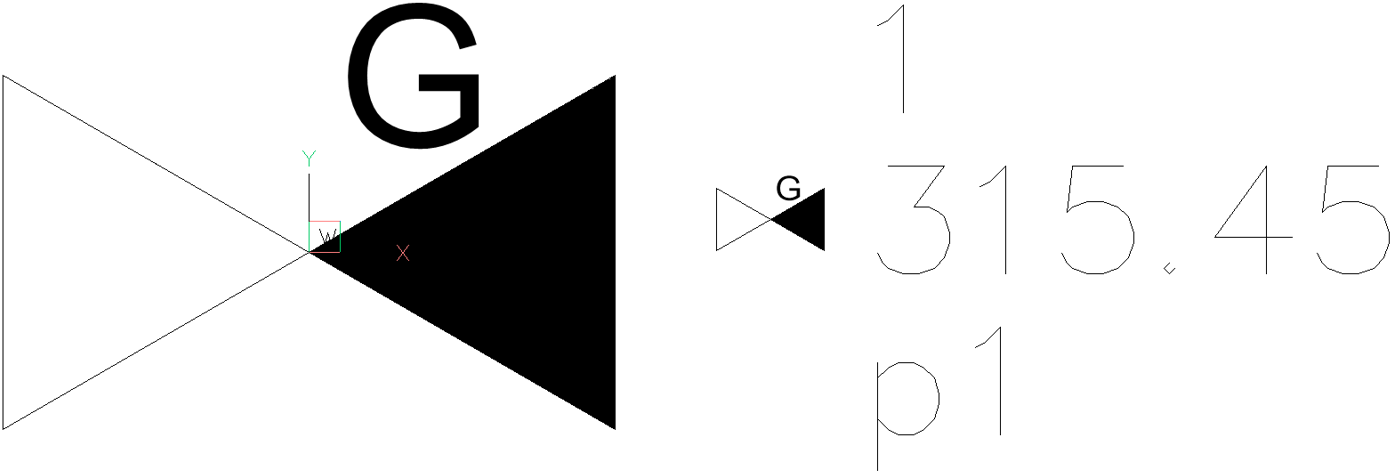
Edit the Symbol block in the Block editor.
Symbol block defined in the Block editor (left) and assigned to a Civil point in a drawing (right)
-
Save the block In the Block editor.
Note: Civil Point Symbol block is automatically refreshed in the drawing.
Editing Civil point Label block
This section describes the procedure for editing a pre-defined Label block. It can also be used to edit user-defined Label blocks.
The pre-defined Label block contains only a few attributes that are visible on Civil points in the drawing. Other attributes that Civil points contain but are not visible in a drawing, must be added to the Symbol block.
-
Launch the BEDIT command.
-
Select the pre-defined Label block Bsys_civilpoint_label and click OK.
List of available blocks in a drawing
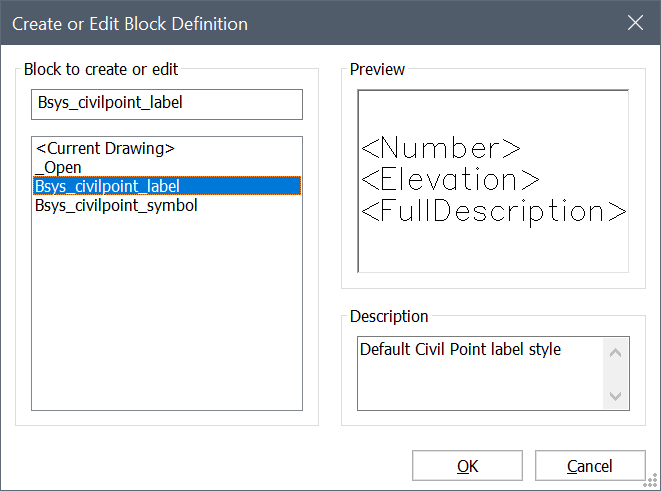 Note: Texts containing <Number>, <Elevation> and <FullDescription> are inserted in a pre-defined Label block to display the default attributes when inserting Civil points in a drawing.
 -
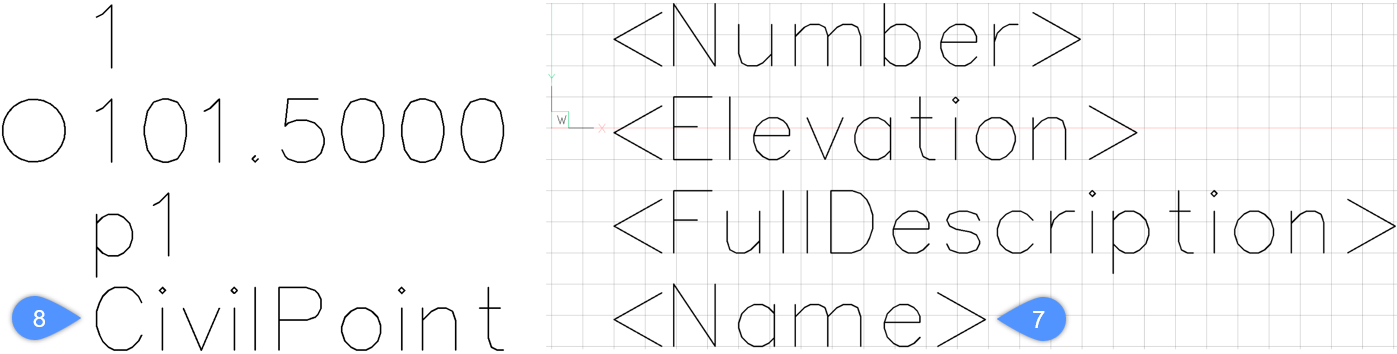
Insert a Text containing <Name> (7), or similar, type the<Name> in the Value field in the Attribute Definition properties, to display the point name (8) in a drawing.
Additional attribute added to a Label block
An attribute prefix can be added before the < character and a suffix after the > character.
Other Civil point attributes, such us Easting, Northing, User-defined attributes etc., can be added to a Label block by the same principle.
-
Edit the Text and/or Attribute definition parameters, such as Color, Text Style, Height, Rotation etc. in the Properties panel.
-
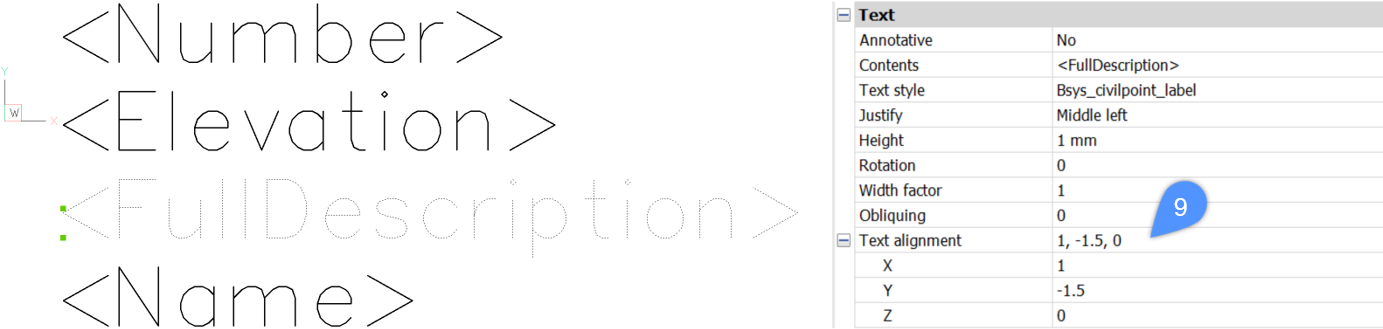
Change the attribute position by moving the desired Text/Attribute definition using the MOVE command, or edit its position (9) in the Properties panel.
Edit the Text position in the Properties panel
 Note: The position of attributes in a Label block determines their offset from the Symbol block insertion point, which is located at the coordinates (0,0,0).
 -
Save the block In the Block editor.
-
Launch the REGEN command to refresh the Civil point labels.