Using the Details panel
Opening the Details panel
If the Details panel doesn't display in the panel, right-click in the panel and select or execute the DETAILSPANELOPEN command.
 ) is added to the collapsible panelset at the right-hand side of the BricsCAD application window.
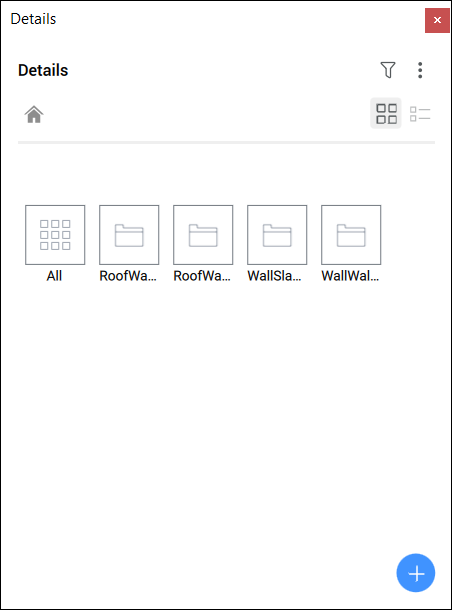
Click on the Details button () to expand/collapse the Details panel.
Saving details to the Details panel
After you created a new detail, it's possible to save it to the Details panel. This way, you can use the same detail in other files. Use the command BIMCREATEDETAIL or click Create Detail in the Details panel.
Viewing a detail
- Click the category of the detail you want to view. The details assigned to that category display.

- Click the detail you want to view.
The View detail dialog box displays.
Managing tags
- In the Details panel, click on the detail you want to adjust.
The View Detail dialog box displays.
- Go to the Solid Reference Tags category to manage the solid reference tags.
You can only delete these tags, you cannot add new tags.
- Click in the add tags
 button and type the name for the new tag, then press ENTER to add it into General Tags.
The new tag is added to the General Tags category in an orange box.
Repeat this procedure to add more tags.
- Click Save to save the changes and close the View Detail dialog box.
Searching details with tags
Click the filter icon ( ) to open the filter options. Here you can search the library for specific details using tags. You can add one or more tags at once to filter your result and select all matching details.
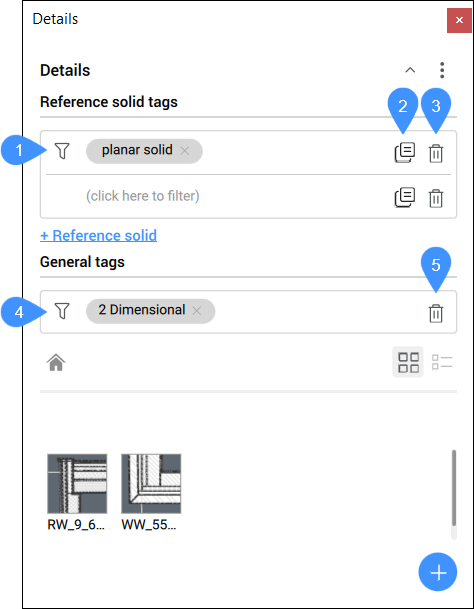
- Add Reference solid tag
- Copy Reference solid
- Delete the Reference solid
- Add General tag
- Delete General tag
- Add Reference solid tag
- Click in the box to open the drop-down list with Reference solid tags and select a tag from the list. You can also type a name of a tag to add the tag.Note: You can add several tags per reference solid. to add a reference solid, click on + Reference solid.
- Copy Reference solid
- Copies the selected Reference solid with its tags.
- Delete the Reference solid
- Deletes the selected reference solid.Note: you can click the cross next to the tag name to delete only one tag from a Reference solid
- Add General tag
- Click in the box to open the drop-down list with General tags and select a tag from the list. You can also type a name of a tag to add the tag.Note: You can add multiple tags.
- Delete General tag
- Deletes all the General tags.Note: you can click the cross next to the tag name to delete only one tag.
Editing a detail
- Click the detail you want to edit to open the View Detail dialog box.
- Click the Open button.
The .dwg file of the detail opens in a separate drawing tab.
- Make the necessary adjustments to the detail.
- Save the detail .dwg file.
The detail is updated in the Details panel.
- The existing details won’t be updated automatically. To replace the existing details by the new one, follow the steps below to propagate a detail.
Propagating a detail
You can propagate a detail to all of the similar connections in your project.
- Click a detail in the library.
The View Detail dialog box displays.
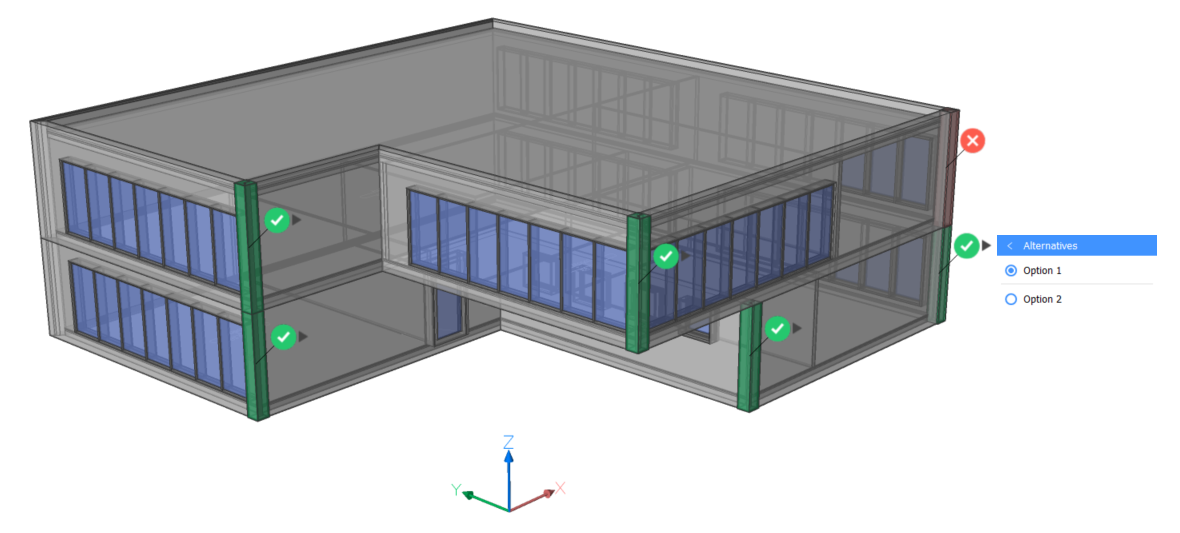
- Click Propagate.
To apply all suggestions, press Enter.
To reject a suggestion click on the check mark. A red cross icon replaces the check mark. Click the icon again to accept the suggestion. If there are several alternatives, the alternatives display when you hover over the check mark and you can select the option you want.
Press Enter to accept all accepted suggestions.
You can also propagate a detail in your project using the BIMPROPAGATEFROMFILE command. This command allows you to propagate detail files that are not in the library.
Sharing details
You can save details as a .dwg file and share the details folder/library. Save the detail drawings at the correct location to display it in the Details panel.
- If you want to make a new detail to share, you can create a new detail first, as is explained above.
The following steps apply both to new details as well as existing details.
- All the details you have created are automatically saved in the folder, and its subfolders, which is set through the DETAILSPATH system variable. By default, this is C:\ProgramData\Bricsys\Details.
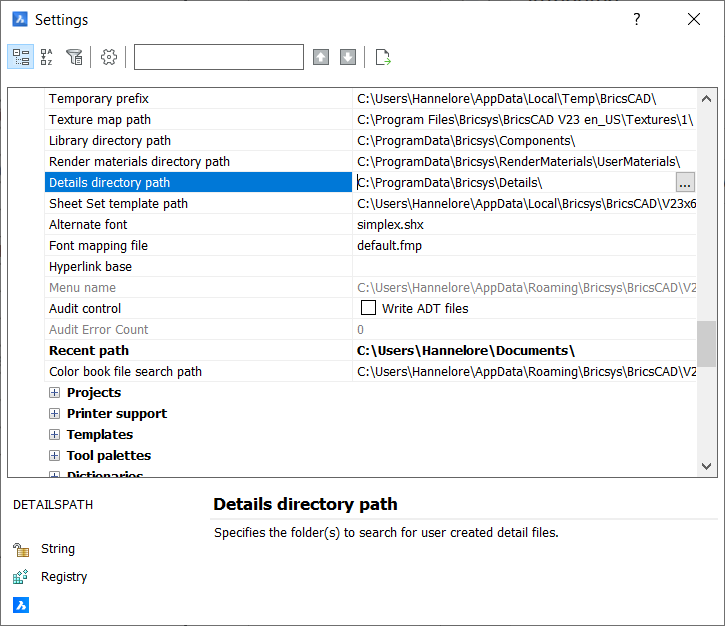
Then click on the three dots next to the existing name in the Path List to open the Path List dialog box. Here you can change the location.
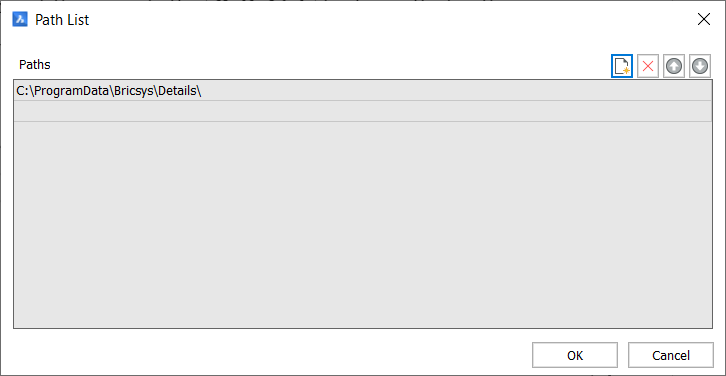
You can also create additional paths.
Click the New icon (
 ), then click on the three dots of the new row to add a path for the Details library.
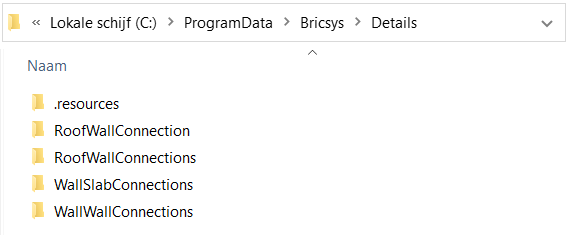
 - If you want to share a folder, go to the file explorer on your computer and follow the path to the details folder. If you haven’t created any details yet, this folder only contains the folder .resources.
If you have created some details, you can find the same folders here as in the Details panel.
- Copy the folder that you want to share and turn it into a zip file. You can share this zip file with others.
- If you receive a zip file you should unpack it and copy the folders containing the details to the folder C:\ProgramData\Bricsys\Details.Note: Make sure the details are saved in a folder that you place in the Details folder. If you just place the dwg files in the Details folder, they will not appear in the Details panel.
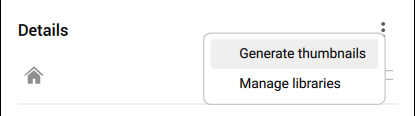
- To load the new details in your library panel, go to the Details panel, open the Menu and click Generate thumbnails.
The new details folders will appear in the Details panel.