Importing Autodesk Revit families in BricsCAD
Commands
IMPORT, INSERT
Disclaimer
Unless otherwise indicated, the word Revit used in this article refers to the Revit® software and its peripherals by Autodesk®.
Important notification before getting started
BricsCAD V26 currently supports the import of Revit 2015-2026 files only. The previous BricsCAD versions support to import Revit® files as shown in the table below. If you would like to import a model created in a later version of Revit®, please consider importing the model into BricsCAD as an IFC file. For more information, please visit the IFC import and export in BricsCAD article.
| BricsCAD BIM version | Supported Revit® version |
|---|---|
| BricsCAD BIM V22 | Revit 2015-2022 |
| BricsCAD BIM V23 | Revit 2015-2023 |
| BricsCAD BIM V24.1 | Revit 2015-2023 |
| BricsCAD BIM V24.2 | Revit 2015-2024 |
| BricsCAD BIM V25.1 | Revit 2015-2024 |
| BricsCAD BIM V25.2 | Revit 2015-2025 |
| BricsCAD BIM V26.1 | Revit 2015-2025 |
| BricsCAD BIM V26.2 | Revit 2015-2026 |
Importing RFA family files
- Launch the IMPORT command to open the Import file dialog box.
- Select Revit Family (*.rfa file) (1) in the Files of type list.
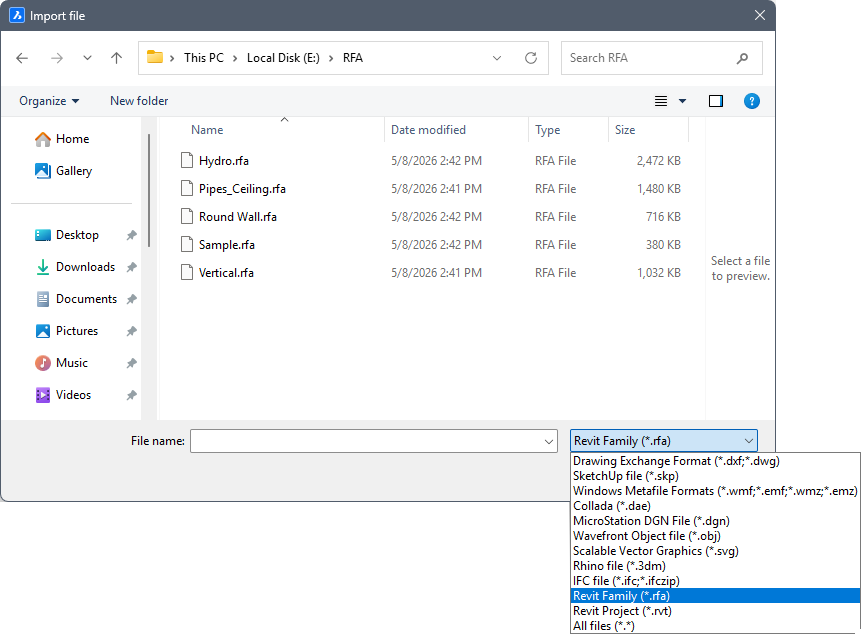
- Select the RFA file you want to import.
- Click Open to import the Revit® Family.
When the RFA family file is imported the geometry from this file is included in BricsCAD as separate 3D solids.
Procedure: inserting RFA family files
- When DUCS = ON (Dynamic UCS) the RFA entity aligns with the 3D solid face under the cursor.
- When DYN = ON (Dynamic Dimensions) the distances from the nearest parallel edge on the face of the 3D solid display.
Using Insert
- Launch the INSERT command to open the Insert Block dialog box.
- Select Browse... to open the Select Drawing File dialog box.
- Browse to the folder where your RFA family files are saved.
- Select Revit Family (*.rfa file) (2) in the Files of type list.
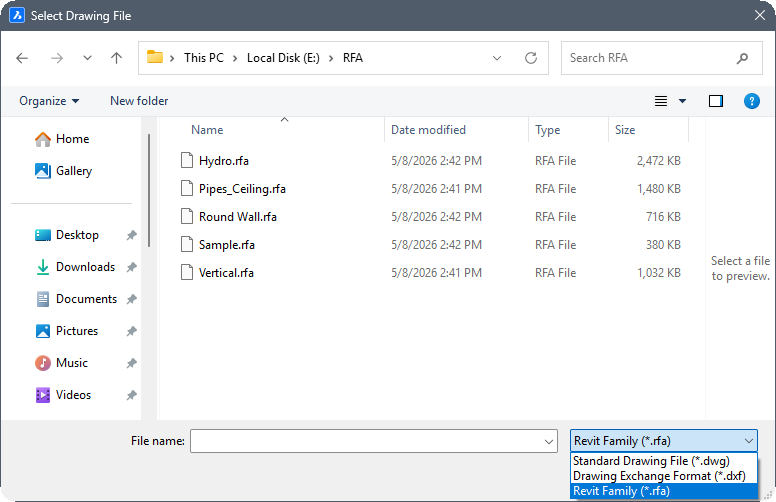
- Select the RFA file you want to import.
The selected file is attached to the cursor (3).
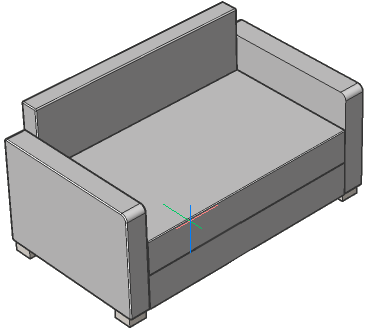
The following illustration shows inserting a Revit® family sofa when both DYN and DUCS are On.
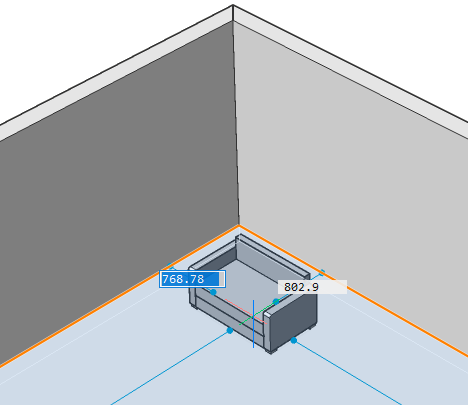
- Do the following to place the selected RFA family file using the dynamic dimension fields:
- Hit the Tab key to select one of the dynamic dimension fields, then type a value and hit the Tab key to lock the dimension. The locked dimension will turn red.
- Repeat the previous step to lock another dynamic dimension field.
- Optionally hit the Tab key to adjust the dynamic dimensions.
- Press Enter to accept the current position.
Using the Library panel
- Open the Settings dialog box and search for the COMPONENTSPATH system variable.
- Add the RFA root folder to the path list.
- The contents of the selected folder are automatically listed in the Library panel.
- If necessary, choose to Generate Thumbnails in the menu of the Library panel.
-
Select the RFA file from the Library panel to place it in your model space.
The following animated GIF shows how to add the RFA root folder path to the Library directory path.