Bricsys 24/7 3D Viewer (Beta)
The Bricsys 24/7 3D Viewer allows you to view 3D models.
The supported file formats are:
| Format | File extension |
|---|---|
| CAD | .dwg |
| Revit | .rvt |
| IFC2X3, IFC4 | .ifc |
What’s new?
- Upload a new model in a document folder to start the conversion process.
- View your model quicker, thanks to a faster conversion process.
- Now, it also supports Revit files (RVT 2023 and older) and IFC4 files.
- It has an innovative design to orient the model to a basic view.
- Introducing an expandable Model structure and separate Properties panel.
- Synchronized selection of elements from view to Model structure and vice versa.
- User-friendly, familiar, and unified way to navigate the model.
- Use the Esc key to exit a command.
- More versatile slicing of the model with the section box.
Open the Bricsys 24/7 3D Viewer from the main application
- Click Files
 in the toolbar.
 - Upload a new model in a document folder to start the conversion process.
- Click the file name in the content pane to open the document details dialog.
- Click Open in viewer.
The 3D Viewer opens.
Tip: The files do not have a preview, but this does not mean that the file was not converted yet.
Disclaimer
When testing, be aware of the size of the file (gigabyte usage). 3D models can quickly consume a lot of your cloud storage.
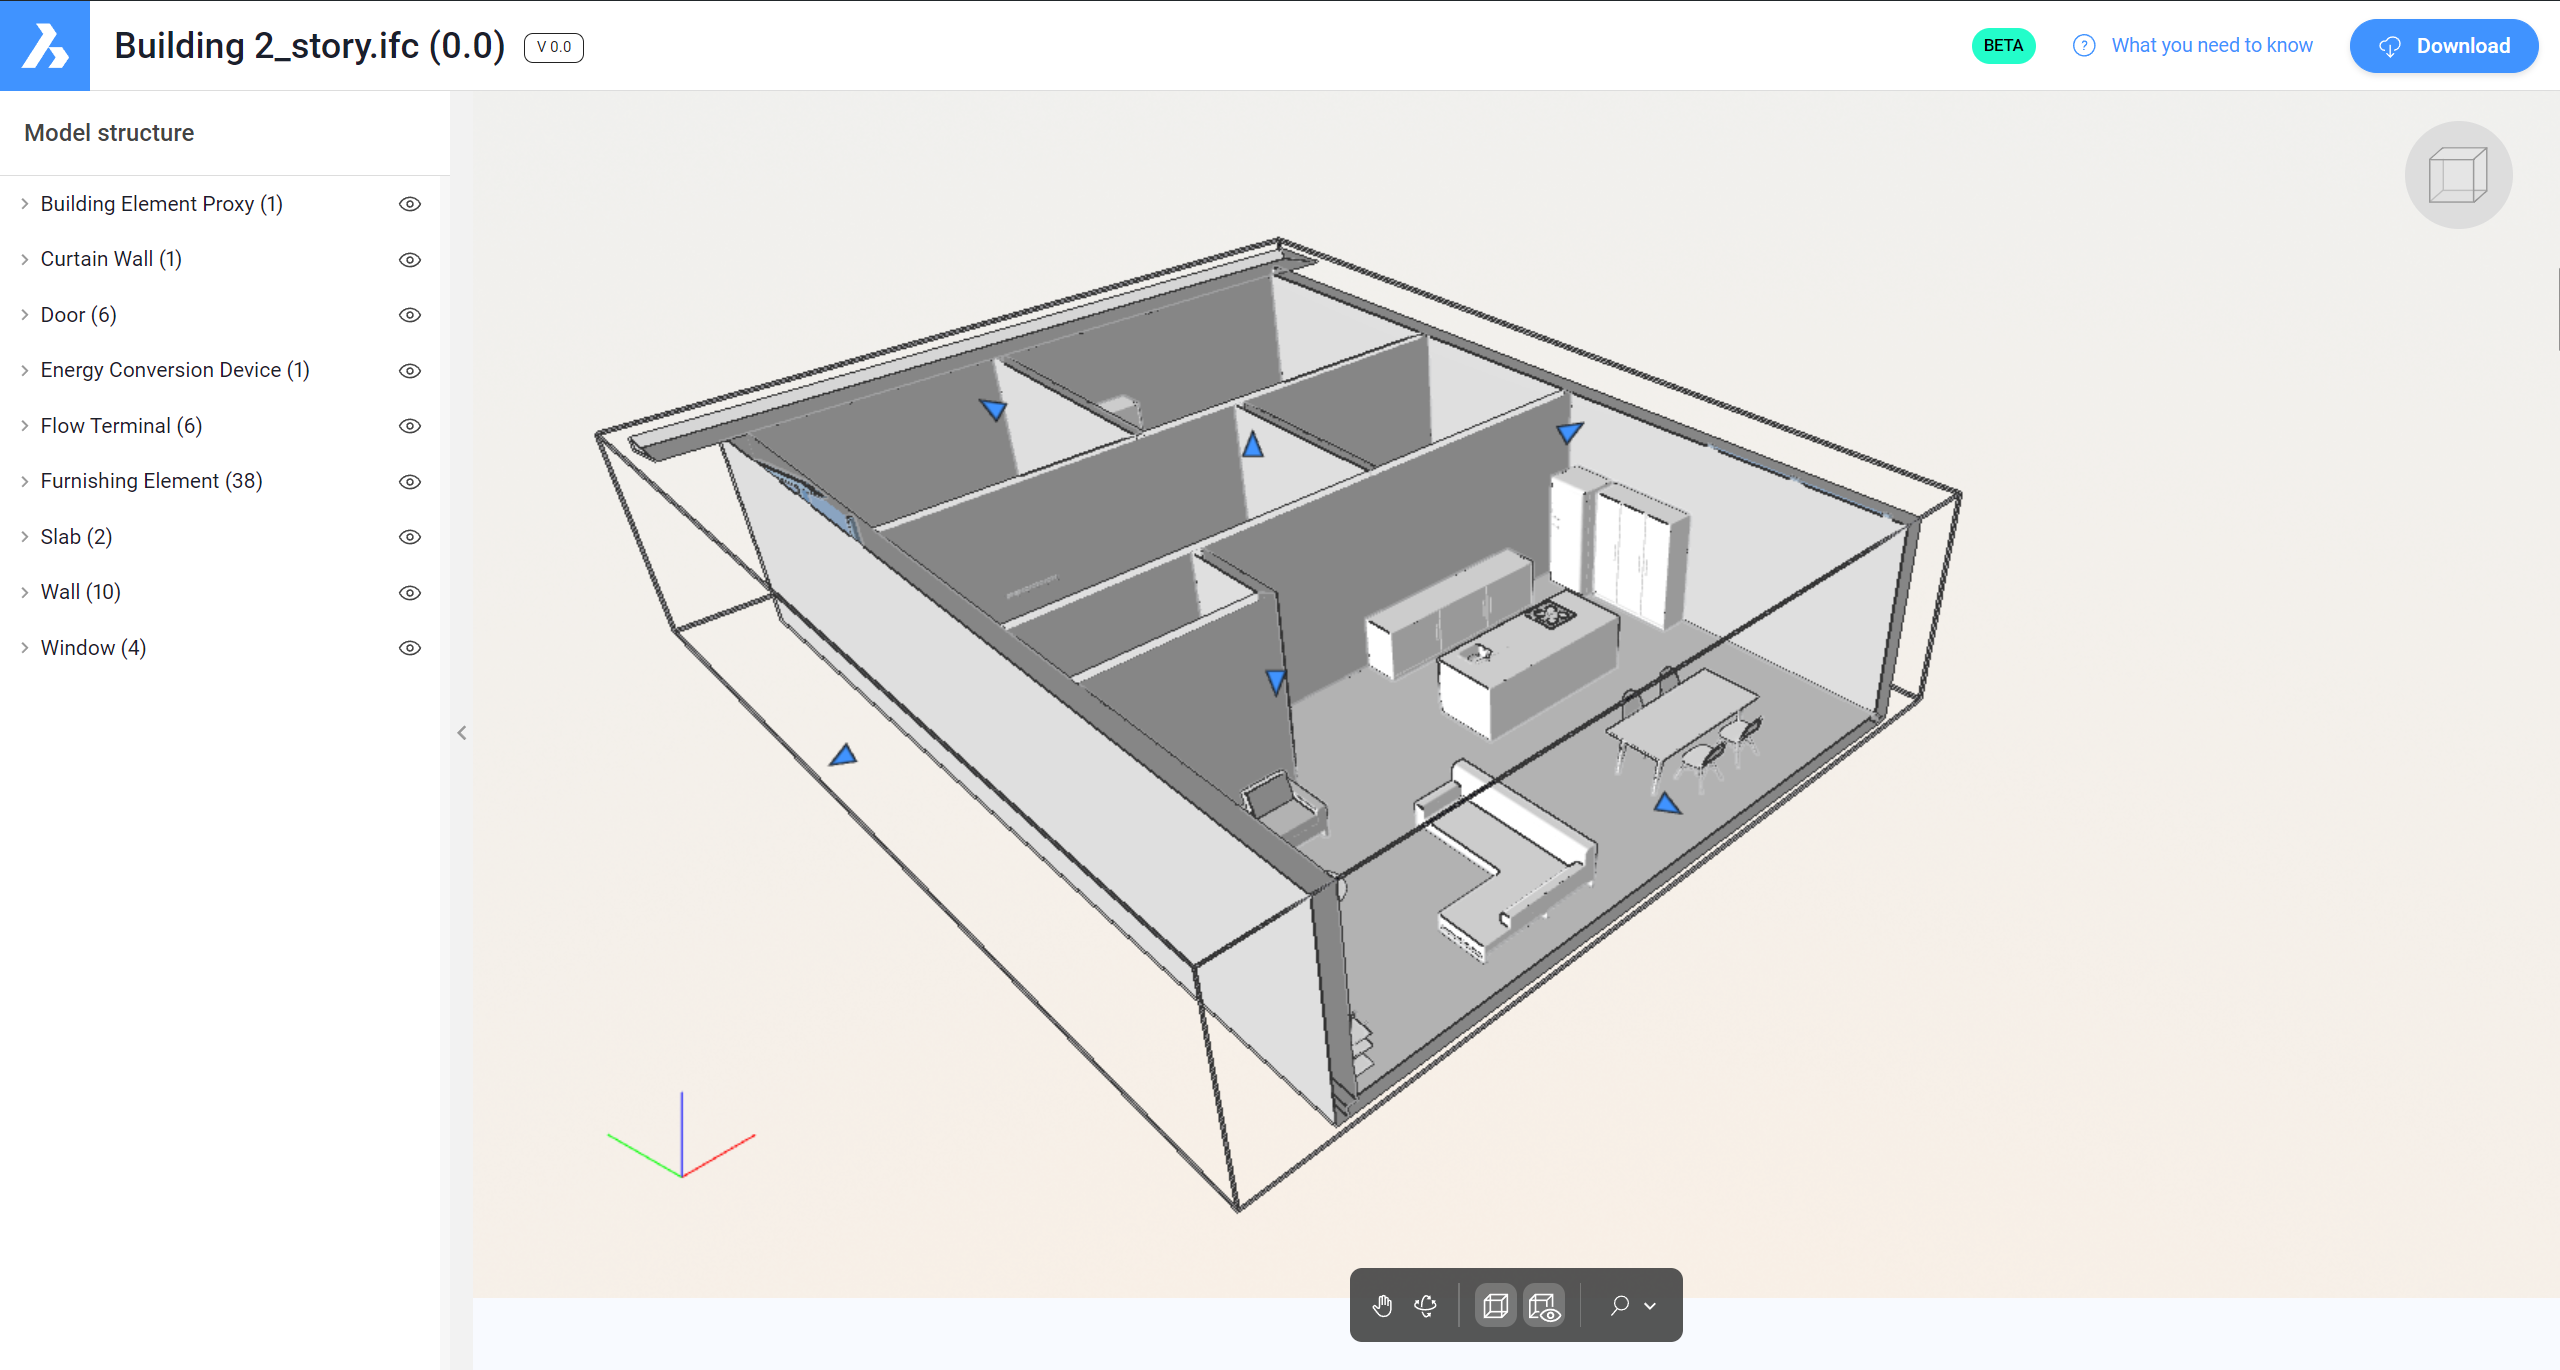
Navigation in Bricsys 24/7 3D Viewer
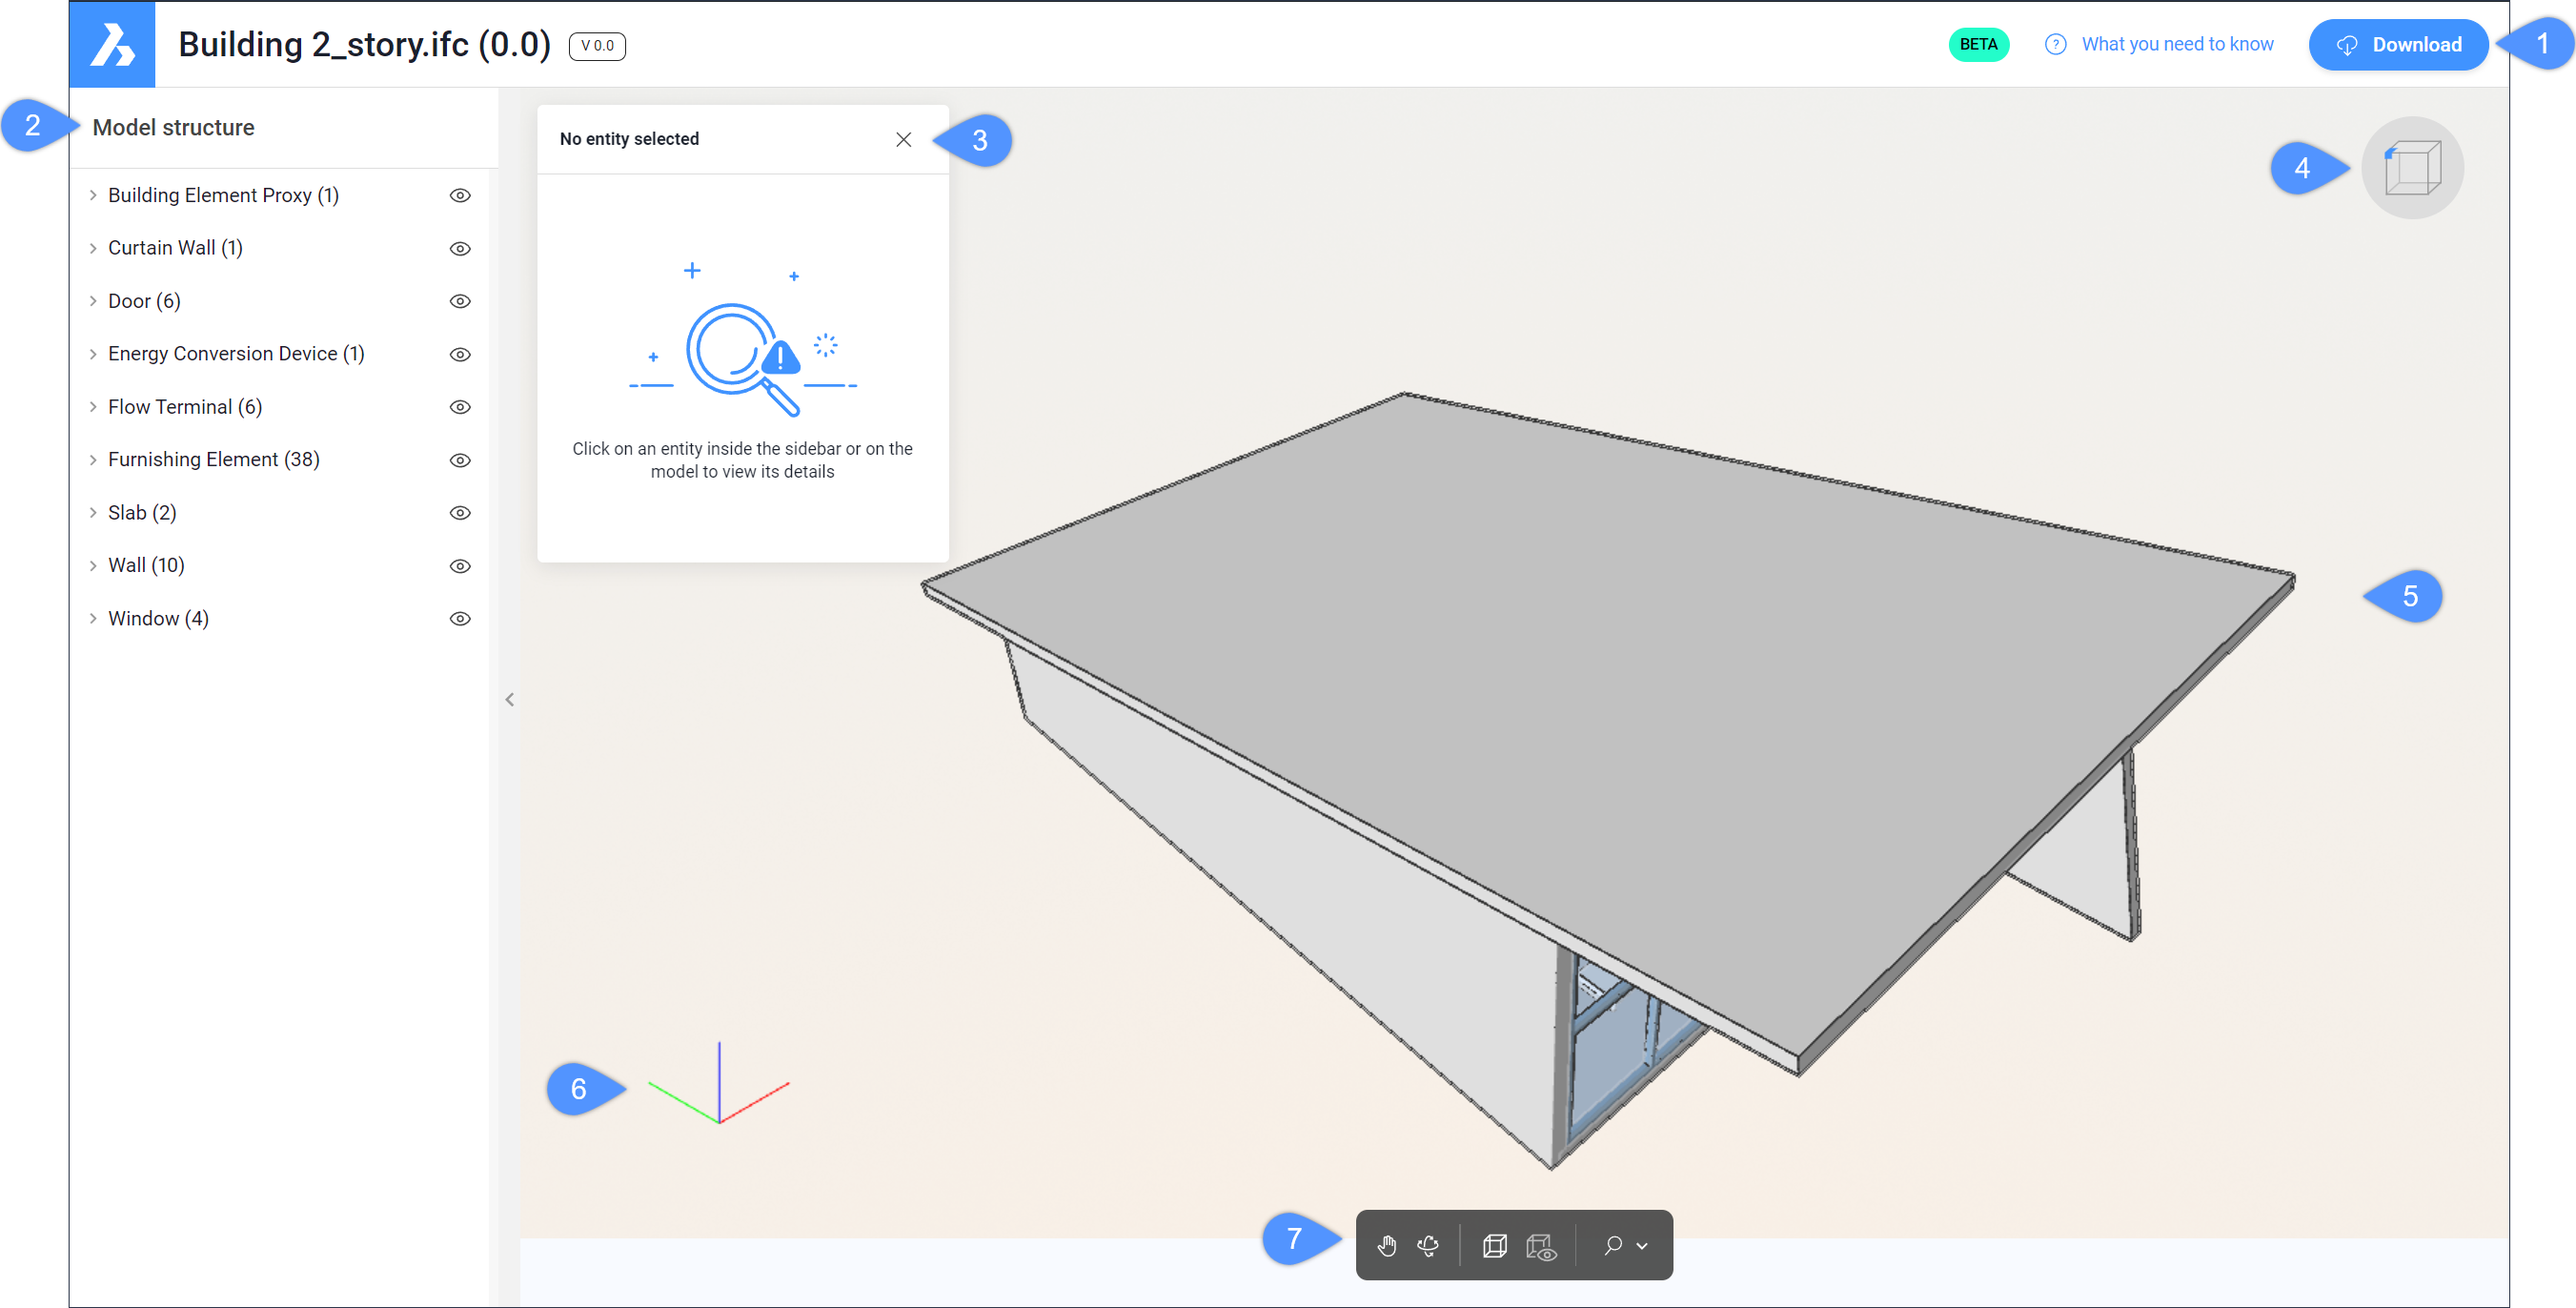
- Download
- Model structure
- Properties
- Views icon
- Current view of the document
- UCS icon
- Toolpalette
- Download
- Allows you to download the file to your download folder.
- Model structure
- Allows you to view and select entities from a structured tree.Tip:
- Click an entity or multiple entities in the Model structure panel. The selected entities are highlighted in the tree and in the current view of the document.
- Click the arrow up/down to expand/collapse a branch that contains multiple entities.
- Press the Esc key to disable the selection.
- Click the eye icon (
 ) to toggle the visibility of the entity or for all underlying entities of a branch.
 - Click the arrow left/right to hide/show the Model structure panel.
- Properties
- Displays the properties of the selected entity.
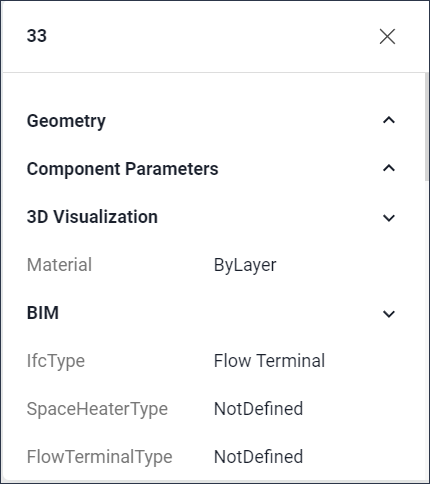 Note: It only shows the properties of a single entity. If multiple entities are selected, their properties are not displayed.Tip:
- Click the arrow up/down to expand/collapse branches.
- Use the scroll bar to see all properties.
- If the name of a property is too long, hover the cursor over it to see the entire name.
- Click the X button to close the Properties panel.
- Select an entity to enable the Properties panel if it was previously closed.
- Views icon
- The icon is placed on the top right corner of the view.
There are 10 basic views of models in the 3D viewer: Top view, Front view, Right view, Left view, Bottom view, Back view, Front right corner, Front left corner, Back right corner, and Back left corner.
Note: The default view is Front left corner.When you hover the cursor over the icon a text with a drop-down button that indicates the selected view is displayed.
- Click the drop-down symbol.
A drop-down list appears.
- Select an option.
The drop-down stays open until you move the cursor away from the drop-down.
Note:- You can toggle between perspective and isometric mode.
- When you rotate or pan the model, the basic view is replaced by a custom view. This means that the basic view is not available anymore and you need to select another basic view.
- Click the drop-down symbol.
- Current view of the document
- Shows the entities in the viewed area.Note: You can click on the model to select entities. Press the Esc key to disable the selection.
- UCS icon
- Displays how the X, Y, and Z axis are orientated.
- Toolpalette
- Contains a set of tools that allows you to navigate in the model.
- Pan (
 )
) - When activated, use the left click to move the entire model in real-time.Tip:
- It acts like a touchpad.
- You can also use middle click to pan. Panning is enabled while the mouse wheel is pressed and disabled when released.
- When you select a basic view, the Pan tool is automatically disabled.
- You can use the Esc key to disable the Pan tool.
- Orbit (
 )
) - When activated, use the left click to rotate the model in a constrained manner, in real-time.Tip:
- You can also use Shift + middle click to rotate.
- When you select a basic view, the Orbit tool is automatically disabled.
- You can use the Esc key to disable the Orbit tool.
- section box (
 )
) - Activates the section box that allows you to slice the model by dragging the planes, to inspect the model on possible construction problems.Note:
- Drag the blue arrows to slice the model.
- When activating the section box tool, the section box visibility tool is automatically enabled.
- You can select entities, pan, rotate, or zoom while the section box tool is enabled.
- You can use the Esc key to disable the section box tool.
- If you disable the section box and enable it again, it remembers the box you had previously.
- Drag the blue arrows to slice the model.
- section box visibility (
 )
) - Toggles the visibility of the section box.Note:
- It is automatically enabled when activating the section box tool.
- If you disable the section box visibility tool, the section box is not visible anymore, but you can still see the result, and keeps the section box tool enabled.
- It is inactive if the section box tool is disabled.
- Zoom (
 )
) - Visually changes the size of the model within the current view of the document.
Click the drop-down arrow to select an option.
- Real time zoom (
 )
) - Zooms the viewpoint in and out of the drawing in real-time.Note:
- You can use the Esc key to disable the Real time zoom tool.
- You can also use the middle mouse button to zoom in the model.
- Zoom extents (
 )
) - Displays the model to the extents of entities.
- Real time zoom (
- Pan (
How to log an issue from the main application
- Click Administration
 in the toolbar.
 - Click Project settings.
- Click Support request.
The New support request form appears.
- Select the category .
- Fill out all fields.
- Click Send Support Request.
Known limitations
- Annotations are not yet available.
- Properties of multiple selected entities are not displayed.
- Combining multiple models in view is not possible.
- In the current beta version, there are limitations on large sets of properties. Be aware when uploading large models or models with many properties added to the entities. This is in ongoing development to be improve.
- When the Perspective option is disabled, if you zoom in outside the bounds of the 3D model until the model is no longer visible within the viewport, zooming out will result in the 3D model becoming invisible.
Workaround: Zoom the model to extents.
- For BricsCAD BIM DWG files, properties will only be available when the .bsyslib file is embedded.