FINDOUTLIERS command
Finds any outlier outside of the valid area.

Icon: 
Description
Finds entities positioned at extreme coordinates outside a specified area. These entities are often hard to detect and can make it difficult to manipulate the view because it depends on the total extent of the drawing.
Method
The command opens the Find Outliers command panel.
- 2D mode
- 3D mode
- Settings
- Show valid area
- Inspect Outliers
- Results
- Back to Settings
- Finish
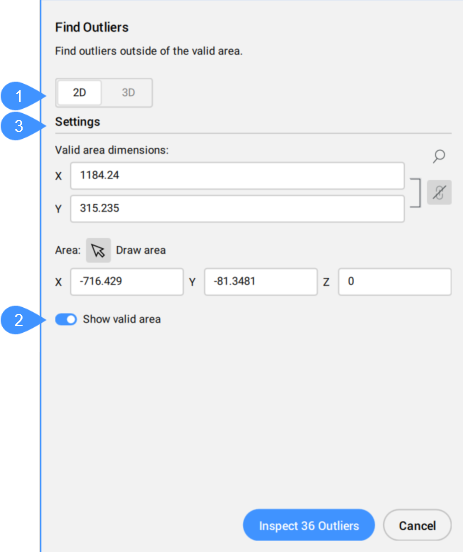
2D mode
When this mode is active, the default area is simplified to a 2D rectangle, defined by the X and Y dimensions.
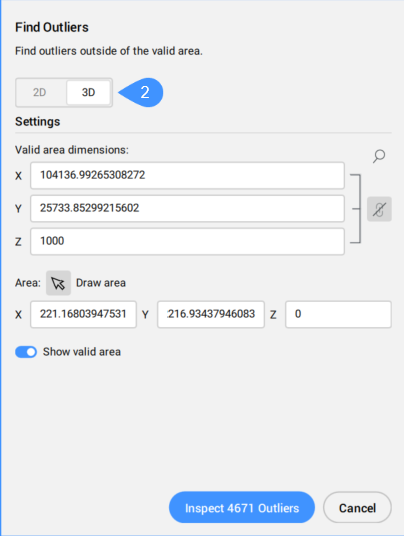
3D mode
When this mode is active, the valid area is a 3D box, defined by the X, Y, and Z dimensions.
Settings
- Valid area dimensions
- Sets the valid area of the drawing. The entities outside this area are considered to be at extreme coordinates and are listed in the Results section of the Find Outliers command panel.Note: In the Command line, the change Dimension option allows you to set the valid area dimensions.
The default value for the X, Y and Z dimensions is 100000.
Note:- Click the Sync all dimensions button (
 ) to sync or unsync all dimension.
- When the Sync all dimensions button is On and you modify one dimension, the other dimensions change to the same value.
- If the dimensions have different values (the dimensions are unsynced) and you turn On the Sync all dimensions button, the Y (for 2D mode), respectively the Y and Z (for 3D mode) values change to the same value as X.
- The valid area is graphically displayed in the model space by a transparent green box.
- The unit used depends on the template you are working in. For example, if you are working in the Default-mm template, the unit for the valid area is mm.
- In the Command line, the Keep all dimension identical option defines if all dimensions will be modified at once.
- Click the magnifying glass icon (
 ) to zoom to extents.
- Click the Sync all dimensions button (
- Area
- Sets the area directly on the drawing Model Space, by picking the points for each coordinate.Note: In the Command line, the draw new Area option allows you to define the area by picking points for each coordinate.
Show valid area
Enables/Disables the display of the valid area.
Inspect Outliers
Displays the Results section.
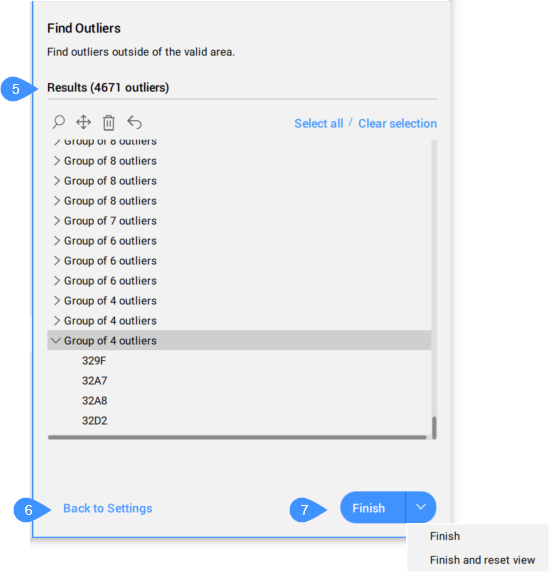
Results
Displays the outliers found in the drawing. You can select the outlier by clicking it. The entity is then selected in the drawing. After selecting an outlier, you can press the magnifying glass icon () to zoom in, the move icon ( ) to Move to valid region origin or in any other place, or the trashcan icon (
 ) to delete it. Also, you can undo the move or delete actions by pressing the undo icon (
 ).
).
The same options are available in the context menu opened by right clicking the selected outliers.
Outliers that lie close to each other are clustered as a group. When selecting a group of outliers, all the elements in the group are selected at once to zoom in on them, move, or delete them. If there is only one group present, the entities are listed individually, and not clustered in a group.
When selecting outliers, a widget appears in the drawing area. The widget gives you control to zoom in ( ) to the entity attached to it or zoom out (
 ) when clicking it again.
- Click the widget of a cluster to zoom to the extents of the cluster. The zoom widget of the cluster disappears and individual widgets get displayed for the individual outliers in the cluster.
- If you select more than 1 cluster in the command panel list (for example: 2 clusters, or 1 cluster and 4 individual outliers) and use the action menu to zoom to them, widgets are only displayed for the entire clusters, not on the level of the individual outliers in the cluster.
- If you select one cluster in the command panel list and use the action menu to zoom to them, all individual outliers of the cluster have a widget.
- Selected visible outliers that do not belong to a cluster have a widget.
Back to Settings
Goes back to the Settings section.
Finish
Closes the Find Outliers command panel and keeps the selected outliers.
- Finish and reset view
-
Closes the Find Outliers command panel and restores the view (zoom level, camera position).
Note: In the Command line, the option is finish and Reset view.