Create a relation
You can create a new relation:
- Click Administration
 in the toolbar.
 - Click Relations in the tool menu.
- Click the Add new relation button in the content pane to add a parent folder.
The Add item window appears.
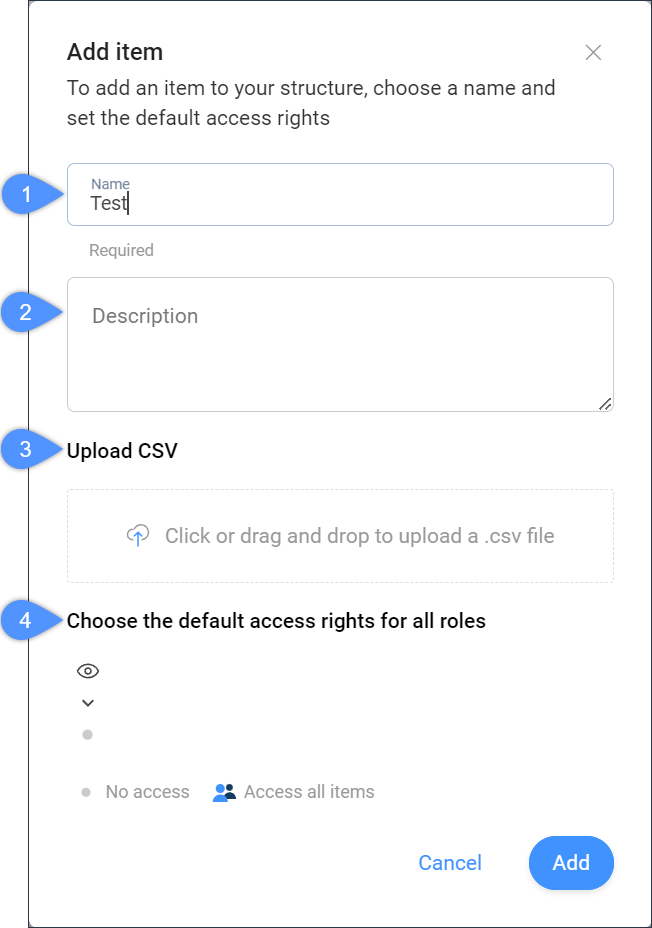
- Name (1)
- Allows you to define the name of the highest level for the relation. This is the name you will see first, and it is the root element of the tree.
When using a relation field in a metadata form, the name will be used to generate the document name.
Note:- The Name field is required.
- Using special characters in relation fields can cause errors when using the same relation field to rename documents via metadata.
- Description (2)
- Allows you to type a description to explain in more detail what the relation is about. This field is optional.Note: Adding a description is very useful when working with coded values like “BA, Building A”, where “BA” is the actual name and “Building A” the description.
- Upload CSV (3)
- Allows you to upload a CSV file with a predefined structure.Important: The system will process your data in UTF-8 format. When exporting the CSV file, make sure the UTF-8 encoding is selected. If you see strange characters in your relation after uploading the CSV file, the encoding is probably not set correctly.
For the system to correctly create your relation, you need to follow a simple set of rules:
- Each line can only have one new level.
- After each new level, you can add a description (not required).
- The highest level may or may not be defined.
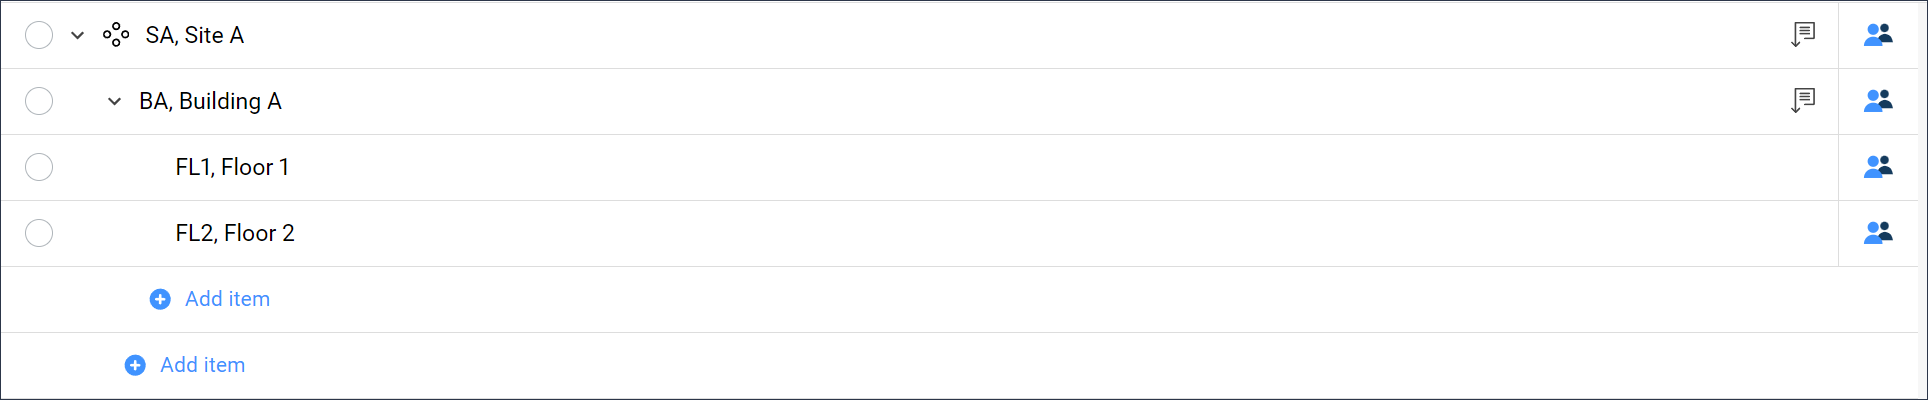
Example CSV:
SA Site A SA BA Building A SA BA FL1 Floor 1 SA BA FL2 Floor 2 Example CSV without repeating previous levels:
SA Site A BA Building A FL1 Floor 1 FL2 Floor 2 Example CSV without defining the highest level “SA, Site A” and without repeating previous levels:
BA Building A FL1 Floor 1 FL2 Floor 2
- Choose the default access rights for all roles (4)
- Allows you to set the default access rights for all roles.
Click the Add button.
- A pop-up window informs you that the folder is uploaded.
- The new relation is displayed in the content pane.
All of the above CSV examples will have the same result:
- Select a parent folder and click the ellipsis button
 at the top of the content pane.
 - Click Add relation.
The Add item window appears that allows you to add an item to your structure.
- Enter a name.Note: This field is required.
- (Optional) Add a description.
- Choose if you want to copy access rights from parent folder or not.
The Copy access rights from parent folder option is enabled by default. If disabled, you can choose the access rights for the new item.
- Enter a name.