


Setup RLM login
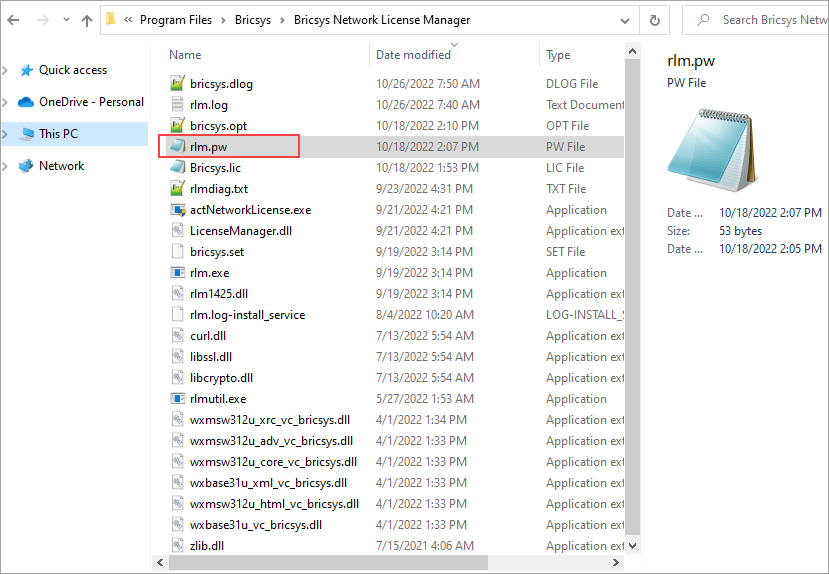
- Create a file named rlm.pw inside the directory where rlm.exe is located (by default C:\Program Files\Bricsys\Bricsys Network License Manager\actNetworkLicense.exe).Note: If this file is located in the directory with the rlm binary, the RLM Web Interface will require users to log in before they can perform any actions.
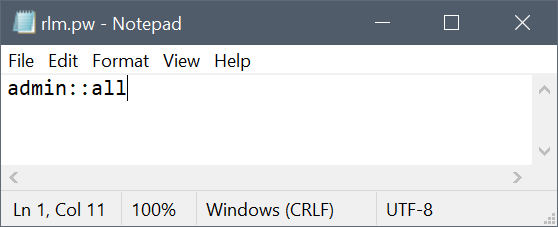
- The RLM password file has one line for each user, formatted as follows:
username::allThe username cannot contain a ':' character. The password field is initially left blank. The permissions are generally set to all.
The list-of-permissions field is a comma-separated list of the various privileges which you can assign to users:
- all: It is a special privilege name. It enables all privileges.
- edit_meter: Modifies count for meter counters.
- edit_options: Edits options files for ISV servers.
- edit_rlm_options: Edits license files and options files for the rlm server.
- edit_xfer: Edits server-server license transfer settings for ISV servers.
- logfiles: Enables the functions that change log files - switch, switchr, newlog.
- remove: Allows you to remove a license from a running process.
- reread: Gives you access to the functions that do reread commands on license servers.
- shutdown: Gives you access to the functions which shut down license servers.
- status: Allows you to display the status and debug log information from the license servers.Note: edit_meter, edit_options, edit_rlm_options, edit_xfer, remove, and shutdown options enable "status" privilege even if not present.Note: Check the list-of-permissions at the bottom of this page. A user with no privileges assigned will have access to the ACTIVATE LICENSE, DIAGNOSTICS, RLM MANUAL, SYSTEM INFO, ABOUT,CHANGE PASSWORD, and LOGOUT commands.
Examples:
user1:$5ukMApW1jixwcrGqRALO91:alluser2::edit_options,edit_rlm_options,reread
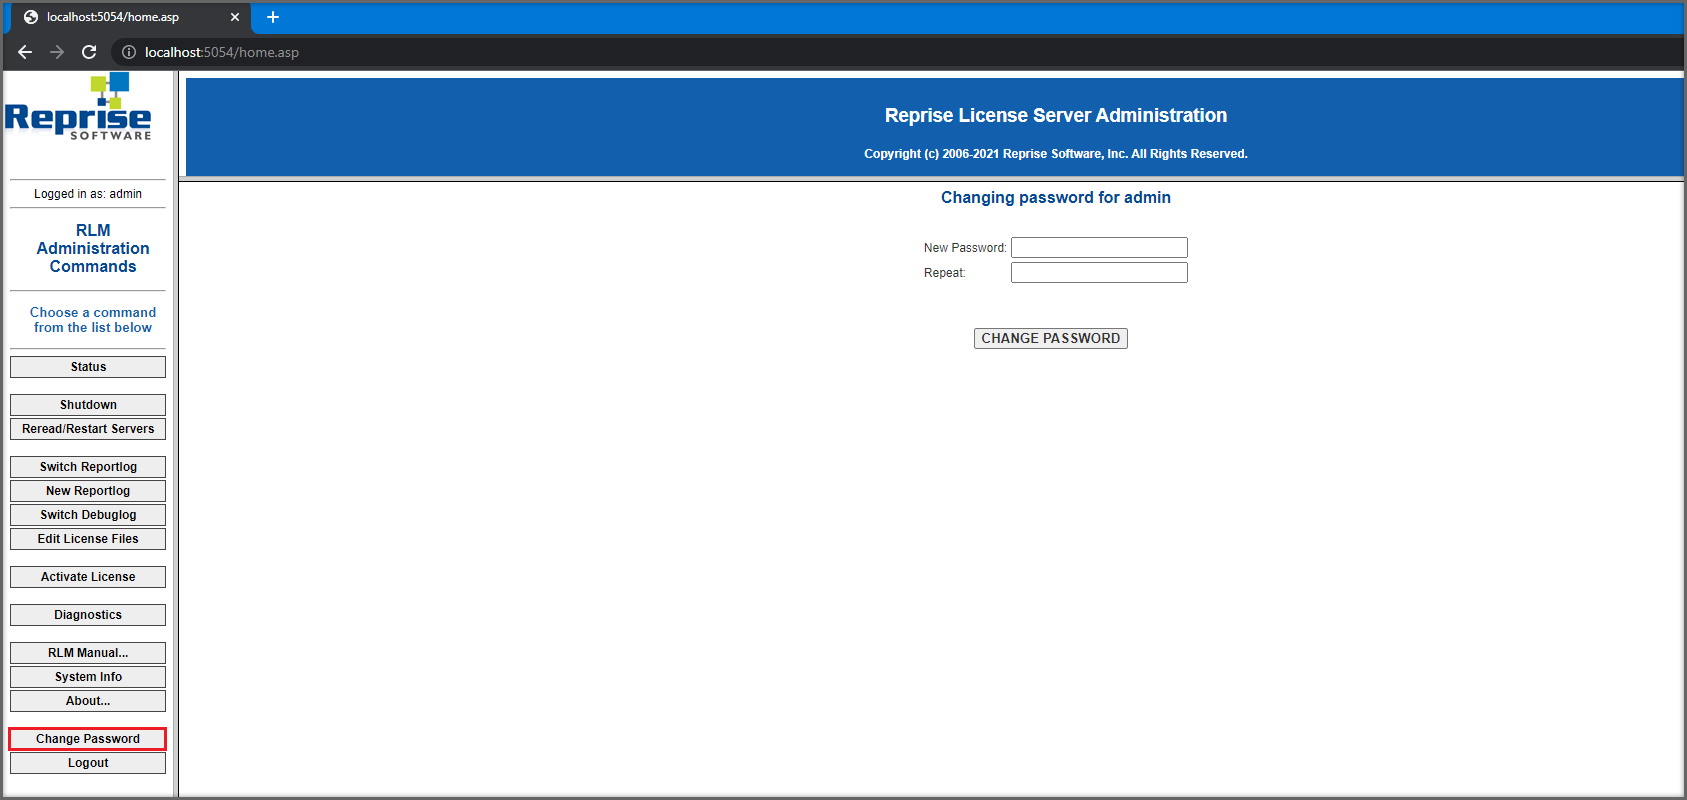
- Access the license server web portal from the browser by using localhost:5054 in the same system or by using <License_Server_IP>:5054 in other systems.
- You are prompted for a username and password. You can enter the username and log in without supplying a password since the password field is left empty.Note: If you do not add a password to the newly created login, the result will be that the RLM will shut down by itself in 10 minutes, and other undesired effects will appear, such as an incomplete Diagnostics file.

- To set a password or to change it later, select the Change Password menu item once logged in as that user. Enter the new password and click on the CHANGE PASSWORD button to update it. The new password is written to the rlm.pw file automatically. In the rlm.pw file, the password field is an encrypted hash of the actual password (similar to the Unix password file).
After that, restart the server or simply kill the rlm.exe process and start it again from Windows services. Then, go back to the web UI and log in with the new credentials.
- Whenever a new user attempts to access the web portal, authentication (username and password) will be requested.
Note:
- It is recommended to protect access to this file so that ordinary users cannot edit it. Both the RLM password file and the directory which contains it must be read-write to the rlm process.
- Starting with RLM 12.4, if there is no password file present, the edit options and edit RLM options commands are disabled.
- Starting with RLM 14.2, if there are users in the rlm.pw file with blank passwords, RLM will log this condition and exit after 10 minutes unless started with the -z switch.