


Custom Paper Sizes dialog box
The Custom Paper Sizes dialog box allows you to create custom paper sizes for a non-system plotter (such as Print as PDF.pc3) selected in the Printer / Plotter Configuration list or change a standard paper size.
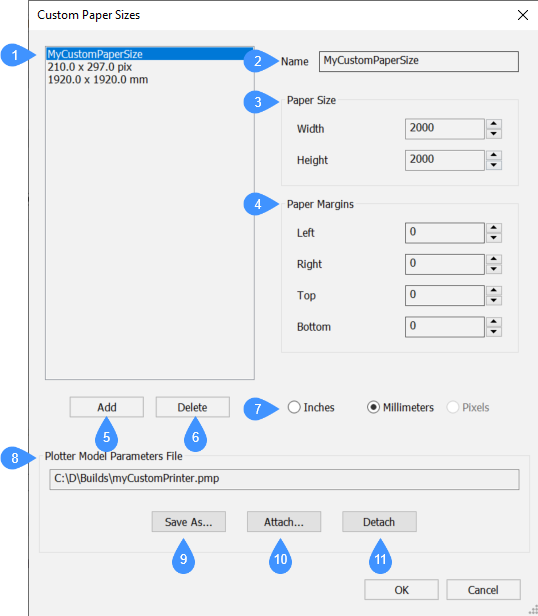
- Custom Paper Sizes list
- Name
- Paper Size
- Paper Margins
- Add
- Delete
- Units
- Plotter Model Parameters File (PMP file)
- Save As
- Attach
- Detach
Custom Paper Sizes list
Displays the list of all custom paper sizes created by the user.
Name
Allows you to name the custom paper size.
Paper Size
You can insert the width and the height of the page in the appropriate fields.
Paper Margins
You can set the paper margins by entering the desired values in the fields. Only positive values are allowed.
Add
Allows you to create the new custom paper size and adds it to the list.
Delete
Allows you to select a custom paper size from the list and delete it. You can delete one item at a time.
Units
You can choose whether to use inches or millimeters for your custom paper size.
Plotter Model Parameters File (PMP file)
Displays the path of the attached PMP file, if any.
Save As
Saves the selected custom paper sizes configuration to a PMP file that can be used for future plotting.
Attach
Attaches the PMP file to the plotter configuration (PC3) file. Opens Calibration data file dialog box where you have to choose a PMP file. The custom paper size will be available in the drop-down paper size list.
Detach
Detaches the PMP file from the plotter configuration (PC3) file.