Animation Editor panel
- Run the ANIMATIONEDITOROPEN command.
- Right-click a ribbon panel or toolbar and choose Animation Editor from the Panels list.
The Animation Editor panel allows you to create schedules for multi-parametric animations with complex camera movements and render them as 2D videos.
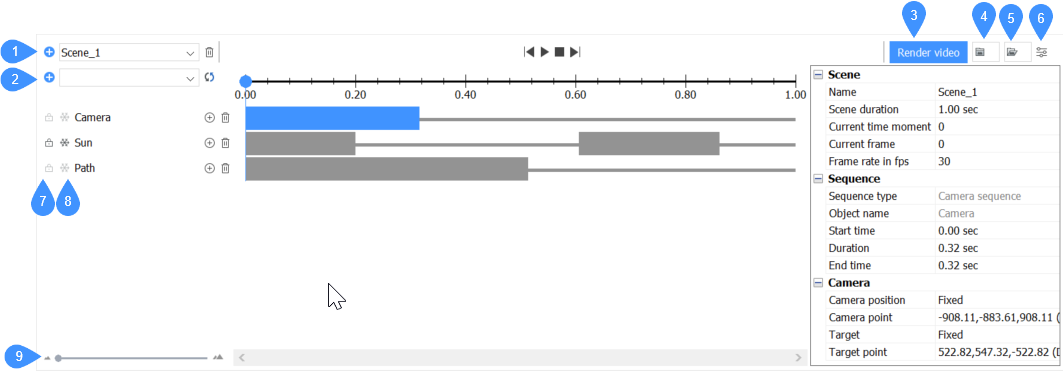
- Add scene
- Add timeline
- Render video
- Record graphics for the current scene
- Load animation graphics
- Configurator
- Lock/unlock timeline button
- Disable/enable timeline effects button
- Slider
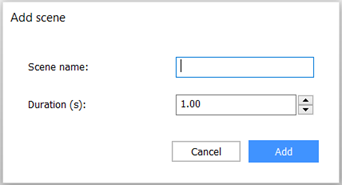
Add scene
Opens the Add scene dialog box to specify the scene name and its duration (s):
Add timeline
Adds the selected parameter to the timeline.
One of the parameters that can be added is the sun effect. Once the sun animation sequence is added to the timeline, several properties are available in the properties configurator of the Animation Editor panel.
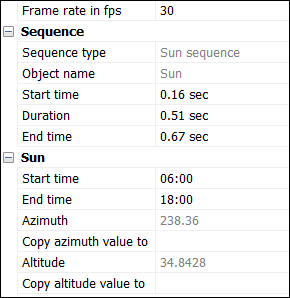
- Sequence properties
- Defines the properties of the sun sequences on the timeline.
- Sun properties
- Defines the properties of the sun itself regarding its position and timing.
Render video
Opens the Render video dialog box to specify the render options.
Record graphics for the current scene
Records animation graphics and saves it to a zip-archive or to a folder of your choice.
Load animation graphics
Loads animation graphics data from a zip archive or a folder and opens the special mode for playing these graphics.
Configurator
Toggles the settings panel.
Lock/unlock timeline button
Toggles the timeline to lock any timeline changes or vice versa, in order to enable changes.
Disable/enable timeline effects button
Toggles the timeline effects between enabled and disabled. Disabled timeline effects are excluded from the animation.
Slider
Allows you to move the slider to zoom in/out on the timelines.