Custom properties
About
BricsCAD provides a way to assign your own properties to desired building elements in a single command. This is called assigning custom properties. The approach is first to create a custom property set, then assigning it to the building elements to which the property set is to be applied. The method is carried out by the BIMPROPERTIES command, which allows you to create, edit, and delete the custom property set in a dialog box. This dialog box also allows you to add properties to the currently selected property set. Important to note is that these custom properties are also included in IFC export.

For more information about this command, visit the Command Reference article BIMPROPERTIES command.
To learn more about creating user-defined quantity definitions, visit the Procedure article Customizing BIM Quantities.
Using the BIM properties dialog box
- Open the BIM Properties dialog box by typing BIMPROPERTIES in the Command line. The dialog box displays for specifying and editing properties of entities in BIM projects.
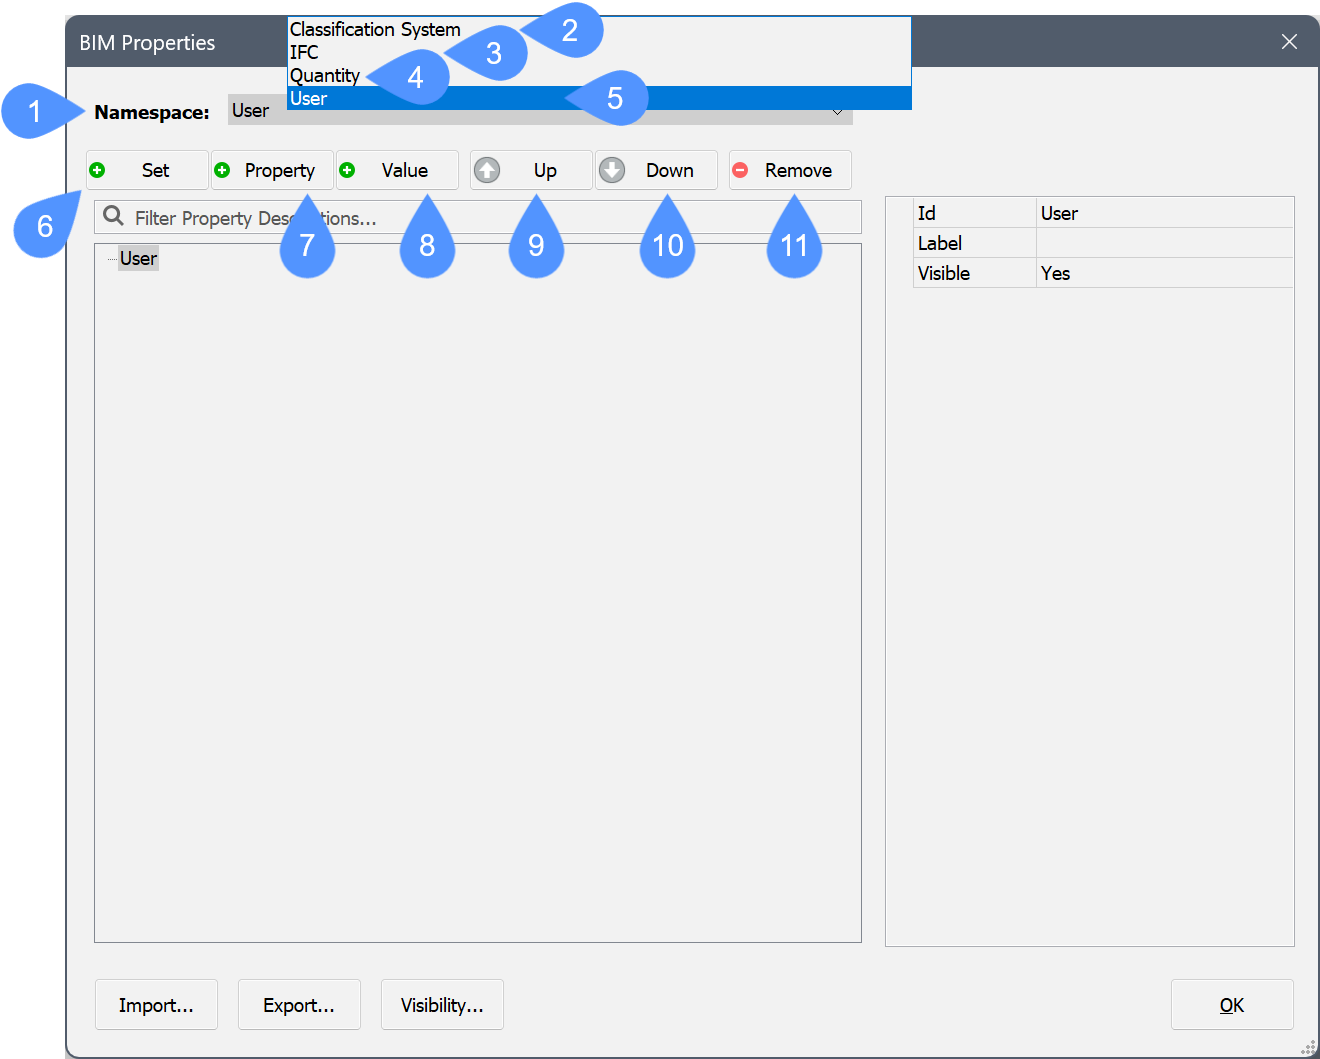
(1) Namespace Groups property sets in namespaces. (2) Classification System namespace Shows the classification system namespace. (3) IFC namespace Shows the IFC2x3 and IFC4 properties that are merged. (4) Quantity namespace Shows some hardcoded quantities
(5) User namespace Shows the custom properties. (6) Set button Creates a new property set. (7) Property button Adds a new property to the currently selected property set. (8) Value button Creates a new value definition for the currently selected property set. (9) Up button Moves the selected property or value up the list. (10) Down button Moves the selected property or value down the list. (11) Remove button Removes the selected property set, property definition or value definition. - To create a custom property set, select the User option in the Namespace drop-down list, then click the Set button (6). A new property set is added to the User space.
To edit the property set do the following:
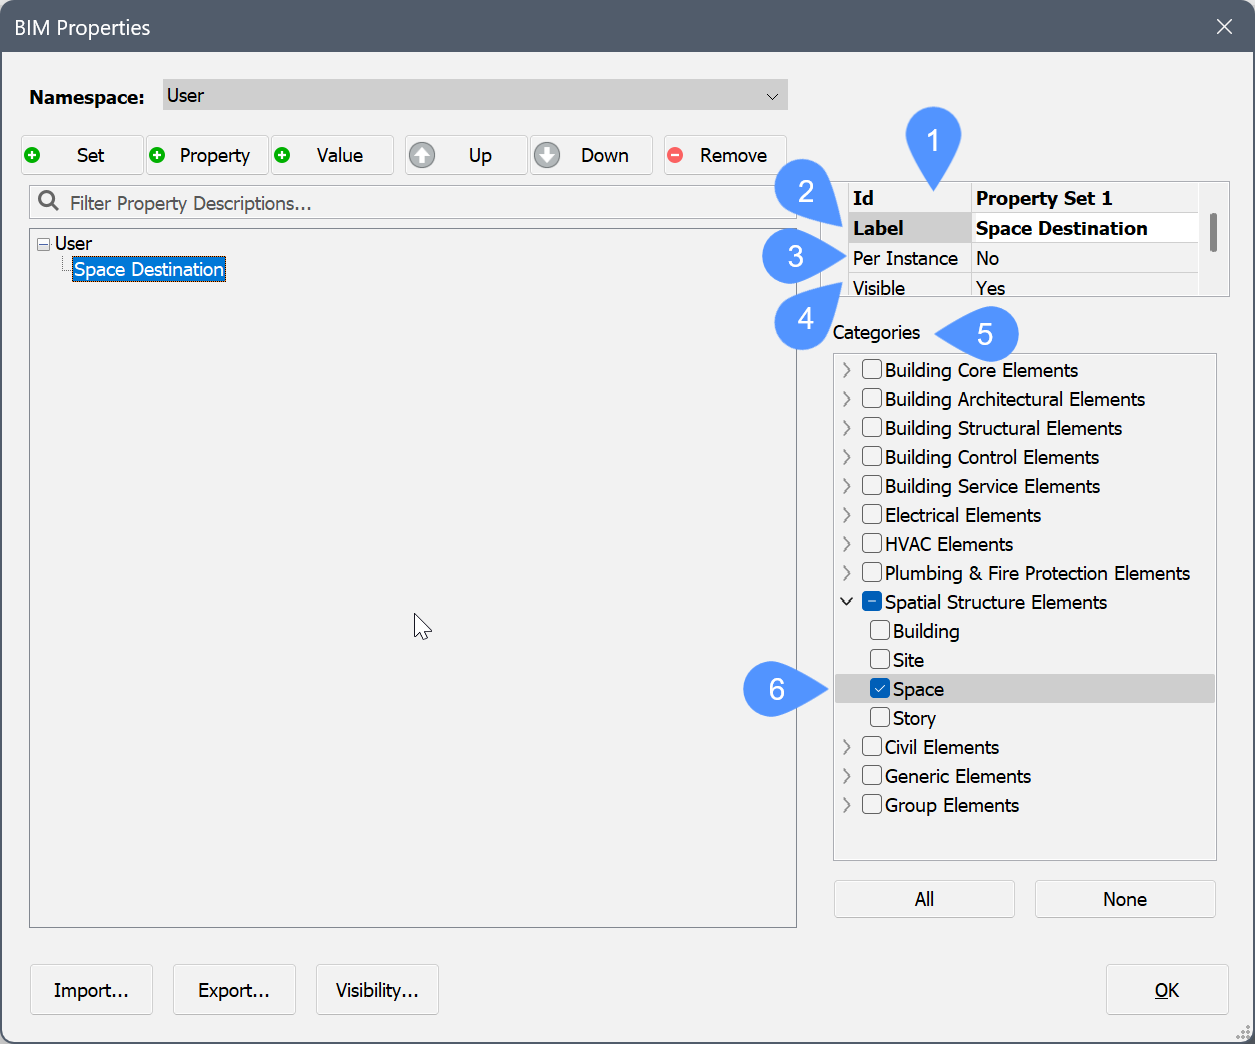
- Type a name in the Id (1) field.
- Type a name in the Label (2) field.
The Label name appears in the properties tree. If the Label name is not defined, the Id name displays instead. The Id must be unique.
Optionally, you can choose to have the custom property be only applied to specific instances (3), and choose the visibility (4).
Note: To enable the Per Instance property, do the following:- Click the property in the Properties panel.
- Click the Browse button.
The Enable per-instance property set dialog box displays:
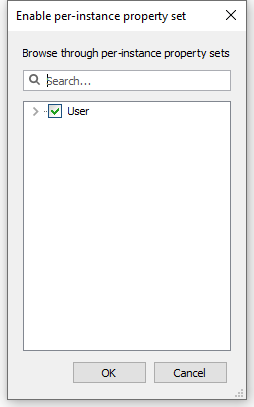
- Check the User namespace, then click the OK button.
Select the building element categories (5) the property set applies to.
Expand one of the categories to see the different sub-categories of building elements. Check the box next to desired one (6) to associate it with the property set.
- To add a property to the custom property set, select the property set and click the Property button.
To edit the property do the following:
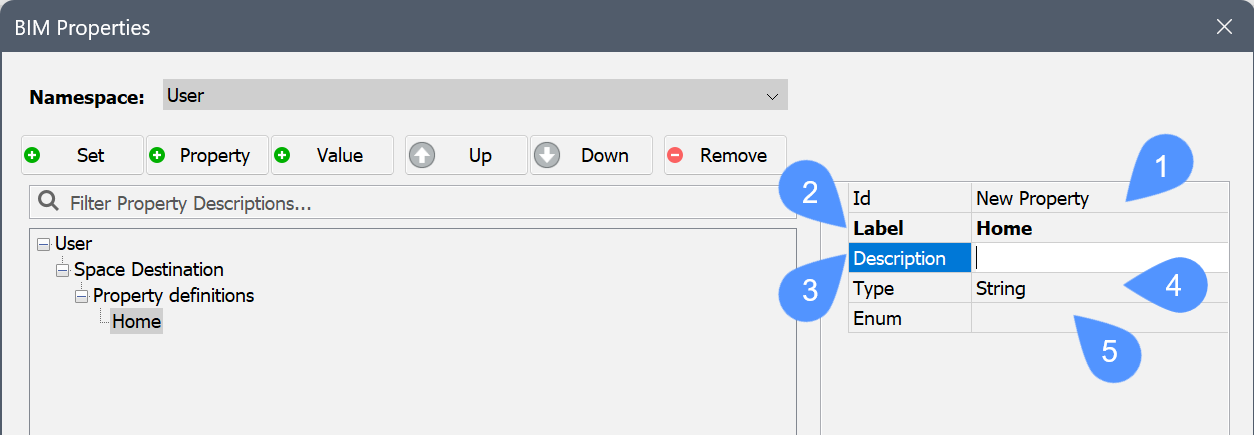
- Type a name in the Id (1) field.
- Type a name in the Label (2) field.
- Optionally, type a description in the Description (3) field.
- Select the property Type (4). The options are
Boolean: an On or Off value.
Integer: a whole number between -2147483648 and 2147483647.
Real: an approximation of a real number.
String: a sequence of characters, can be both numbers and letters.
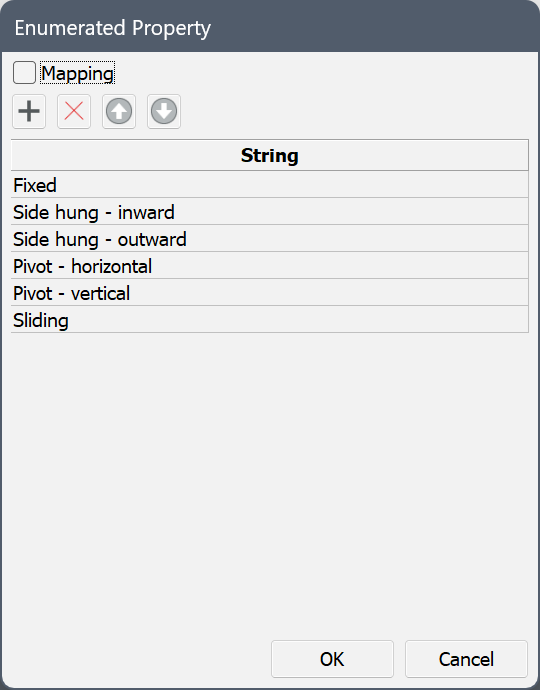
- Optionally, define enumerated values (5), that is a fixed number of possible values for custom BIM properties. Click the Browse button to open the Enumerated Property dialog box and use the Add new enumerated value button to add new values. These values can be selected in a drop-down list in the Properties panel. Optionally, check the Mapping option to add a description for each value.
- To add a new value to the custom property set, select the property set and click the Value button.
To edit the added value do the following:
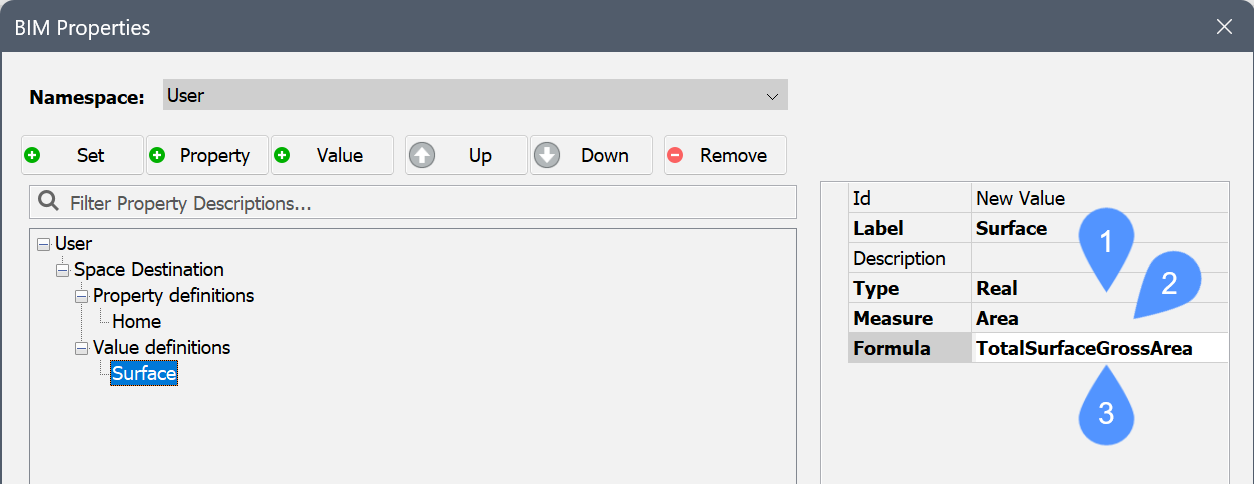
- Type a name in the Id field.
- Type a name in the Label field (for example, Surface).
- Optionally, type a description in the Description field.
- Select the property Type (1) (for example, Real). Note: When the Type property is Real, Measure property (2) becomes available. The Measure property sets the value for Length, Area, Volume or Mass.
- Select the property Measure (2) (for example, Area).
- Edit the Formula (1) property by typing a value, according to the selected value type. You can use the syntax of the Formula field of the corresponding BIM entity type in the Quantity namespace to compose a formula.
- To remove the property set or property, select it in the tree, then click the Remove button.
- Press the OK button to accept it.
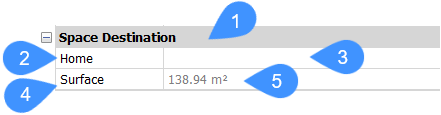
Now if you select a building element which is associated with the previously set category or sub-category and open the Properties panel, the new property set is displayed (1) with its newly assigned property definition (2) without a value set (3) and its newly assigned value definition (4) with its value (5).
To assign a value to your property definition, select it in the Properties panel, then type a new value in its field (3).