The TEXT command places single lines of text in the drawing and optionally evaluates LISP expressions.
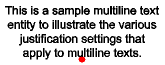
The MTEXT command places formatted paragraph text in a bounding box that limits the extent of the text.
Creating single line texts
Do one of the following:
Click the Text tool button () on the Draw toolbar or the Annotate / Text ribbon panel.
Choose Text in the Draw menu.
Launch the TEXT command.
You are prompted:
Text start point or [use defined Style/Align on line/Fit between points/Center horizontally/Middle (hor/vert)/Right justify/Justification options...]:
Specify a point.
You are prompted:
Height of text <current height>:
Do one of the following:
Press Enter or right click to accept the current height.
Enter a value.
Click a point to define the height graphically.
You are prompted:
Rotation angle of text <current angle>:
Do one of the following:
Press Enter or right click to accept the current rotation angle.
Type a value.
Click a point to define the rotation angle graphically.
Type the text, then press Enter.
A new empty text is created.
Do one of the following:
Type the text.
Press Enter to stop.
(option) Keep adding texts then press Enter twice to stop.
Note: When you have already created text in the current BricsCAD session, the most recent text entity highlights when you repeat the TEXT command. Press Enter or right click to create a new text below the most recently created text, using the same text height and rotation angle.
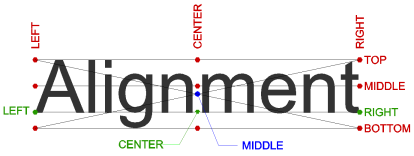
Single line text justification options:
Creating multiline text
Do one of the following:
Click the Multiline Text tool button () on the Draw toolbar or the Annotate / Text ribbon panel.
Choose Multiline Text in the Draw menu.
Launch the MTEXT command.
You are prompted:
First corner for block of text:
Specify the insertion point of the multiline text entity.
You are prompted:
Justification/Rotation/Style/Height/Direction/Width/<Opposite corner for block of text>:
Do one of the following:
Specify the opposite corner of the text block to define the maximum width of the multiline text.
If Dynamic Dimensions are active, the height and width of the text field are displayed dynamically. Type the height and width in the dynamic dimension fields. Press the Tab key to switch; press Enter to confirm.
Type @ in the Command line, then press Enter for non-wrapped (zero width) text (= unlimited line width).
The Text formatting toolbar opens right above the text block.
Type the text.
The maximum line width is defined by the width of the text block as defined in step 3.
Press Enter to start a new paragraph.
To conclude the command and close the Text formatting toolbar do one of the following:
Click the OK button
Press Ctrl+Enter.
Click outside the MText entity.
Text formatting toolbar tools and settings
Button or setting
Name
Description
Text Style
Sets the text style
Text Font
Sets the text font
Text Height
Sets the text height
Bold
Creates bold text
Italic
Creates italic text
Underscore
Creates underscored text
Overscore
Creates overscored text
Uppercase
Converts selected text to uppercase
Lowercase
Converts selected text to lowercase
Annotative
Toggles the Annotative property
Line Spacing
Sets the line spacing
Columns
Arranges the text in columns
Toggle spellchecker
Toggles the Spell Checking for Mtext editor.
Color
Sets the color
Oblique Angle
Sets the oblique angle
Width Factor
Sets the width factor
Character Spacing
Sets the character spacing
Undo
Undoes recent actions
Redo
Redoes previously undone actions
Stacked text
Creates stacked text (fractions, subscripts and superscripts)
Note: See Formatting stacked text below for more information.
To create a subscript or superscript, insert the ^ character before the text that should become a subscript or after the text that should become a superscript. Then select the text and the ^ character and use the Stacked Text option.
Special Character
Inserts special characters
Field
Inserts a variable field
Justify
Sets the text justification
Paragraph alignment
Sets the paragraph alignment
Background Mask
Adds a colored background
Ruler
Toggles the ruler display
Numbered and bullet lists
Creates numbered/bullet lists
OK
Closes the Text formatting toolbar and applies the changes
Cancel
Closes the Text formatting toolbar and leaves the MText entity unchanged
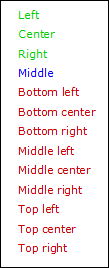
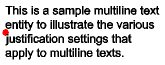
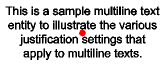
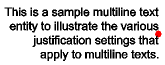
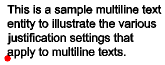
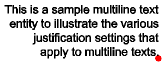
Multiline text justification
The red dot indicates the insertion point of the multiline text entity.
Top left
Top center
Top right
Middle left
Middle center
Middle right
Bottom left
Bottom center
Bottom right
Including special text characters and symbols
You can use control codes and Unicode strings to include special characters in text entities.
To include control codes, type 2 percent symbols (%%) followed by the special control code or character. A single percent sign is treated as a normal text character.
Special text characters
Control Code
Unicode String
Result
%%d
\U+00B0
Draws a degree symbol (º)
%%p
\U+00B1
Draws a plus-or-minus symbol (±)
%%c
\U+2205
Draws a diameter symbol (Ø)
%%k
\U+0336
Starts to strike-through text. Repeat the code to stop.
%%u
\U+005F
Starts to underscore text. Repeat the code to stop.
%%o
\U+203E
Starts to overscore text. Repeat the code to stop.
Symbols and Unicode strings
Name
Symbol (*)
Unicode String
Almost equal
\U+2248
Angle
\U+2220
Center line
\U+2104
Delta
\U+0394
Electrical phase
\U+0278
Identity
\U+2261
Not equal
\U+2260
Omega
\U+03A9
Squared
²
\U+00B2
Cubed
³
\U+00B3
(*) If supported by the text font.
Spellchecker
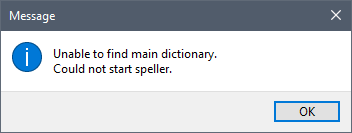
When the spellchecker button () is activated, the spell checking is available in the Mtext editor. The misspelled words are underlined in red in real time. Right click the string to display spelling suggestions.
A warning message appears when a valid dictionary is missing. See the SPELL command.
Adding a background mask
When creating or editing a multiline text entity, click the Background Mask tool button () on the Text Formatting toolbar.
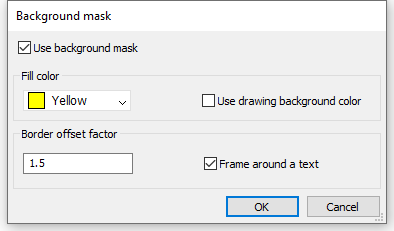
The Background Mask dialog box appears:
Check the Use background mask option.
Do one of the following:
Choose a color in the Fill color drop-down list.
Choose Select color... in the Fill color drop-down list and choose a color in the Color dialog box.
Check the Use drawing background color option.
Define the Border offset factor, which sets the margin around the text for the background. The value is based on the text height and must be in the range 1-5. A factor of 1.0 fits the multiline text entity exactly.
(option) Tick the Frame around a text option to create a text frame.
Click OK to create the background mask.
Formatting stacked text
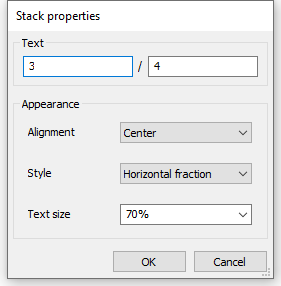
Stacked fraction text can be formatted using the Stack properties dialog box.
Right click the stacked fraction text, then choose Stack properties in the context menu. The Stack properties dialog box displays:
The Stack properties dialog box allows you to edit the values of the fraction as well as the Appearance:
Alignment: allows you to switch between Bottom, Center and Top.
Style: allows you to switch Diagonal fraction, Horizontal fraction and Tolerance.
Text size: adjusts the text size based on a percentage of the set text height. Enter a value or choose a value from the drop-down list.