GIS Import dialog box
Opens via: GISIMPORT command
The GIS Import dialog box allows you to import different GIS Features (Layers) with shapes and attributes from SHP, GML, KML/KMZ or Geodatabase files into the current drawing. You can also specify the properties for each imported Feature.
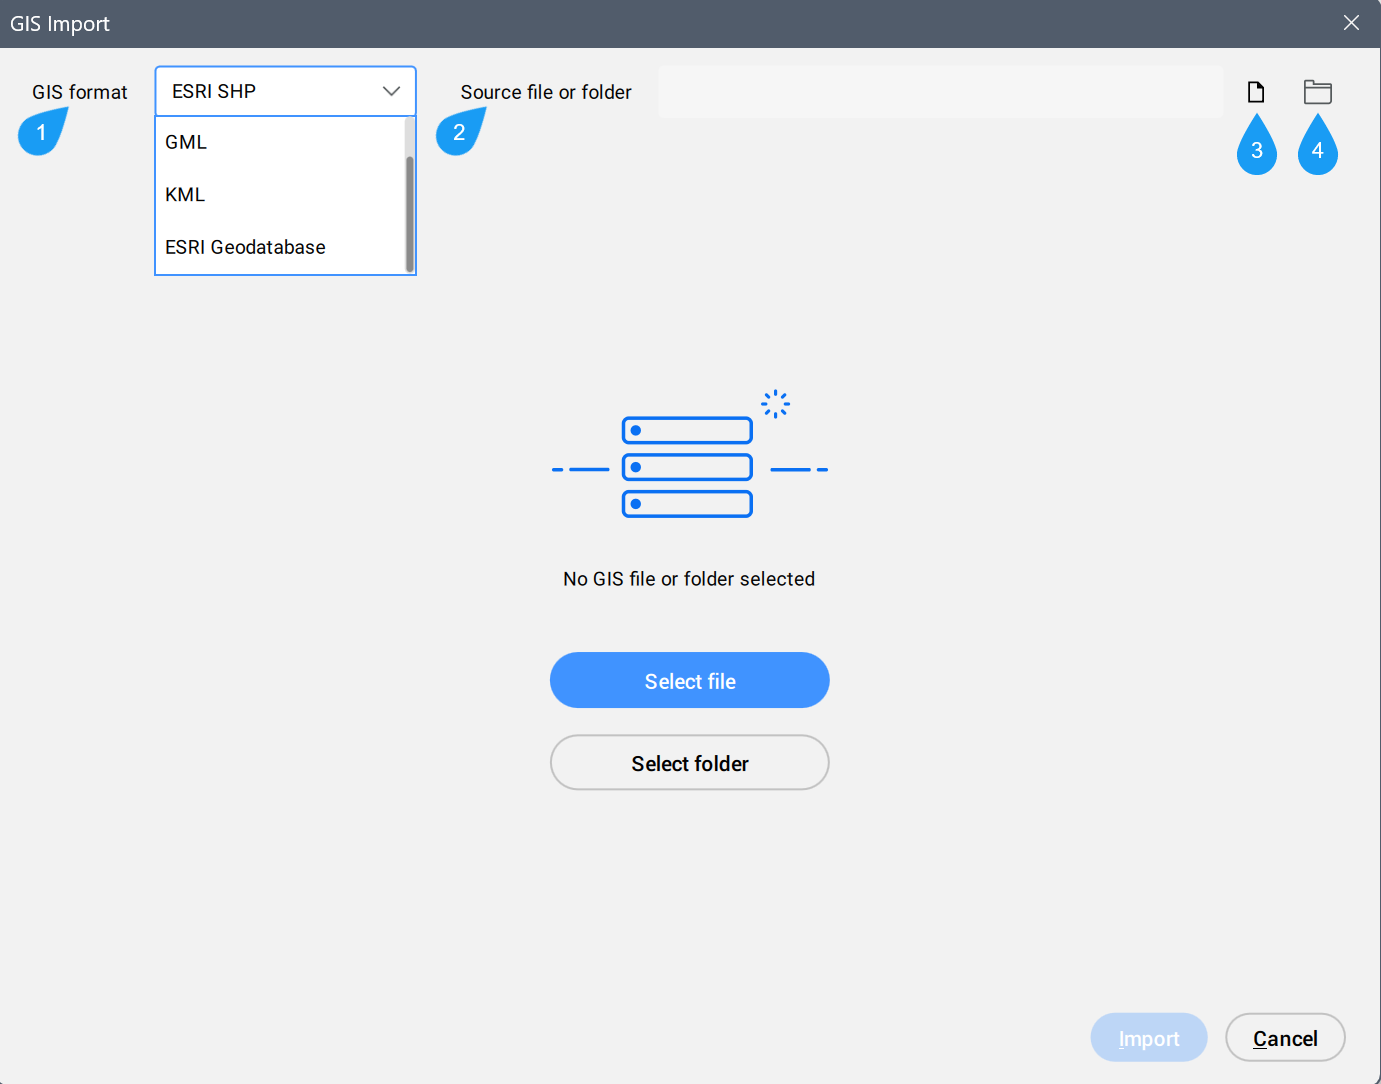
- GIS format
- Source file or folder
- Select the source file
- Select the source folder
- GIS format
- Defines the GIS format.
- Source file or folder
- Displays the file source path.
- Select the source file
- Opens the Open file dialog box to select a GIS file.
- Select the source folder
- Opens the Choose input folder dialog box to select a folder that contains the GIS files.
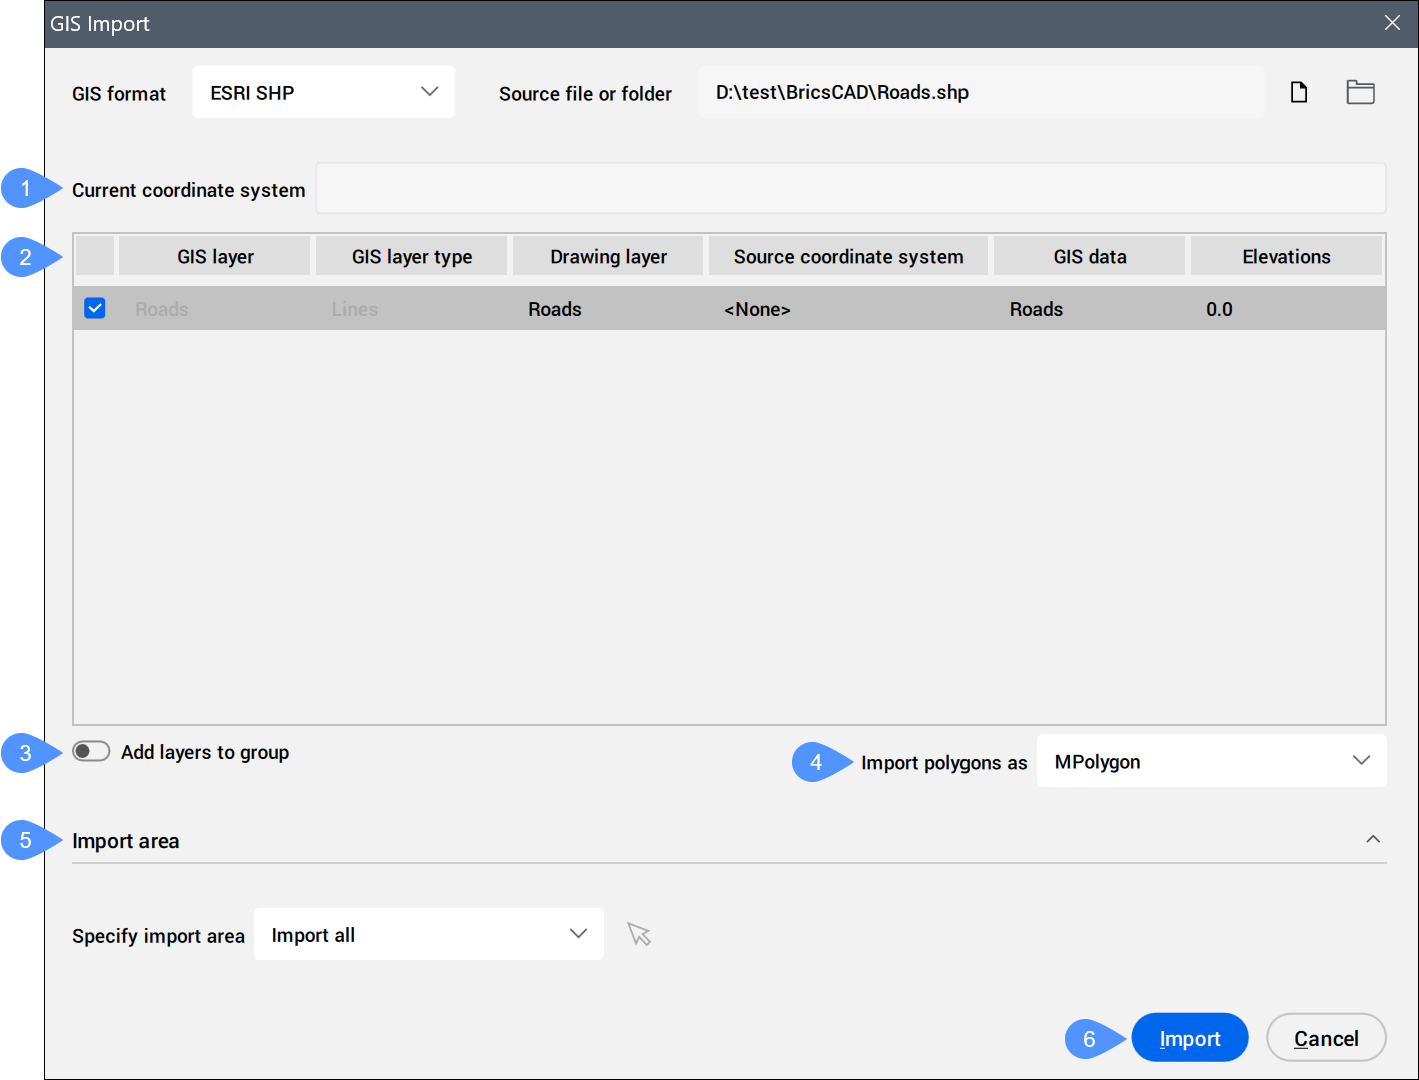
- Current Coordinate System
- Table of imported GIS layers
- Add layers to group
- Import polygons as
- Import Area
- Import
Current Coordinate System
Reports the GIS coordinate system being used by the current drawing.
Table of imported GIS Features
Lists the GIS Layers to import and allows you to define their properties.
- Selected
- Allows you to select/deselect GIS features to import.Note: A warning message appears when nothing is selected for import.
- GIS layer
- Specifies the name of the GIS layer.Note: Importing a duplicate GIS layer by renaming or merging it is possible. Follow the indications from the warning message.
Press the
 button to open the Duplicated Layers dialog box.
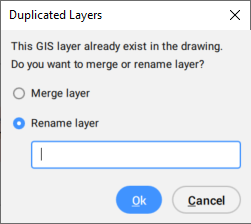
- GIS layer type
- Specifies the layer type, for example lines, polygons, points, etc.
- Drawing layer
- Specifies the drawing layer on which the entities are created.
Click the Drawing layer field of the GIS feature to open the Drawing Layer dialog box to set the layer.
Note: Importing a duplicate GIS layer by renaming or merging it is possible. Follow the indications from the warning message.- Existing layer
- Allows you to choose an existing layer from current drawing.
- New layer
- Allows you to create a new layer.
- Layer from data field
- Allows you to choose a layer from the data field.
- Source Coordinate System
- Specifies the source coordinate system that is used in the imported GIS file, which is read-only.
- GIS Data
- Specifies the GIS Data.
Click the GIS Data field of the GIS feature to open the GIS Data dialog box where you can choose whether or not to import the GIS data.
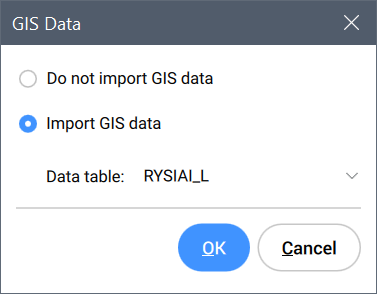
- Do not import GIS data
- If selected, the GIS data is not imported.
- Import GIS data
- If selected, it imports the GIS data from the specified data table.Note: When an entity with GIS data is copied, the GIS data is transferred with it.GIS data linked to entities is maintained when:
- Entity with GIS data is copied in the current drawing.
- You create a block definition as an external DWG file using the WBLOCK command.
- Entity with GIS data is moved between drawings using the COPY and PASTE commands.
- Elevations
- Specifies the elevation at which entities are created.
Click the Elevations field of the GIS feature to open the Elevations dialog box to set the elevation.
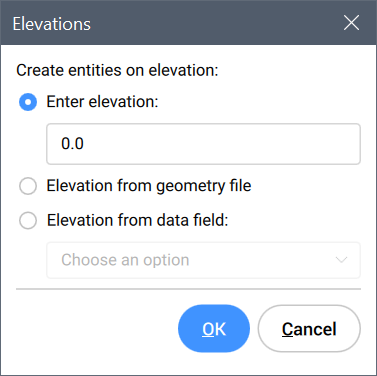
- Enter elevation
- Allows you to enter the elevation value.
- Elevation from geometry file
- Uses the elevation from the geometry file.
- Elevation from data field
- Uses the elevation from the specified data field.
Add layers to group
Adds the imported GIS layers to a new group, visible under the GIS tab from the Civil Explorer panel.
Import polygons as
Allows you to import polygons as MPolygon or Polyline.
Import Area
Allows you to specify the import area.
- Specify import area
-
- Import All
- Uses the entire drawing as import area.
- Select clipping polygon
- Click the mouse icon
 to select a polygon in the drawing that defines the import area.
- Draw clipping polygon
- Click the mouse icon to specify an import area in the drawing.
Import
Imports the GIS features in the drawing and closes the GIS Import dialog box.