Parts List dialog box
Opens via: AMPARTLIST command
Defines part reference information that appears in the parts list and the layout of the parts list.
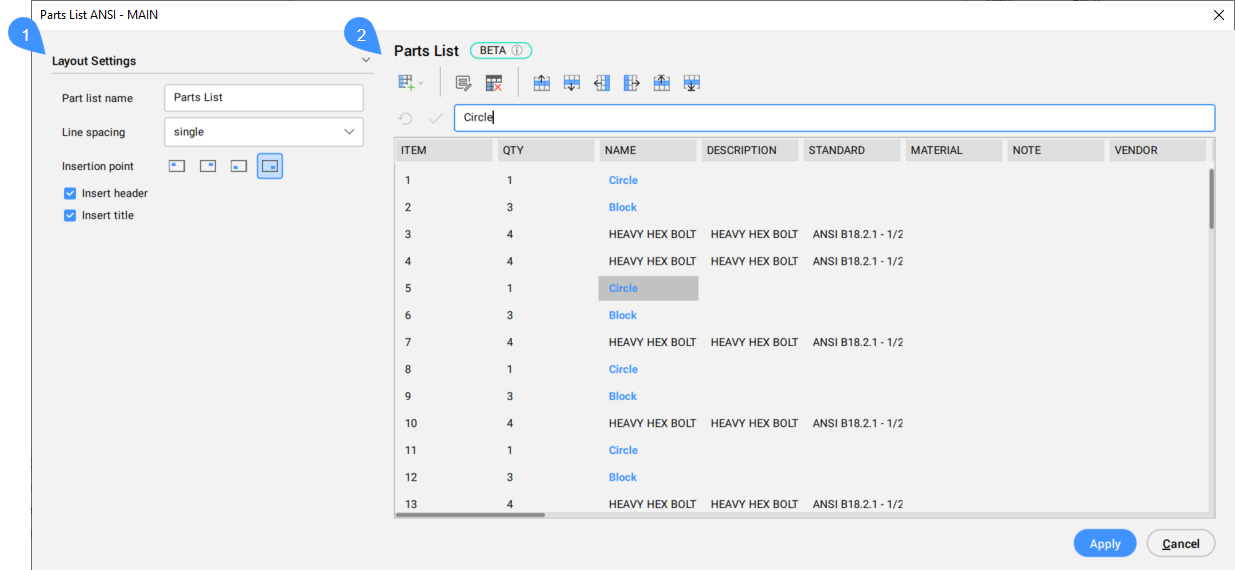
- Layout Settings
- Parts List
Layout Settings
Defines the layout for the parts list.
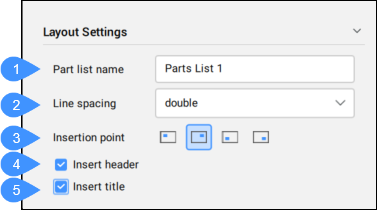
- Part list name
- Line spacing
- Insertion point
- Insert header
- Insert title
- Part list name
- Defines and displays the part list name.
- Line spacing
- Defines the line spacing type by choosing one option from the drop-down list.
- Insertion point
- Defines the placement of the insertion point and the vertical direction of the parts list. If the insertion point is at the bottom, both the header and title points are at the bottom of the parts list, and the parts are listed from bottom to top. Similarly, if the insertion point is at the top, both the header and title appear at the top of the parts list, and the parts are listed from top to bottom.
- Insert header
- Defines if the list will have a header.
- Insert title
- Defines if the list will have a title.
Parts List

- Manage columns
- Set value
- Remove overrides
- Move up
- Move down
- Move left
- Move right
- Move to the top
- Move to the bottom
- Formula bar
- Part references properties
- List of the part references
- Manage columns
- Manages the columns. When you open the drop down list the available options are:
- Insert column left
- Inserts the chosen column to the left side of the current column. The Select columns dialog box opens.
- Insert column right
- Inserts the chosen column to the right of the current column.
- Remove column
- Removes the current column.
Note: The available columns are managed within the BOM Settings dialog box.Note: The Select columns dialog box displays only those columns that have not been inserted yet.
- Set value
- Allows you to override values generated by formulas on the selected cells. The Set Value dialog box opens.

- Remove overrides
- Removes overrides from the current selection and restores their default values as calculated by their formula.Note: This button is available only when overrides exist within the current selection.
- Move up
- Moves the row of the selected cell one step up in the parts list. Multiple rows can be moved at once, too.
- Move down
- Moves the row of the selected cell one step down in the parts list. Multiple rows can be moved at once, too.
- Move left
- Moves the column of the selected cell one step to the left in the parts list. Multiple columns can be moved at once, too.
- Move right
- Moves the column of the selected cell one step to the right in the parts list. Multiple columns can be moved at once, too.
- Move to the top
- Moves the row of the selected cell to the top of the parts list. Multiple rows can be moved at once, too.
- Move to the bottom
- Moves the row of the selected cell to the bottom of the parts list. Multiple rows can be moved at once, too.
- Formula bar
- Allows you to introduce or view a formula. The new value is saved when press ENTER.
- Part references properties
- Displays the property names of parts references marked as visible in the BOM Settings dialog box that define the header of the Parts List table. The names of these properties are defined in the Caption field of the BOM Settings dialog box.
- List of the part references
- Lists the parts references included in the chosen BOM.