Using the Project Browser
The Project browser panel
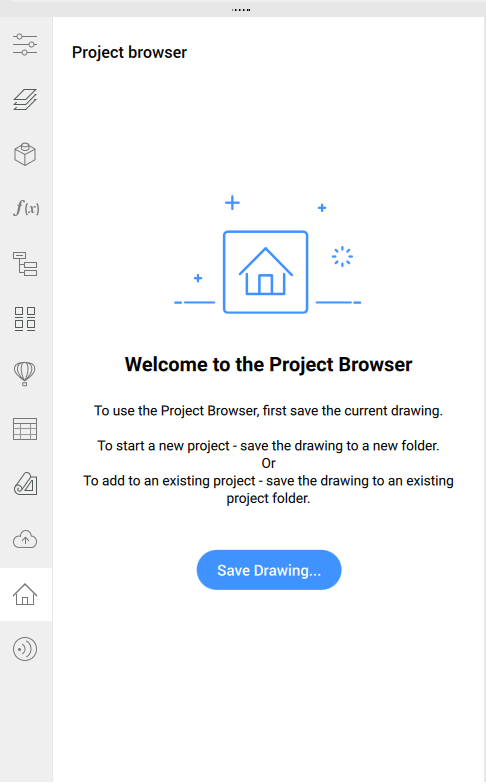
Create a BIM project
To create a BIM project, you must save the model drawing and then:
- Click the Create Project button in the BIM Project Browser.
All external references files of the master are included in the project.
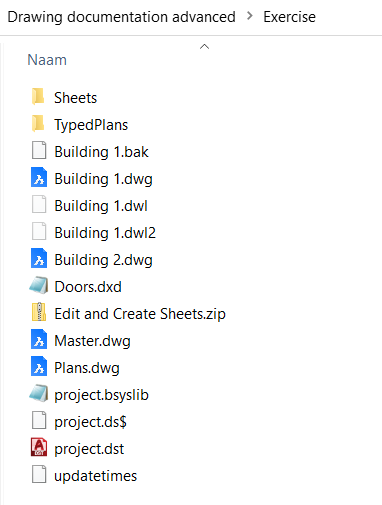
Other drawings can be added to the project by simply saving them in the project folder and then clicking Add to Project.
- The Info tab of the BIM Project Browser panel is opened:
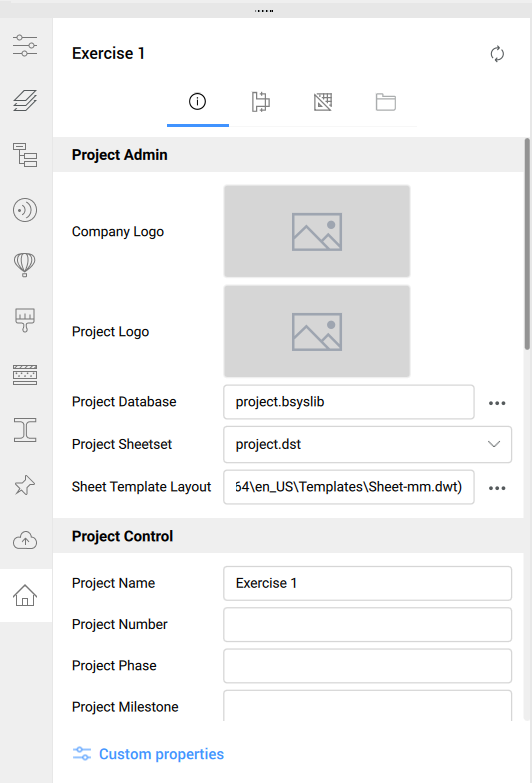
- A Project Database is created. The Project Database dialog box opens by pressing the Browse button (
 ) on the right side of the Project Database field.
 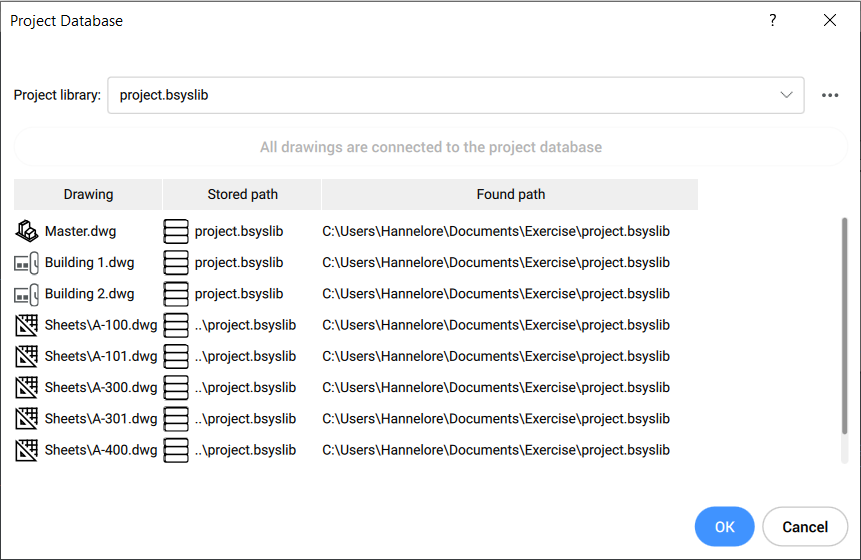 Make sure all drawings are connected to the same project database. That means all models are referred to the same single definition of materials, compositions, profiles, story and building.Note: For more information about the project database, launch BIMPROJECTINFO command that opens the BIM Project Info dialog box.
 - The Project Sheetset field shows the used sheetset. You can open the drop-down menu to select another Sheetset that is located in the project folder.
- Sheet Template Layout shows the path of the current template. Click the Browse button (
 ) to change the template.
 - (Optional) Set the Project info in the Project Control section:
Select a Company Logo file from the Select a Company Logo dialog box that opens when you click on the picture field.
Select a Project Logo file from the Select a Project Logo dialog box that opens when you click on the picture field.
Type a name in the Project Name field (the default project name is the name of the parent folder).
Sheetset Custom Properties and Default Sheet Custom Properties will appear in the title blocks of the sheets.
Refresh the project
Click on the Refresh button ( ). The Project Browser is refreshed to match the changes in the model.
Create Sheets
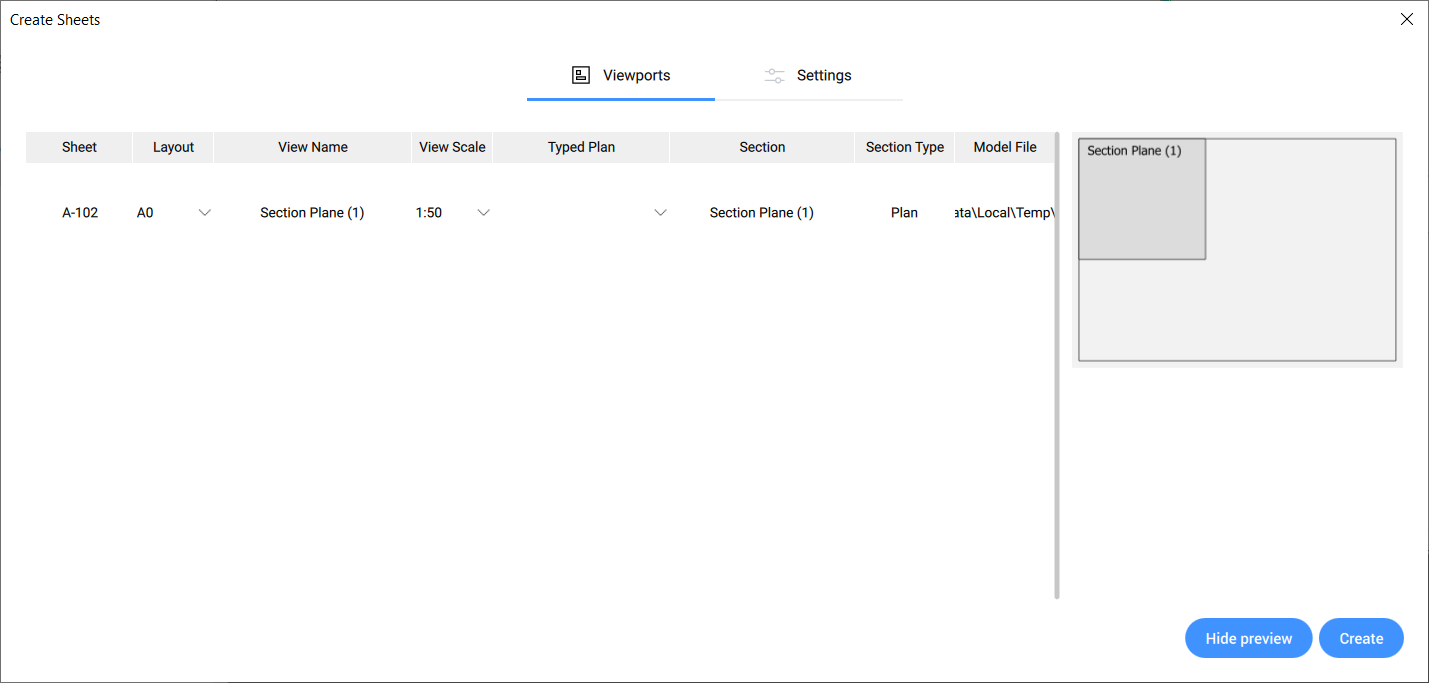
Go to the Sections and views tab of the Project Browser panel and right click a section. Select Create Sheets to open the Create Sheets dialog box.
- The Viewports tab lists all sheets that will be created with their sheet
name, layout, view name, view scale, typed plan, section name and type and model file name.
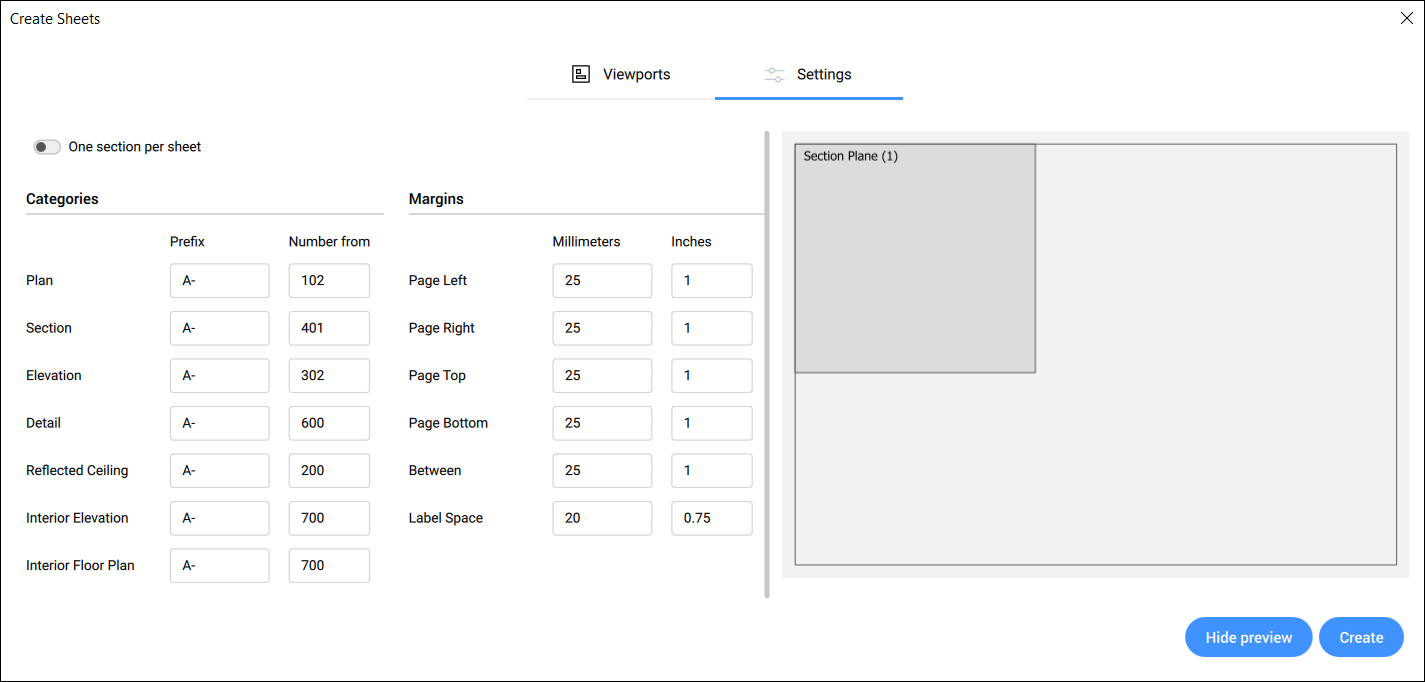
- The Settings tab lists the settings of the sheets that will be created. The naming of the sheets can be changed in the Categories tab section . The margins of the sheets can be set in the Margins tab section. You can also toggle One section per sheet on and off to allow multiple sections per sheet.
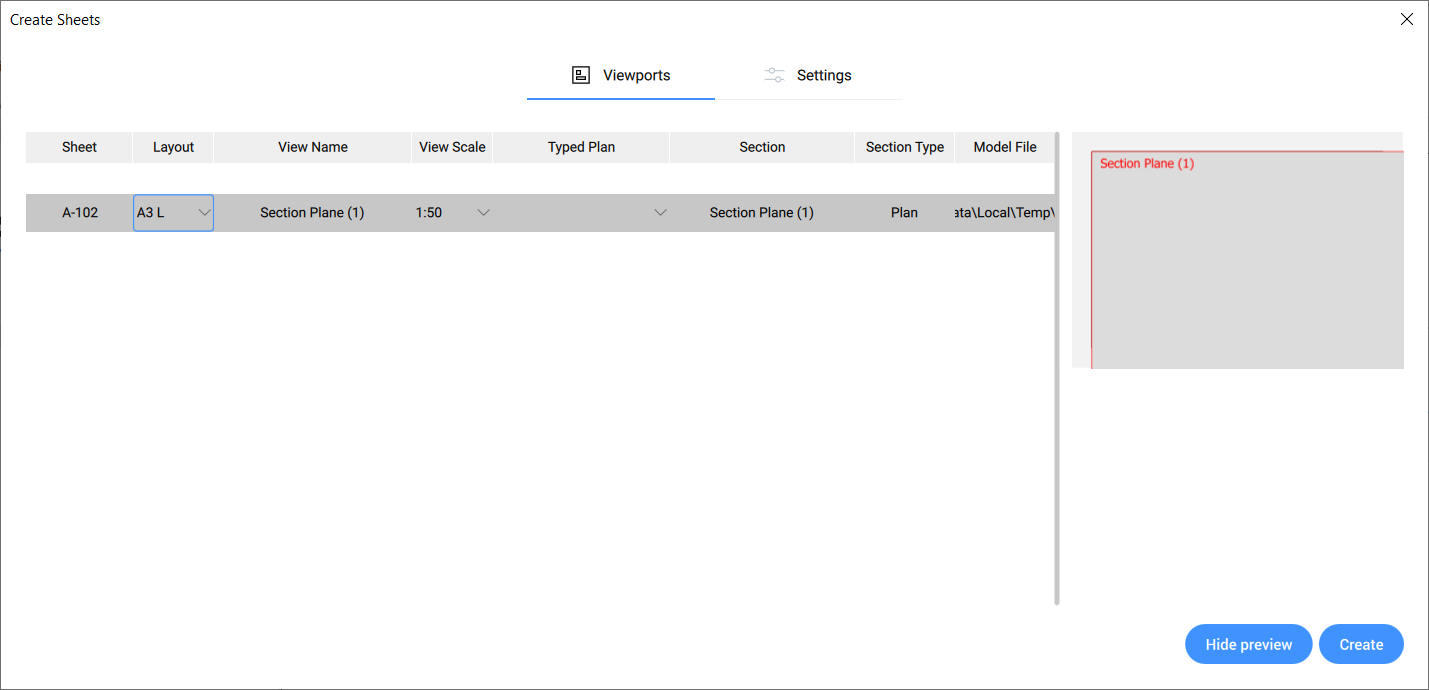
- A preview of the created sheet is shown on the right side of the dialog box. Click hide preview to toggle the preview off.Note: When the viewport is larger than the layout, the preview is displayed in red.
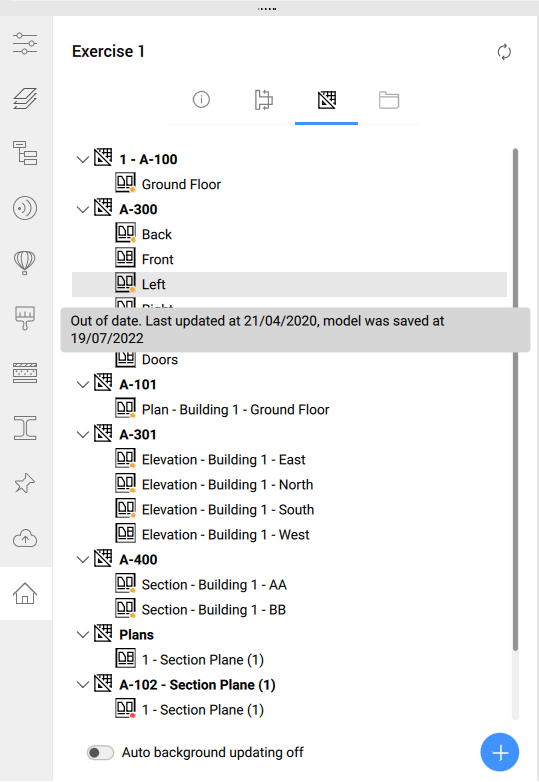
- Click Create to create the sheets. The sheets are then visible in the Sheets tab of the Project Browser panel.
Edit Sheets
- The Viewports tab lists all sheet views of the selected sheet. You can edit the scale and select a typed plan for the selected sheet view.Note: A sheet's views position on the layout cannot be changed in the Edit Sheets dialog box. To do that, go to the Sheets tab and double-click the sheet's name to open the sheet's drawing.
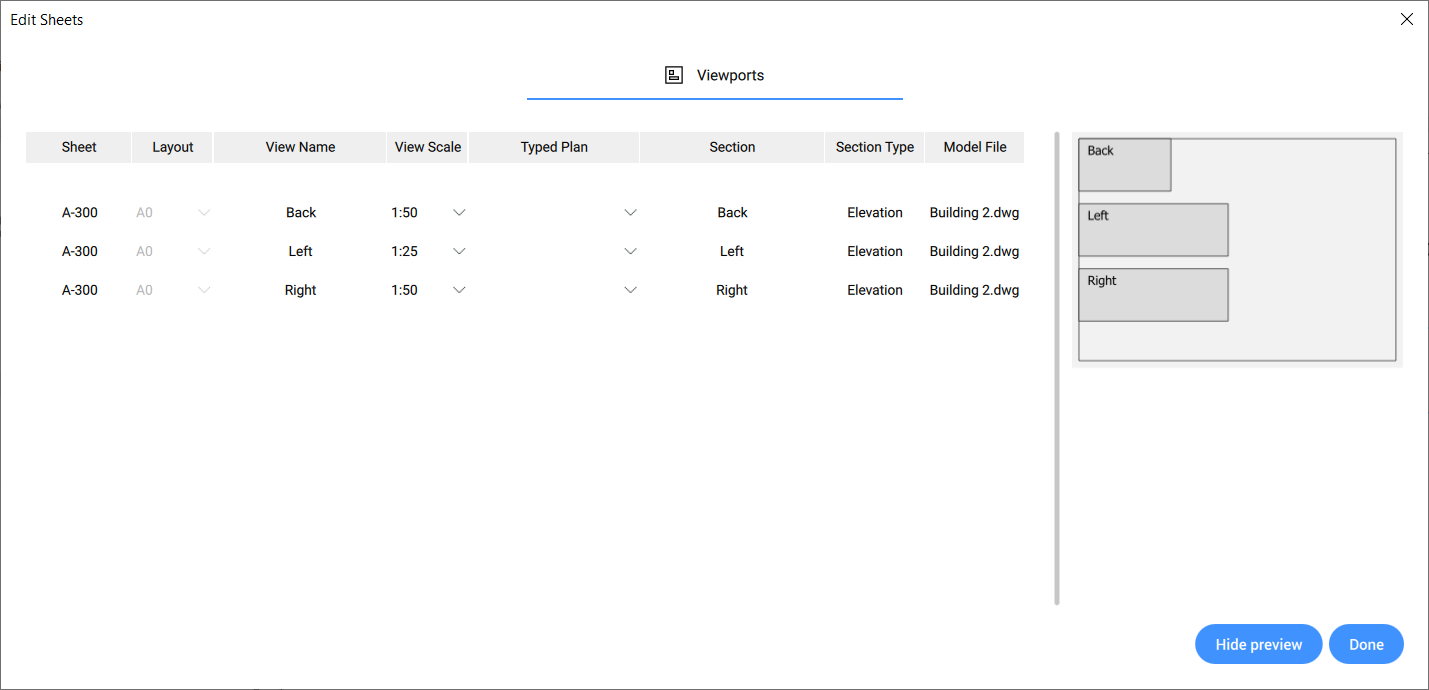
- A preview of the sheet is shown on the right side of the dialog box. Click the Hide preview button to toggle the preview off. When a sheet view size is larger than the sheet's layout, the layout preview is displayed in red. In this case you can adjust the view scale to fit the layout.Note: The layout size of an existing sheet cannot be changed from the Edit Sheets dialog box. To have a different layout size, you need to create a new sheet with the desired size.
- Click Done to save the changes.
Auto Background Updating
Go to the Sheets tab in the Project Browser. At the bottom you can toggle Auto background updating option On or Off. When enabled, section results are calculated automatically without interrupting the user workflow.
Creating schedules
See the Schedules article for more information about Schedules.
Working in the project browser
Right-click an item in the BIM Project Browser to display a context menu.
Section context menu:
- Select Section Entity: selects the section entity in the project model drawing.
- Rename: renames the section entity.
- Display Section Result: displays the section result in the corresponding sheet and zooms in on its viewport. If not already open, the drawing is opened.
- Create Sheets: opens the Create Sheets dialog box that sets the viewport and settings of the new sheet. Note: If the sheets already exist, a dialog box will pop up mentioning you can go to the Project Browser's Sheets tab to edit them. This can be done by right-clicking on a sheet and selecting Edit Sheets from the menu.
- Update now: recalculates the section result.
- Update in Background: recalculates the section result in background, without interrupting the user workflow.
You can easily place a section or a 3D view to an active sheet's paperspace by dragging it from the Sections and views tab and dropping it on the paperspace.
- Open sheet: opens the sheet.Note: You can also double click the sheet to open it.
- Copy Sheet: copies the selected sheet.
- Edit Sheet: opens the Edit Sheets dialog box where you can edit the properties of the selected sheet.
- Remove sheet: removes the sheet.
- Update now: updates the sheet views.
- Update in Background: updates the sheet views in background.
Sheet view context menu:
- Display View: displays the corresponding result and zooms in on its viewport.
- Edit Sheet: opens the Edit Sheets dialog box where you can edit the properties of the selected sheet.
- Remove View/Result: removes the sheet view and corresponding result.
- Update Now: updates the sheet view.
- Update in Background: updates the sheet view in background.
- Place view label: insert a view label in the current sheet and establish the link between view label and viewport. The new view label replaces the old one if the view label already exists.Note: This action is available only when the current document is an active sheet document.
You can easily place a sheet view to another active sheet's paperspace by dragging it from the Sheets tab and dropping it on the paperspace.
- Remove Subset: removes the subset (only possible when it doesn't contain any sheets/subsets).
- Open file: opens the schedule file on a dxd reader on your computer where you can edit and save the file.
- Rename: opens the Choose name dialog box where you can enter a new name for the file. All linked sections and the sheetset will be updated.Note: You can scan the whole project when renaming schedule, this takes more time because BricsCAD will scan all sheet files:

- Duplicate: creates a duplicate of the schedule.
- Generate csv: generates an csv file from the dxd file. The csv file is located in the same schedules folder as the original dxd file.
- Generate xlsx: generates an xlsx file from the dxd file. The xlsx file is located in the same schedules folder as the original dxd file.
- Delete: removes the schedule.
You can easily place a schedule on an active sheet's paperspace by dragging it from the Files tab and dropping it on the paperspace. This action also applies to all supported files for import.

