Polecenia transparentne w BricsCAD
Polecenia Transparentne Civil służą do wprowadzania wartości w oparciu o znane informacje (punkt, odległość lub promień).
Polecenia transparentne można uruchamiać w ramach innego polecenia (na przykład PLINIA, 3DPLINIA, WYRÓWNANIE), korzystając z następujących metod:
- Kliknij polecenie w panelu Polecenia Transparentne Civil na karcie Narzędzia Główne wstążki.

- Wprowadź polecenie w wierszu poleceń.
- Aktywuj pasek narzędzi Polecenia Transparentne Civil i wybierz polecenie.

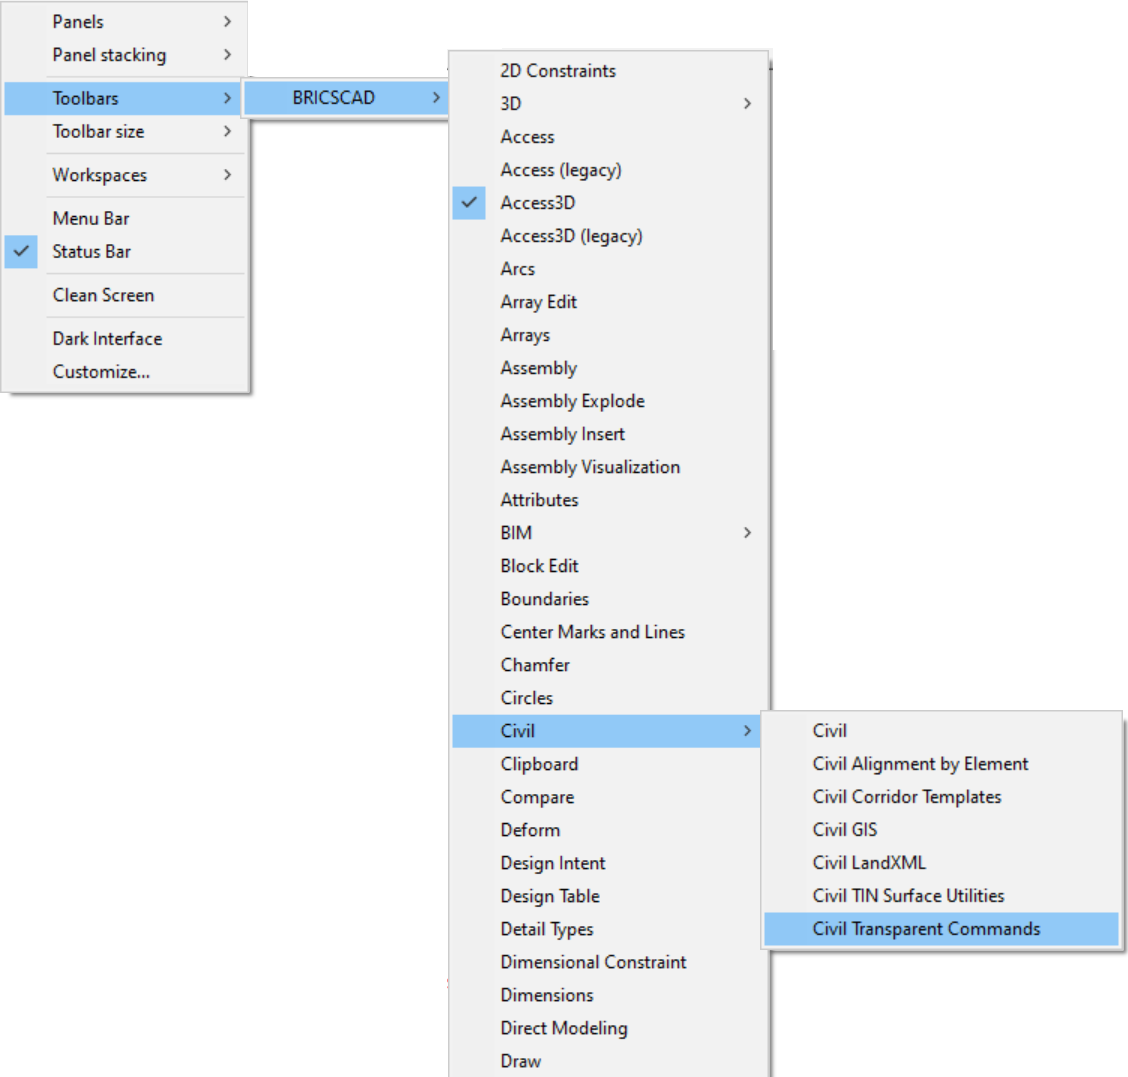
Aby aktywować pasek narzędzi Polecenia Transparentne Civil, kliknij prawym przyciskiem myszy wstążkę, przejdź do Paski Narzędzi, wybierz BRICSCAD, a następnie w sekcji Civil wybierz Polecenia Transparentne Civil.

Namiar i odległość 
Alias: 'NO
Określa lokalizację punktu w namiarze i odległości od znanego punktu. Wynikiem jest współrzędna nowego punktu.
Opcje w ramach polecenia
- Określ kwadrant
- Umożliwia wybranie wymaganego kwadrantu.
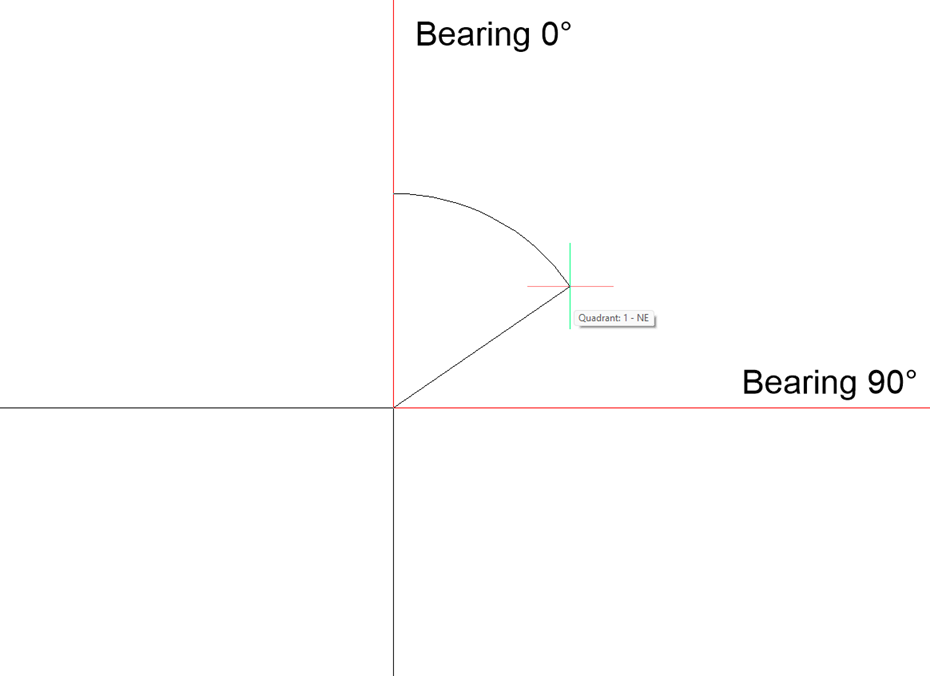
Kwadranty: NE = 1, SE = 2, SW = 3, NW = 4
- Określ namiar
- Określa kąt mierzony wewnątrz wybranego kwadrantu. Pomiar jest bardzo precyzyjny (stopnie, minuty, sekundy).
Kąt można określić dynamicznie na rysunku lub wpisując go w wierszu poleceń. (NE: 0, 90: SE: 90, 0: SW: 0, 90: NW: 90, 0 - Jako przykład, dla NE, 0 reprezentuje oś N i oś początkową pomiaru. Oś końcowa jest reprezentowana przez 90 stopni i w naszym przykładzie jest to oś E).
Można też wprowadzić kąt w liczbach dziesiętnych, a zostanie on przekonwertowany na stopnie, minuty i sekundy (dwie pierwsze cyfry dziesiętne oznaczają minuty, a dwie kolejne sekundy).
Uwaga: Prawidłowe wartości to:- dla stopni: 0-90
- dla minut: 0-59
- dla sekund: 0-59
- Określ odległość
- Określa przesunięcie od początku kwadrantu pod wcześniej określonym kątem. Odległość można określić dynamicznie na rysunku lub wpisując ją w wierszu poleceń.

Przykład: Uruchom polecenie PLINIA:
: PLINIA
Wybierz początek polilinii lub [Śledź] <Ostatni punkt>:
Ustaw następny punkt lub [Rysuj łuki/Dystans/Śledź/Półszerokości/Szerokość]:
Ustaw następny punkt lub [Rysuj łuki/Dystans/Śledź/Półszerokości/Szerokość/Cofnij]: 'NO

 >>Określ kwadrant [1 dla północnego wschodu, 2 dla południowego wschodu, 3 dla południowego zachodu, 4 dla północnego zachodu]: 1
>>Określ namiar: 40d30'20"
>>Określ odległość: 123
Wznów polecenie PLINIAAzymut i odległość 
Alias: 'AO
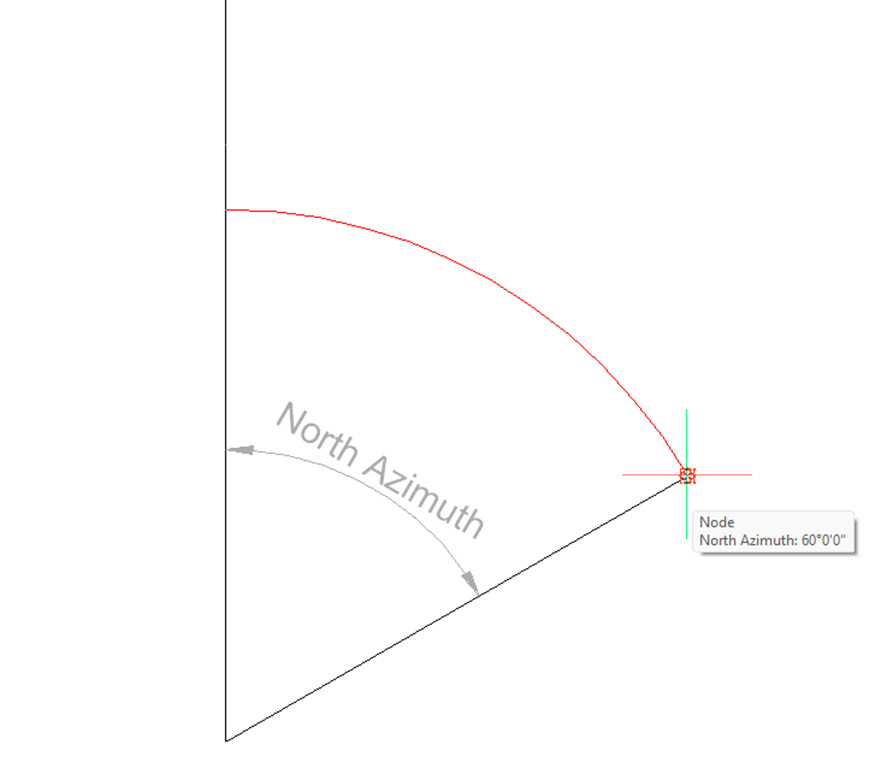
Określa lokalizację punktu w azymucie i odległości od znanego punktu.
Opcje w ramach polecenia
- Określ azymut
- Umożliwia wybranie kąta względem linii utworzonej wcześniej za pomocą polecenia. Można to zrobić dynamicznie na rysunku lub wpisując dokładny kąt w wierszu poleceń (stopnie, minuty, sekundy lub liczby dziesiętne).
- Określ odległość
- Umożliwia określenie przesunięcia od punktu początkowego. Można to zrobić dynamicznie lub wpisując w wierszu poleceń.

Przykład: Uruchom polecenie PLINIA:
pl
Wybierz początek polilinii lub [Śledź] <Ostatni punkt>: 0,0
Ustaw następny punkt lub [Rysuj łuki/Dystans/Śledź/Półszerokości/Szerokość]: '_AO
Określ azymut: 60
Określ odległość: 50
Ustaw następny punkt lub [Rysuj łuki/Dystans/Śledź/Półszerokości/Szerokość]:
Stacja i odsunięcie
Alias: '_SO
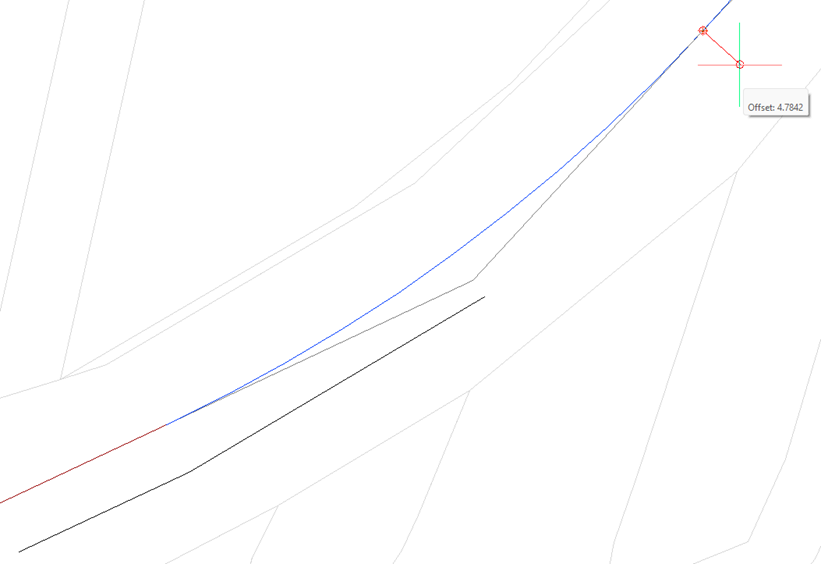
Określa lokalizację punktu na stacji i odsunięcia od wyrównania.
Opcje w ramach polecenia
- Wybierz wyrównanie
- Umożliwia wybranie wymaganego wyrównania poziomego.
- Określ stację
- Umożliwia wybranie dowolnego punktu na osi jako punktu początkowego.
- Określ odsunięcie
- Tworzy linię pomocniczą, prostopadłą do stacji. Umożliwia to określenie odsunięcia na linii pomocniczej. Odległość można wybrać graficznie lub wpisując ją w wierszu poleceń.

Przykład: Uruchom polecenie PLINIA:
: PLINIA
Wybierz początek polilinii lub [Śledź]: <Ostatni punkt>
Ustaw następny punkt lub [Rysuj łuki/Dystans/Śledź/Półszerokości/Szerokość]:
Ustaw następny punkt lub [Rysuj łuki/Dystans/Śledź/Półszerokości/Szerokość/Cofnij]: '_SO


>>Wybierz wyrównanie:
>>Określ stacje:
>>Określ odsunięcie:
Ponów polecenie PLINIA
Numer punktu 
Alias: 'NP
Określa lokalizację punktu przy użyciu numeru punktu. Można wprowadzić wiele liczb punktowych lub zakresów liczb oddzielonych przecinkami.
Przykład: Uruchom polecenie 3DPLINIA:
: 3DPLINIA
Początek polilinii: '_PN
>>Wprowadź numer punktu: 1-4
Wznowienie polecenia 3DPLINIA
Obiekt punktowy (wybrany graficznie na rysunku) 
Alias: OP
Określa lokalizację punktu, wybierając istniejący Punkt Civil.
Przykład: Uruchom polecenie 3DPLINIA:
: 3DPLINIA
Początek polilinii: '_PO
>>Wybierz obiekt punktowy:
Wznowienie polecenia 3DPLINIA
>>Wybierz obiekt punktowy:
Wznowienie polecenia 3DPLINIA
>>Wybierz obiekt punktowy:
Wznowienie polecenia 3DPLINIA
