Opens the Drawing explorer dialog box with Images selected.
Icon:
Description
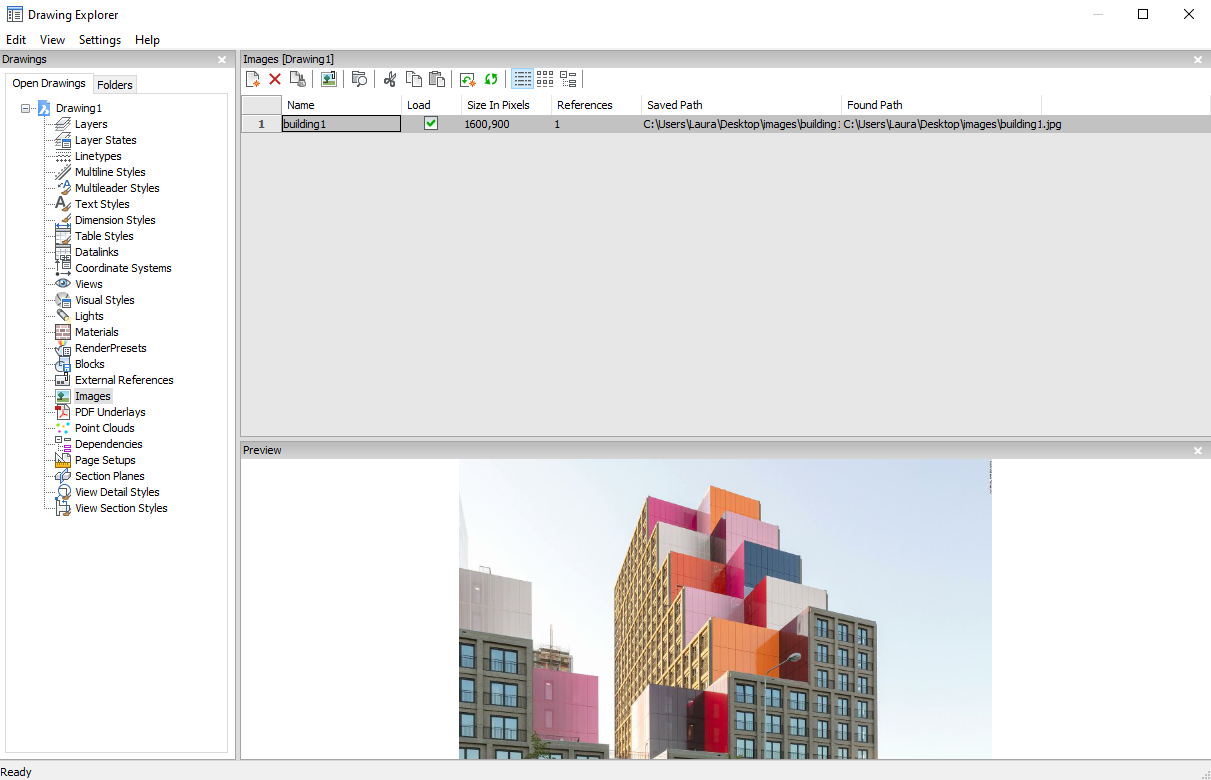
Displays the Images category of the Drawing explorer dialog box:
Supports the following formats:
BMP: Windows bitmap
ECW: Enhanced Compressed Wavelet format
GIF: CompuServe graphic image format
JPG, JPEG, and JPEG2000 (JP2, j2k) : Joint Photographic Experts Group (common among digital cameras)
MTI: Multi-resolution Tiled Image (Bricsys raster format for large images)
PCX: PC Paintbrush
PNG: Portable network graphics
SID: MrSID is an acronym for Multi-resolution Seamless Image Database
TGA: Targa
TIF, TIFF: Tagged Image File Format
Context menu options
New
Attaches raster image files to the drawing. dismisses the Drawing explorer dialog box, and the starts the IMAGEATTACH command. See IMAGEATTACH command.
Delete
Removes the image from the drawing. You may need to use the REGEN command to update the screen.
Insert
Inserts more images in the drawing, like the New button. Displays the Attach Raster Image dialog box. See IMAGEATTACH command.
Run extended search for missing attachments
Runs an extended search for missing attachments.
Clear cash
Clears the folder where temporary image cache files are stored.
Relative path
Shows the Saved Path as a relative path.
Absolute path
Shows the Saved Path as an absolute path of the image located in the drawing folder.
Filename as a path
Replaces the saved path with the file name.
Options within the command
Name
Specifies the name of the image. This usually is the image's file name.
Load
Toggles whether the image is displayed in the drawing:
On: displays the image in the drawing
Off: displays only the image's frame, which is turned off by the IMAGEFRAME command
Size in Pixels
Reports the size of the image in pixels, horizontally and vertically.
References
Reports the number of times the image occurs in the drawing.
Saved Path
Reports the path to the image file when first loaded. When the path cannot be found, click the Browse button which will display the Choose a File dialog box and locate the missing image file.
Found Path
Reports the current path to the image file. This path should match the Saved Path in most cases.