


Using BIM Quickdraw
About

For more information about this command, visit the Command Reference article BIMQUICKDRAW.
Room and walls settings
The BIMQUICKDRAW command opens the Quick Draw command context panel. This allows you to set the room dimensions by directly typing the needed value or by using the field arrows. You can also set the wall placement configuration and snapping options, as well as adopt dimensions of nearby rooms by checking the Auto adopt sizes option.
To change the justification of the walls, press the CTRL key while the Quickdraw justification Hotkey Assistant widget is displayed at the bottom of the screen.

The magnetic snapping feature
With the magnetic snapping feature, you can easily align the Quickdraw cursor. When the command is active, move the cursor close to the object you want to align to. The Quickdraw cursor automatically snaps to the object.
You have the following options:
| 1. Align to the origin |
 |
| 2. Align to existing walls | To the wall itself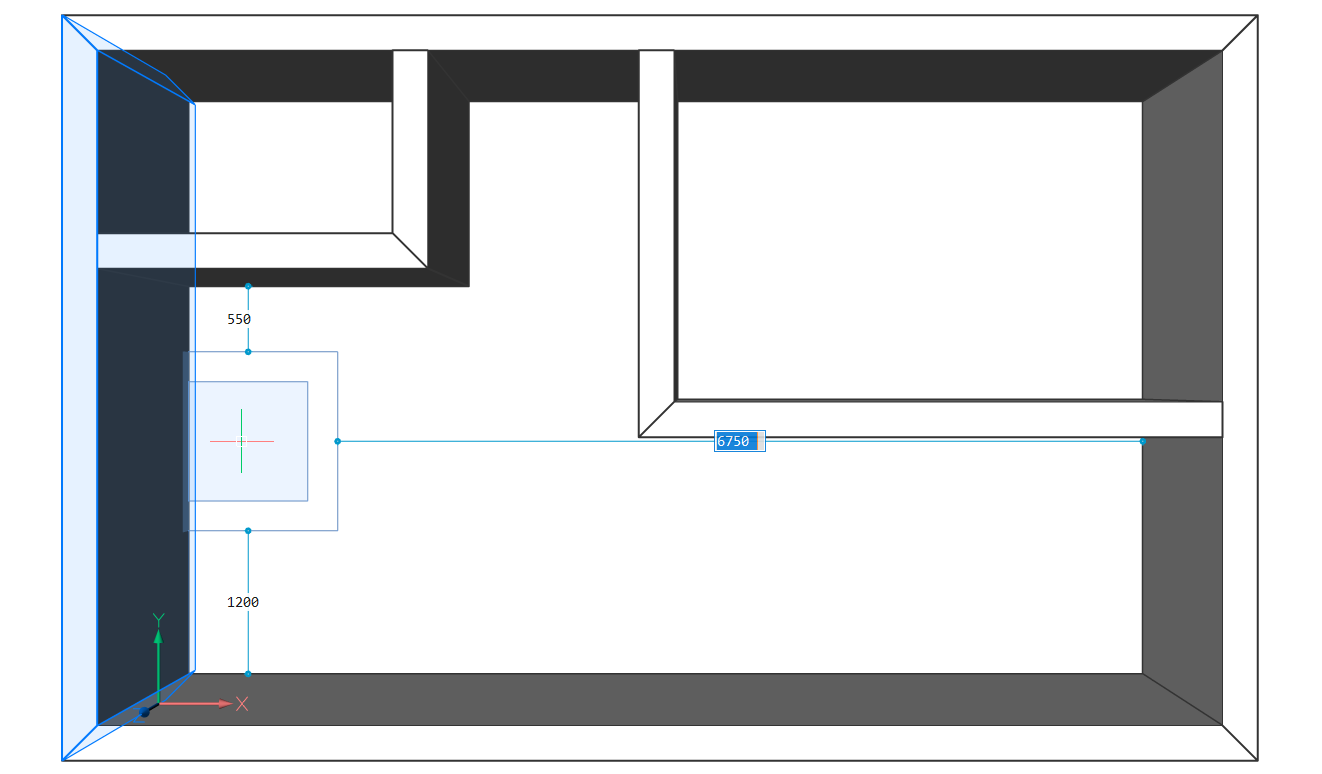 |
To the extents of the wall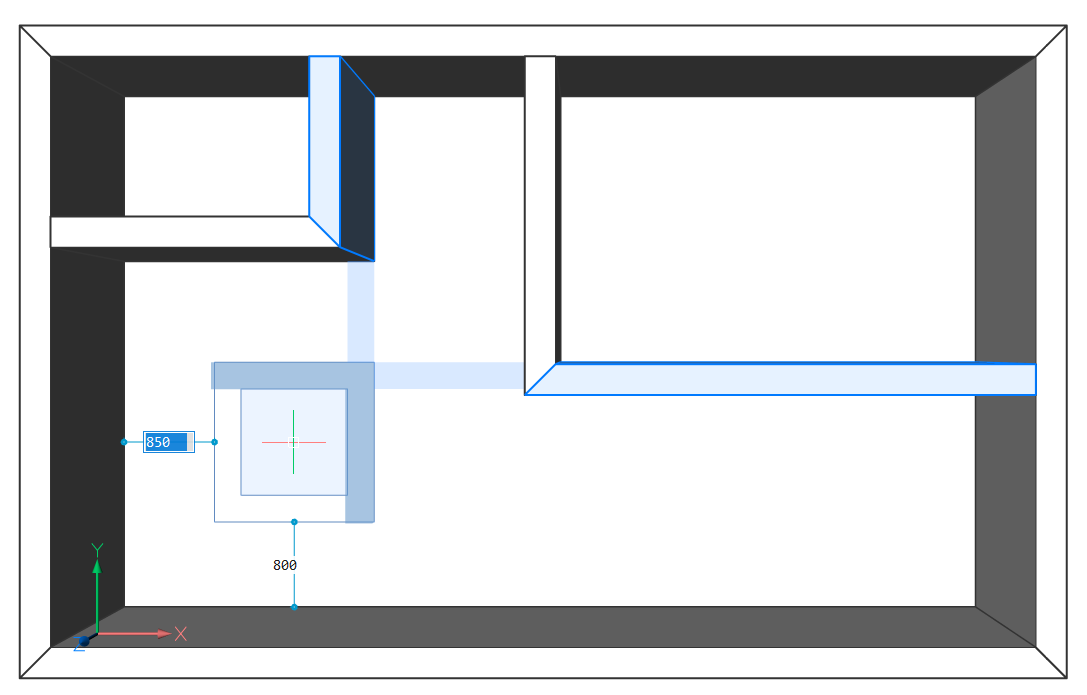 |
|
| 3. Align to lines | To grid lines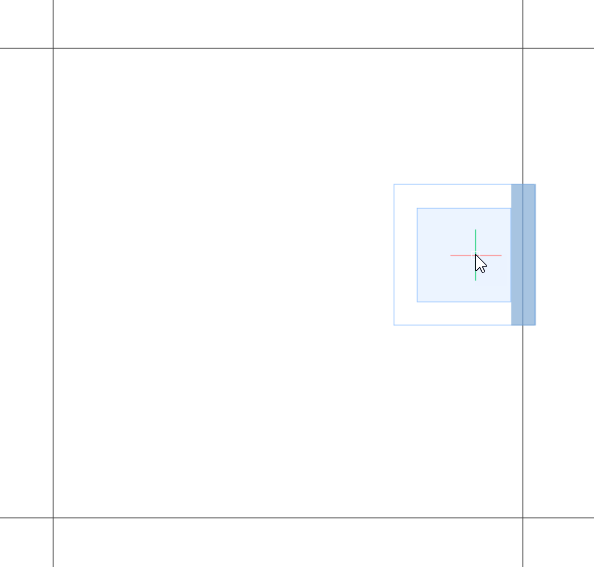 Note: If you use Quickdraw to copy a story, the gridlines will only be copied if the grid is assigned to the same spatial location of the ground floor slab and walls. If this is not the case, the gridlines that lie in the boundary of the ground slab will be projected on the slab of the top floor. This is only a visual help. The gridlines on the slab of the top floor will disappear when you exit the BIMQUICKDRAW command.
|
To X- and Y- aligned lines and line segments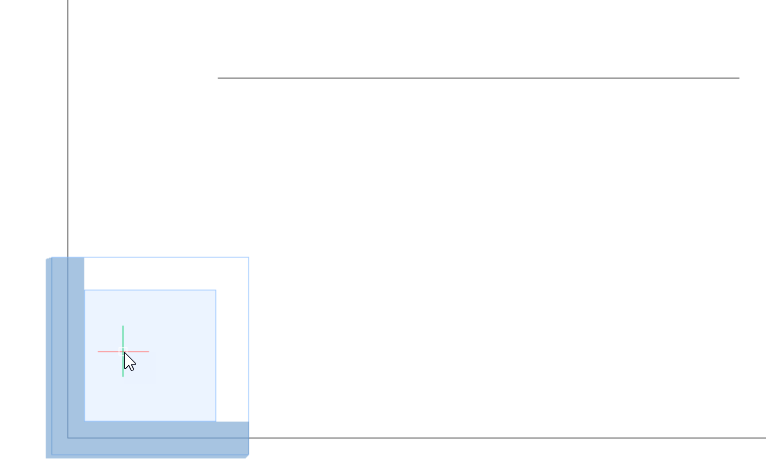 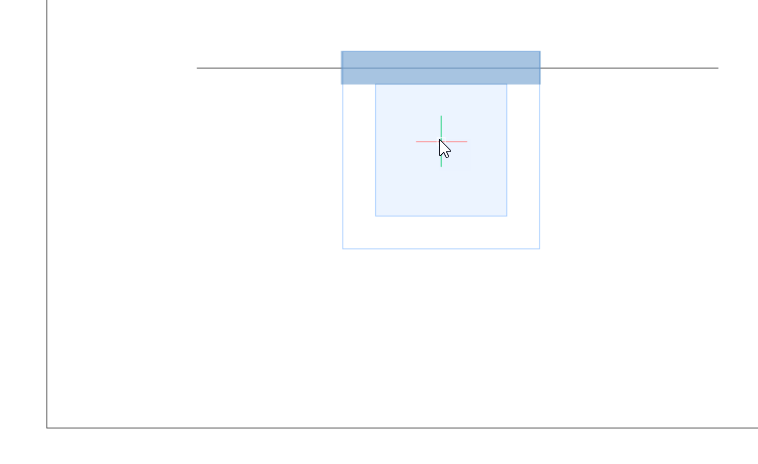 |
|
To parallel lines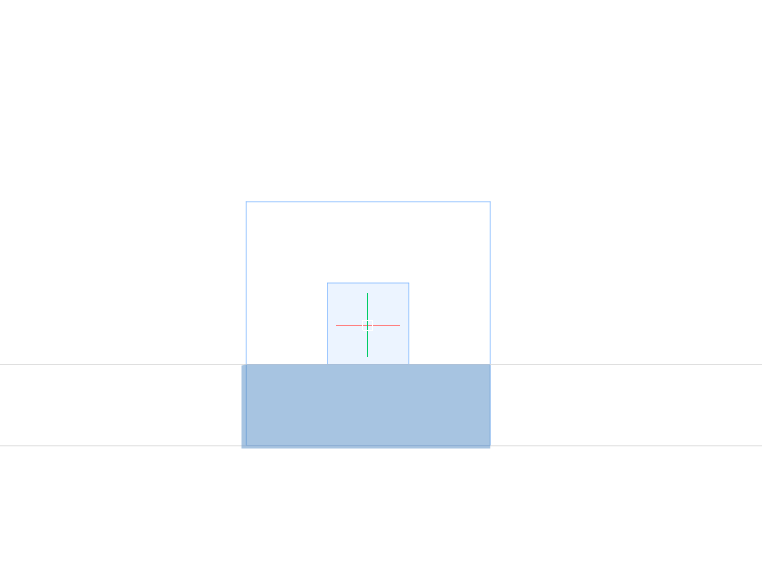
|
Procedure: creating an L-shaped house
- When the Quad cursor is in the No Selection state (nothing is highlighted or selected), select Quickdraw from the Model tab, click the Quickdraw icon in the ribbon or type BIMQUICKDRAW in the Command line.
You are prompted: Select first point:
Note: Use the Quick Draw command context panel to change the settings before you click and then specify the first corner of a building. - Select any point in the drawing area to set the first corner.Note: To start from the origin, use the magnetic snapping feature of Quickdraw.
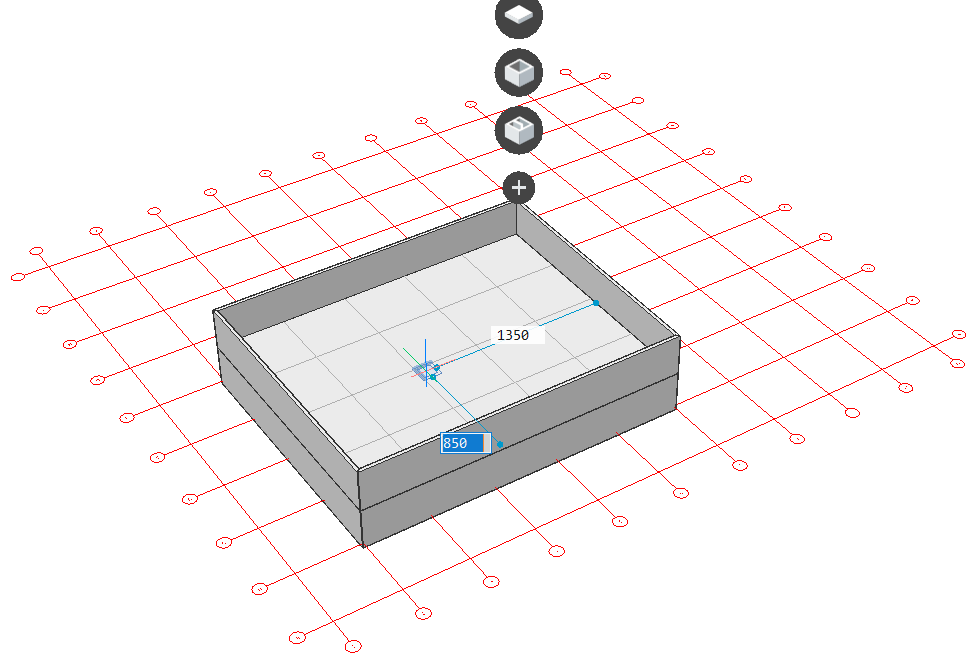
- Drag the mouse cursor to define the footprint of the building.Note: If the Dynamic dimension (DYN) option is on, the current values of the room width (1) and length (2) are displayed in a dynamic dimension field.
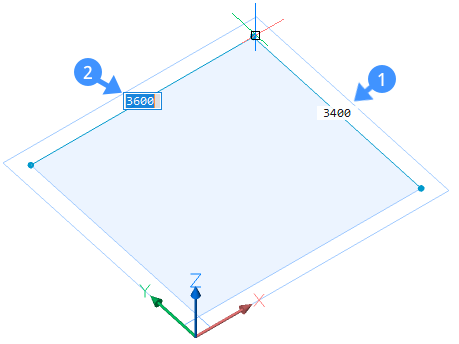
Specify the values of the room width and length in the Dynamic dimension field. Press the Tab key to switch between width and length and press Enter or just click freely. Press Enter or Escape to leave the QUICKDRAW command or you can continue to create more rooms.
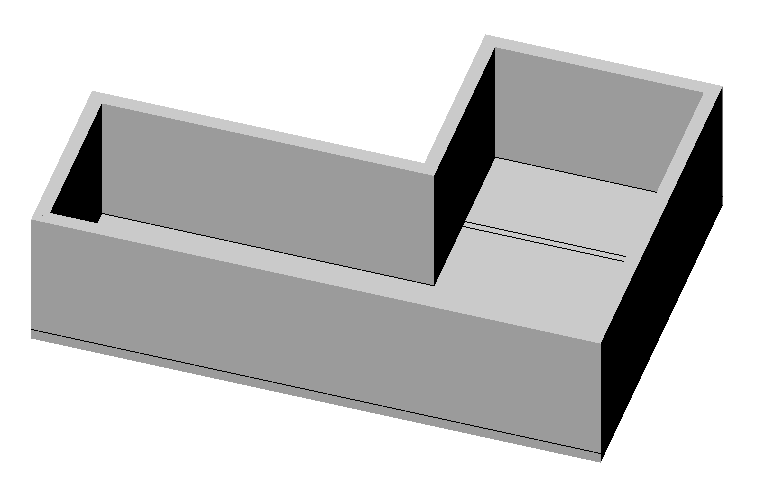
- Place the Quickdraw cursor inside the existing building to create more rooms.
When you place the Quickdraw cursor inside the existing building, the dynamic dimension fields display the distances from the Quickdraw cursor to the adjacent walls (3,4,5,6).
When the Auto adopt sizes option is checked, the dimensions of the walls of the new room will be the same as the wall you snap to. If you don’t want this to happen, uncheck this option in the command context panel.

If the cursor aligns with one or two existing walls in the model, the layout of the cursor will adapt and depict the alignment.
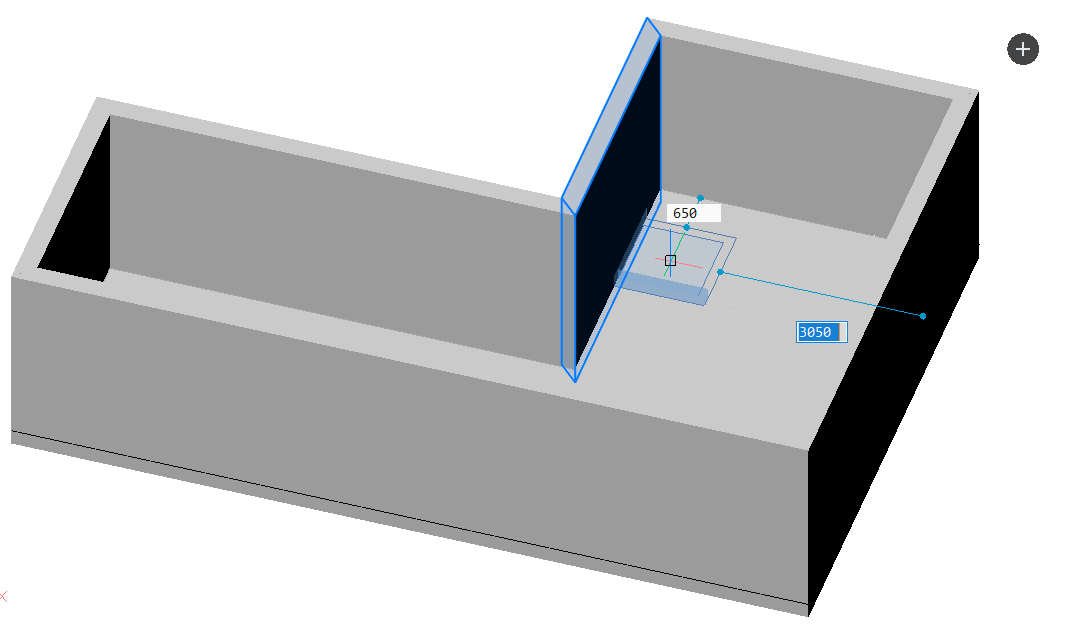
To actually draw new walls, choose the distances from the already existing walls to specify your first point. Move your cursor or type the values in the dynamic dimension fields to do this. Draw walls in the same way as explained in steps 2 and 3.
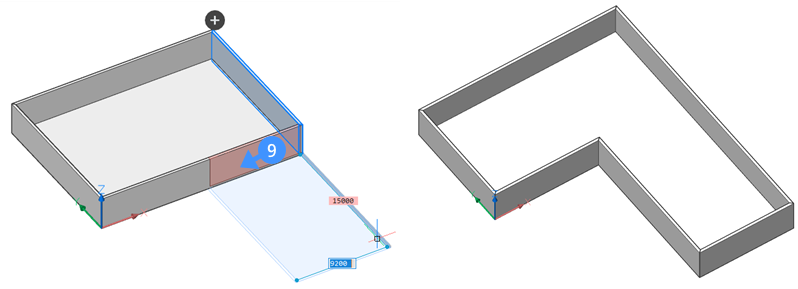
- To remove a section of a wall from the existing room, first, align the
Quickdraw cursor with an existing wall at the inner side of the building.
Then click and drag the cursor outside of the existing building.
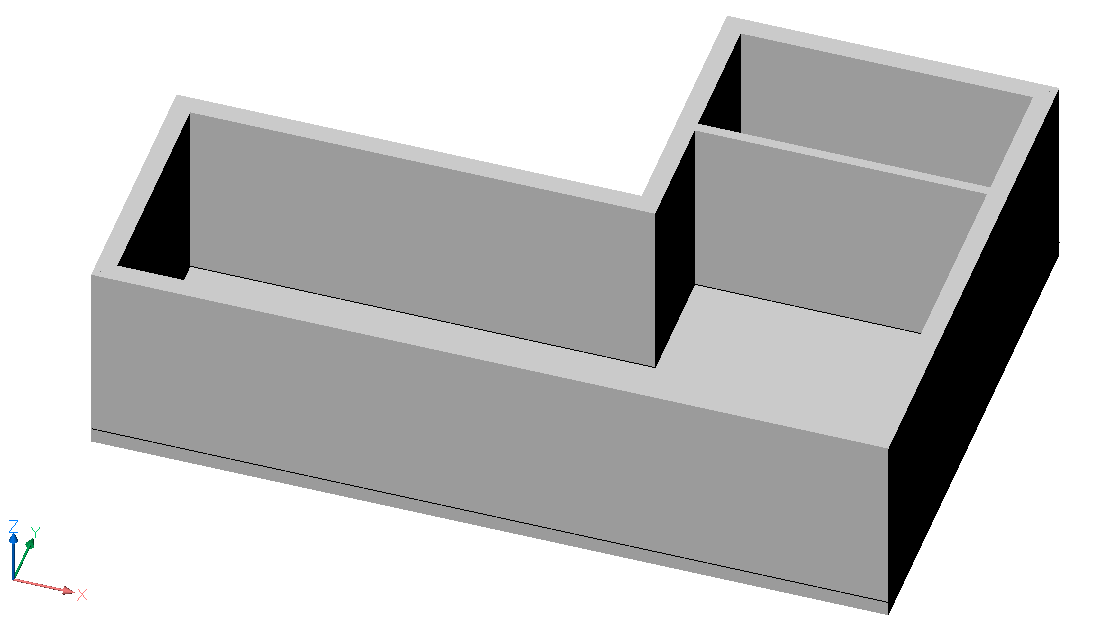
The outer wall will turn red (9) to indicate the part of the wall that will be removed.
- Select a second point. The wall highlighted in red will automatically be deleted and an L-shaped
room will be created.
 Note: You can also align your cursor with an existing wall at the outer side of the building to remove a part of the slab. Then click and drag the cursor inside the existing building.
Procedure: creating a story and a roof
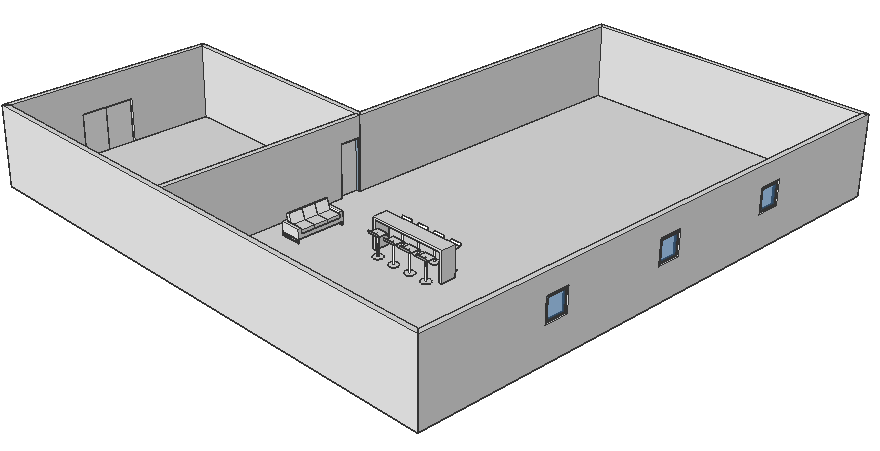
Start with a similar configuration:
Go through the following steps to create two extra stories, a floating part and a flat roof.
- When the Quad cursor is in the No Selection state (nothing is highlighted or selected), select Quickdraw in the Model tab or type BIMQUICKDRAW in the Command line.
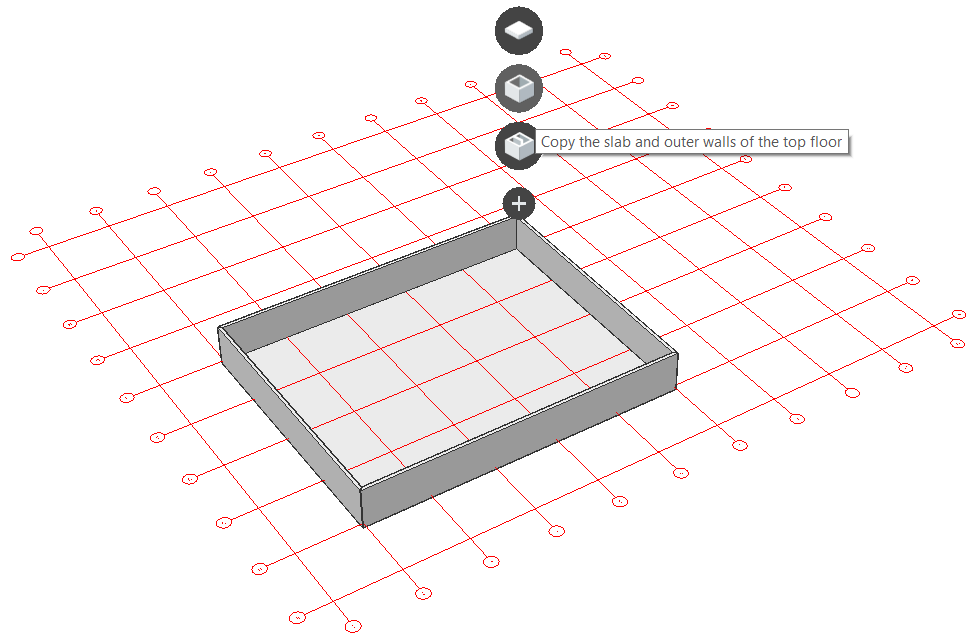
- Click on the icon (
 ) to see the options:
 Fully copy the top floor. All features will be copied (windows, doors, interior walls, and furniture, excluding doors on the outer walls of the ground floor).
 Copy the slab and the outer walls of the top floor.
 Finish the building with a flat roof.
- For the first story, choose the first option (Full copy).
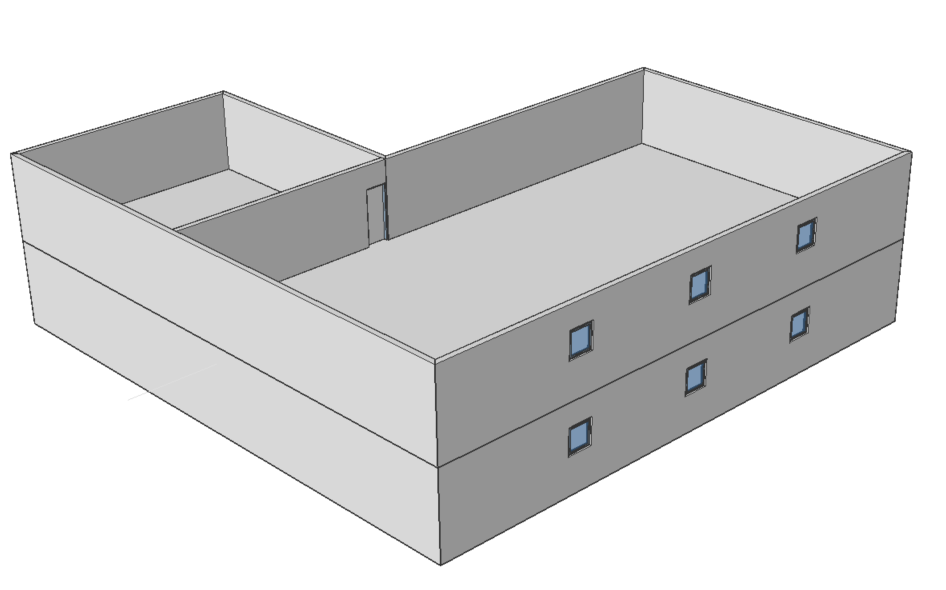
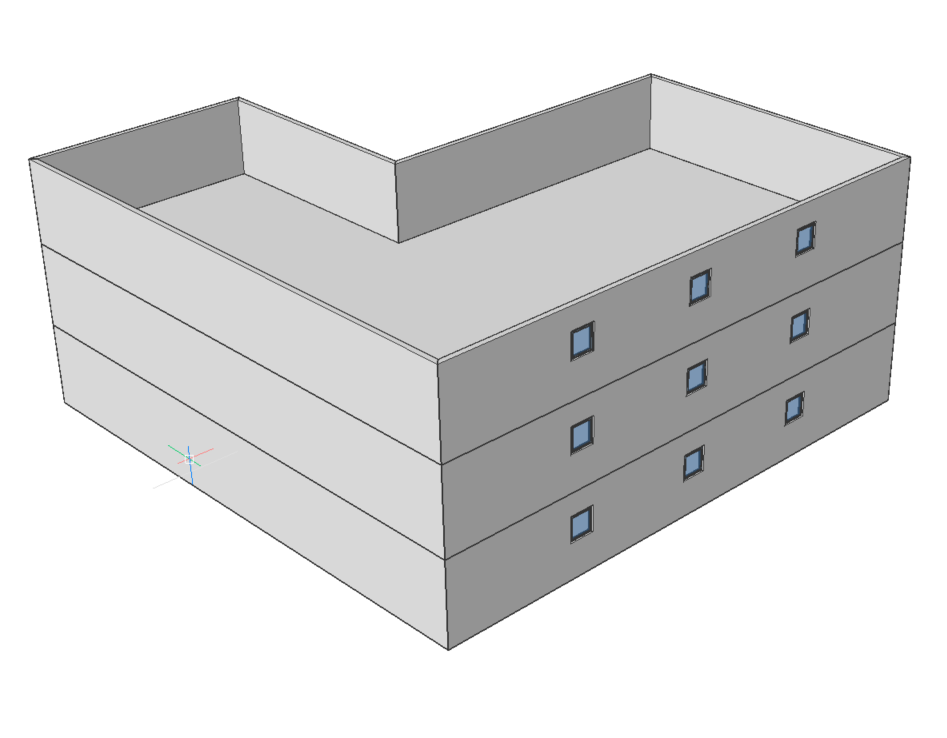
Note: The interior wall and interior door and the windows in the exterior wall are copied. The door in the exterior wall on the ground floor is not copied.Note: The furniture is not copied in this case, because it is not assigned to the ground floor (see the Properties panel). If you want to copy the furniture, use BIMIFY command to assign the furniture to a spatial location. The new furniture will be automatically assigned to the new spatial location.Note: Walls inherit the spatial location of the slab on which they are created. - Repeat step 2. Choose the second option (Copy the slab and the outer walls) to create the top story.
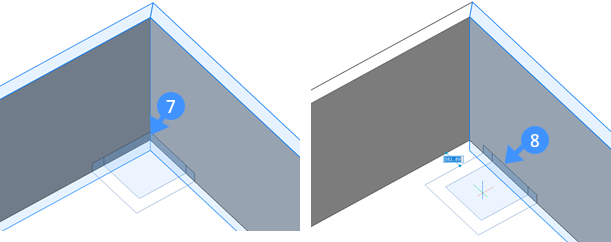
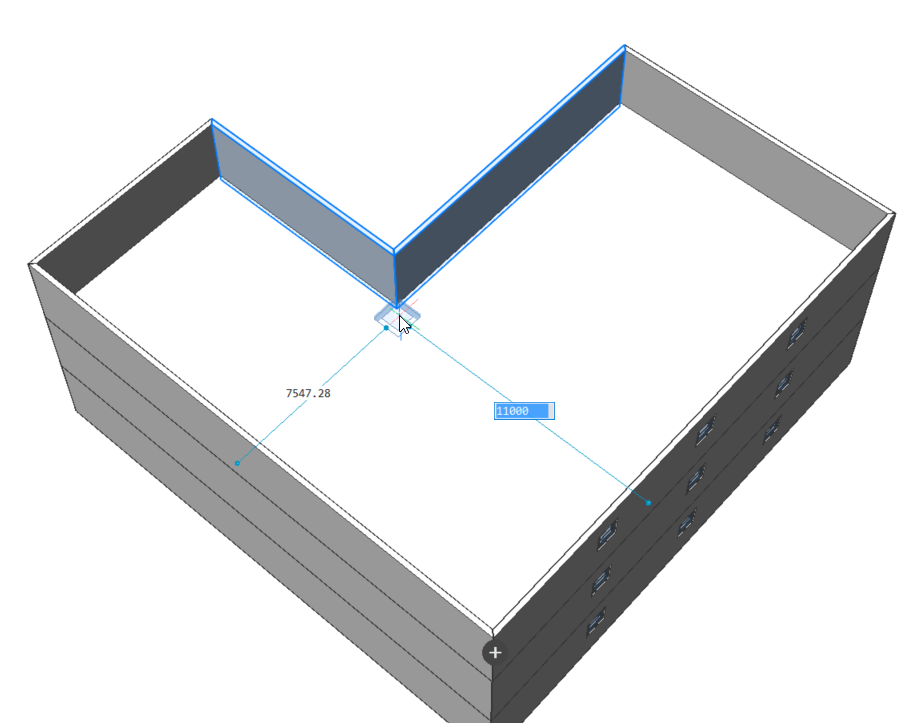
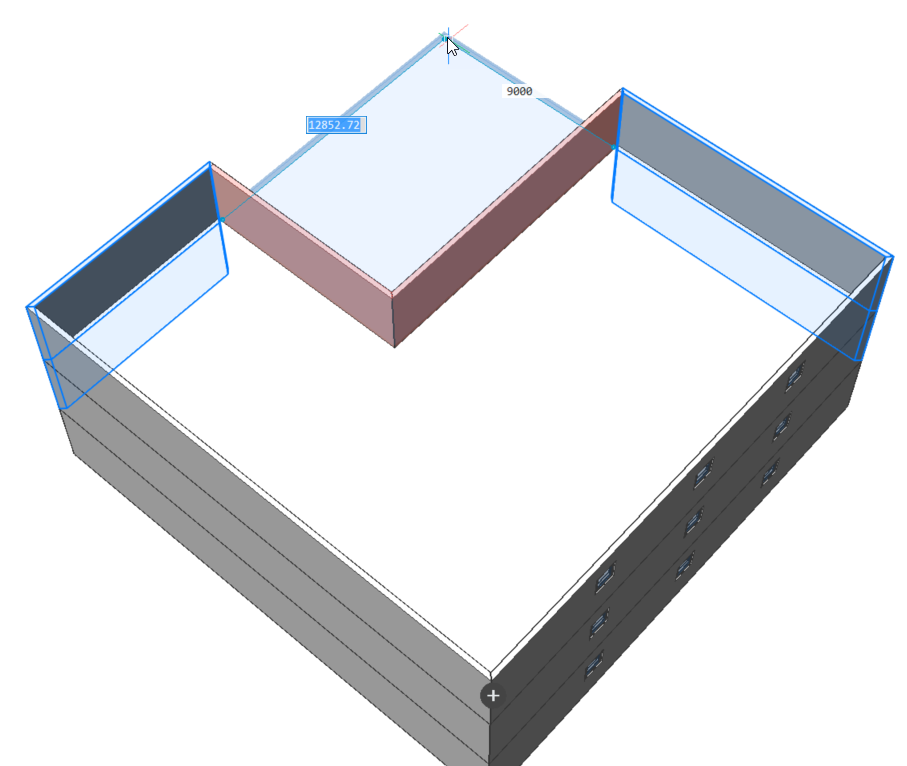
- To make the overhang you should remove parts of the outer walls of the second floor. First, snap the Quickdraw cursor in the corner of the two outer walls, inside the building. Then click and drag the cursor outside.
The outer walls will turn red to indicate that the walls will be removed.
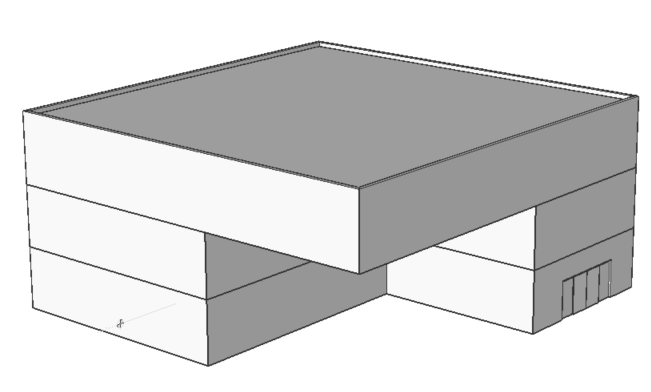
- Use the same method as in step 2, selecting option 3 (Finish the building with a flat roof).
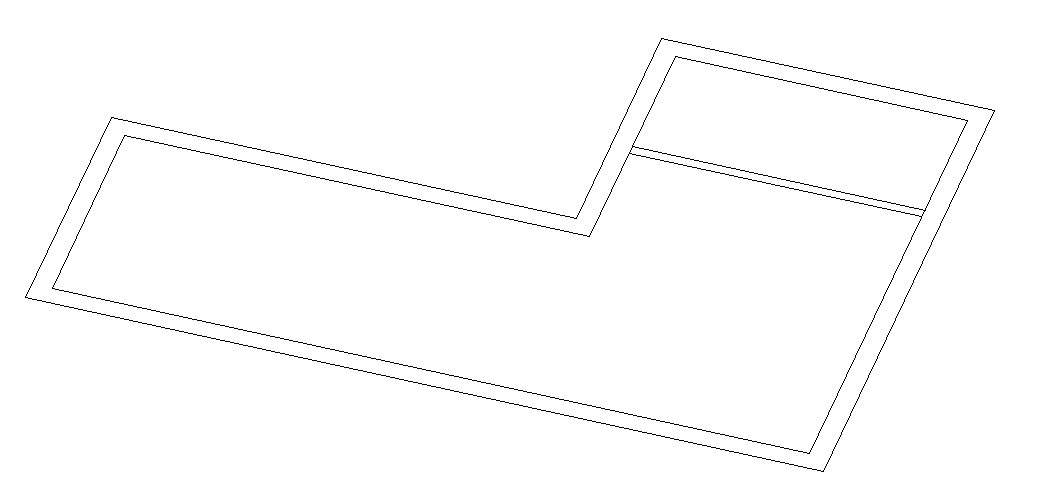
Procedure: using Quickdraw starting from a 2D layout
- Open a 2D floorplan of a rectangular or L-shaped building.
Note: It is also possible to draw a simple 2D floor plan with the (POLY)LINE command to start from. In this case, the default wall thickness of the BIMQUICKDRAW command will be used.Note: The Quickdraw cursor now supports snapping to (double) lines inside XREFs and to entities using ESNAP. - When the Quad cursor is in the No Selection state (nothing is highlighted or selected), select Quickdraw in the Model tab, click the Quickdraw icon in the ribbon or type BIMQUICKDRAW in the Command line.
- Hover over one of the outer walls with the cursor.
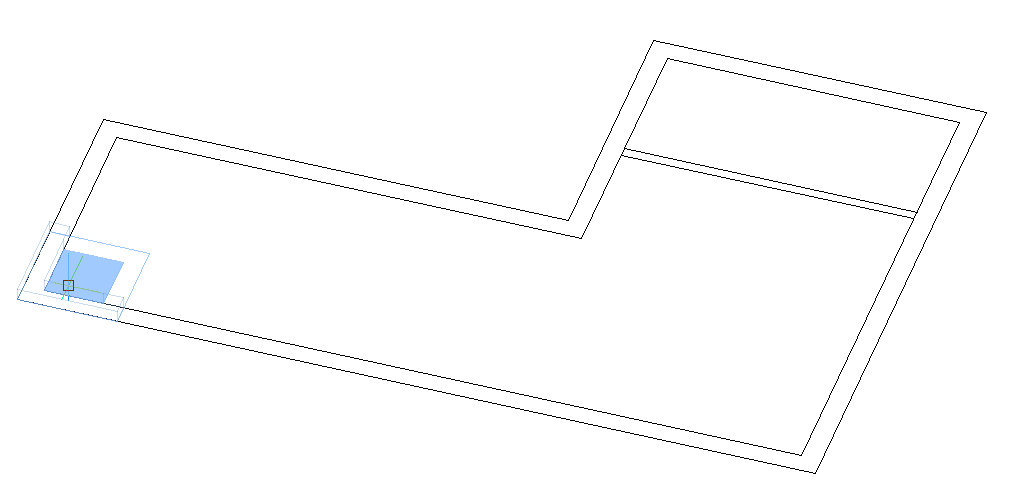
Note: The thickness of the wall automatically adapts to the distance between the parallel lines of the 2D drawing.Note: If the lines in the (imported) 2D floorplan are not optimal (for example, not exactly X- or Y-aligned), the Quickdraw cursor will not snap to it (as it is perfectly X-Y-aligned). In that case, use the OPTIMIZE command to make sure all 2D lines exactly X- or Y-aligned. - Draw the outer walls, using the magnetic snapping feature to snap to the lines of the 2D drawing.
- Hover over one of the inner walls with the cursor, using the magnetic snapping feature to snap to the lines of the 2D drawing.
Note: The thickness of the wall automatically adapts to the distance between the parallel lines of the 2D drawing. - The 2D plan has been transformed into a 3D model.
Note: you can use the same method as in step 2 and 6 of the previous procedure to add floors or finish the building with a flat roof.