MATERIALMAP command
Adjusts the placement of texture images.

Icon: 
Alias: SETUV
Description
Adjusts the placement of texture images onto 3D solids, 3D faces, wide polylines, and polygon meshes to create a more realistic look, such as matching a brick pattern to the wall of a house.
Method
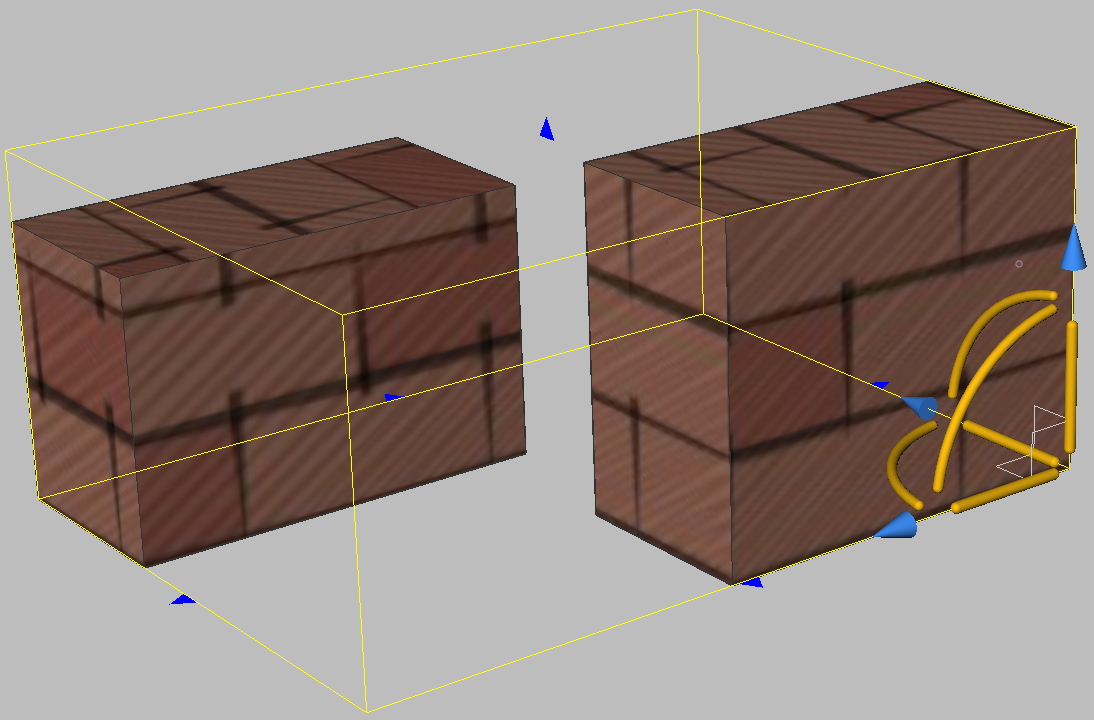
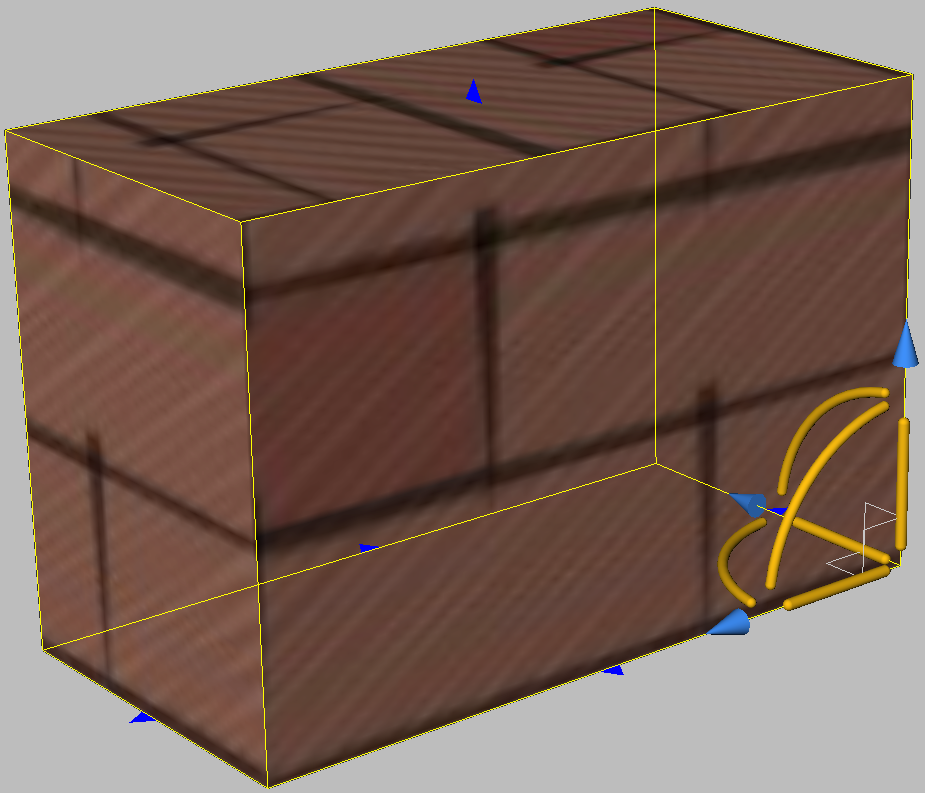
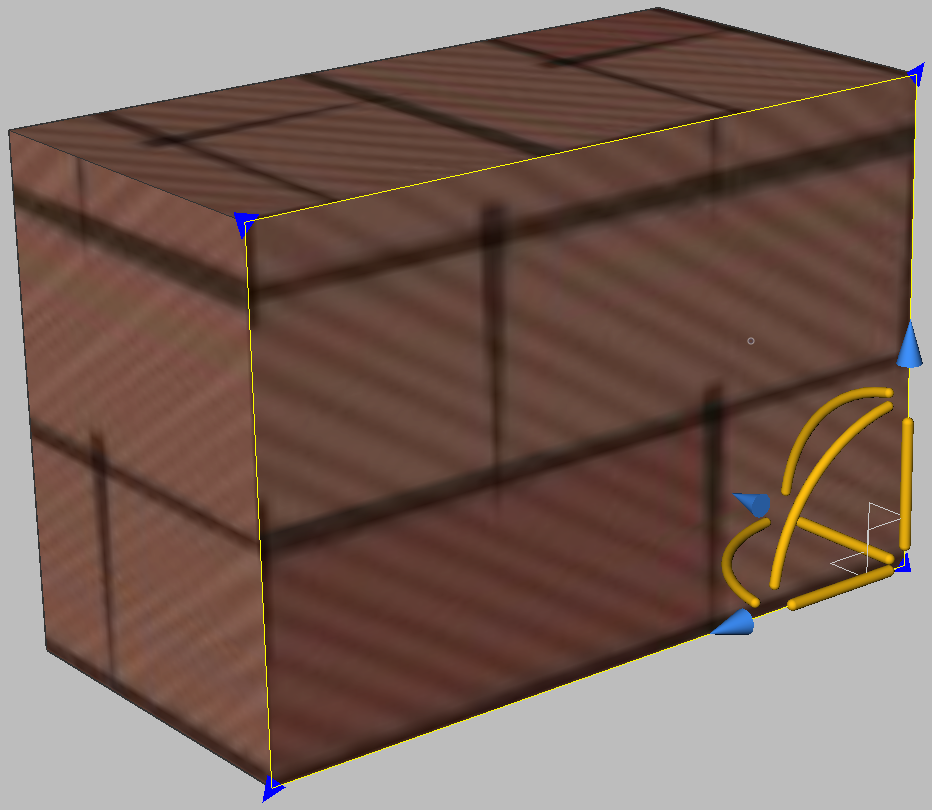
The selected entities are included in a yellow bounding box. Blue grips and the manipulator widget appear:
- Drag the blue grips to change the scale of the material horizontally and vertically.
- Click different parts of the manipulator to move, scale, and rotate the material.
Options within the command
- Box
- Wraps the texture around the six faces of the bounding box.
-
- Planar
- Aligns the texture to a single face.
-
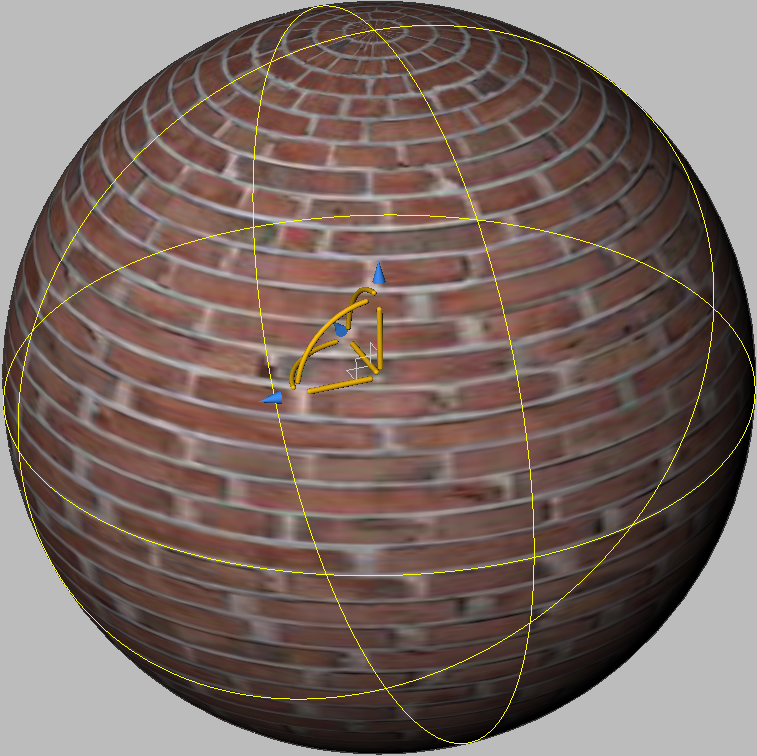
- Spherical
- Aligns the texture to a spherical shape. The top and bottom edges of the image are compressed to a point at the north and south poles of the sphere.
-
- Cylindrical
- Aligns the texture to a cylinder shape. The vertical edges of the image are wrapped together. The height of the image is scaled along the axis of the cylindrical shape.
-

- sWitch mapping mode
- Switches to a different mapping mode.
- copY mapping to
- Applies mapping from the source entity or face to the selected entities, thus duplicating the mapping, including any adjustments, to other entities. All entities share the same mapping origin, axes and scale. As a result, the texture image is extended seamlessly from one entity to another.
- Reset mapping
- Restores the default mapping.