Adnotacje w 3D
Polecenia
BIMTAG, BIMKLASYFIKUJ
BIM klasyfikuj jako adnotację
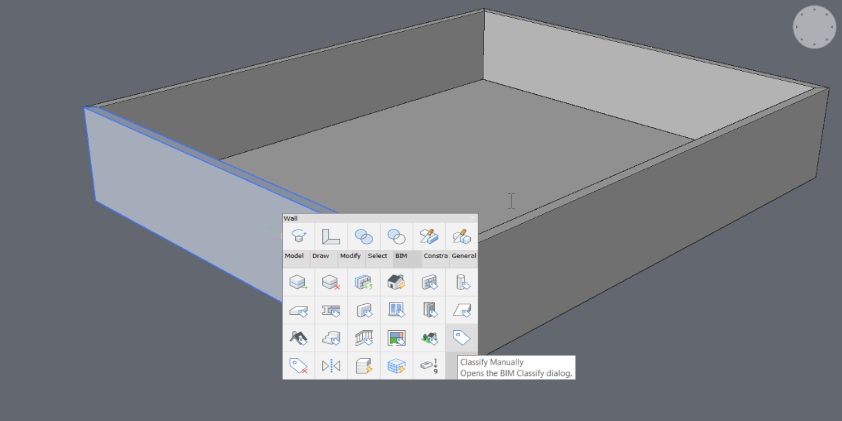
- Zaznacz bryłę i wybierz Klasyfikuj ręcznie w Quad lub sklasyfikuj jako Inne po uruchomieniu BIMKLASYFIKUJ w wierszu poleceń:
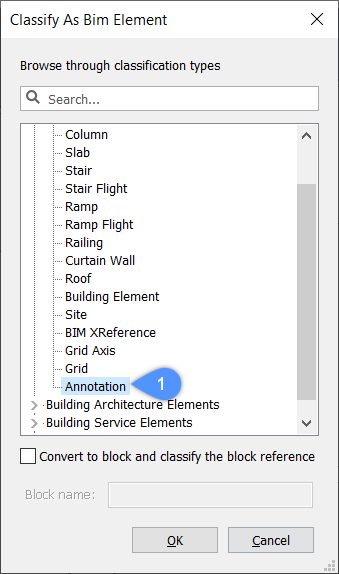
- Wybierz klasyfikację jako Adnotacja(1) w folderze Elementy rdzenia budynku i kliknij OK:
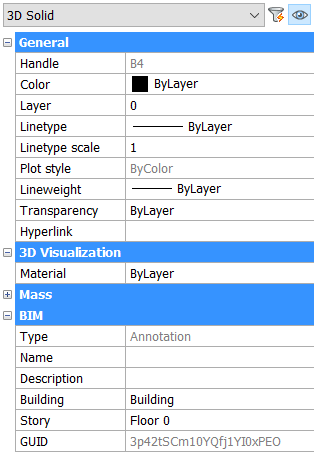
- Po otwarciu panelu Właściwości wybranej bryły można zmienić Nazwa, Opis, Budynek i Kondygnacja.Uwaga: Właściwość GUID nie może zostać zmieniona, ponieważ posiada unikalny, automatycznie generowany ciąg znaków.
Wyświetlanie dodatkowych informacji o materiale wykończeniowym
Ta procedura umożliwia dodanie informacji projektowych do betonowej konstrukcji dachu.
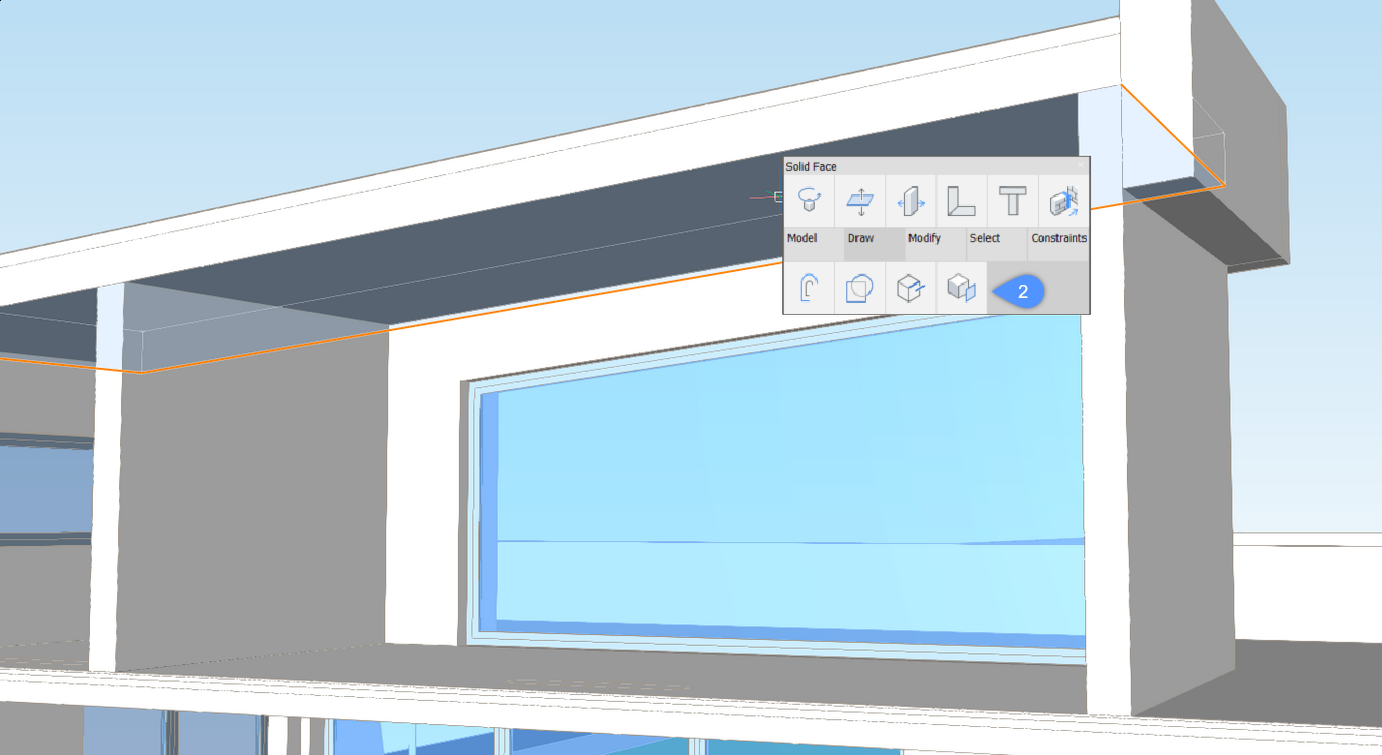
- Użyj polecenia XPOWIERZCHNIE (2) pod Rysuj w quadzie, aby wyodrębnić powierzchnię encji Dach. Region został utworzony.
- Sklasyfikuj region jako Adnotacja, jak pokazano powyżej.
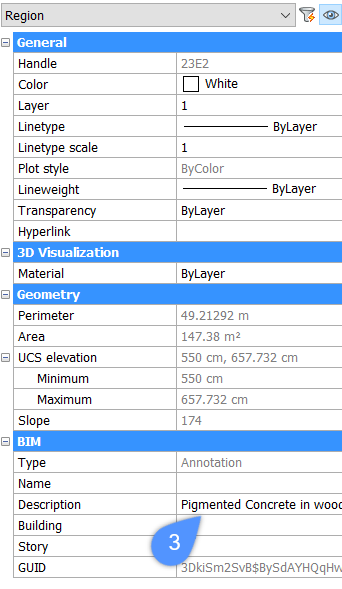
- Wprowadź żądany tekst w polu Opis (3) (znajdującym się w panelu Właściwości ):Uwaga: Domyślnie znacznik BIM odwołuje się do właściwości Opis.
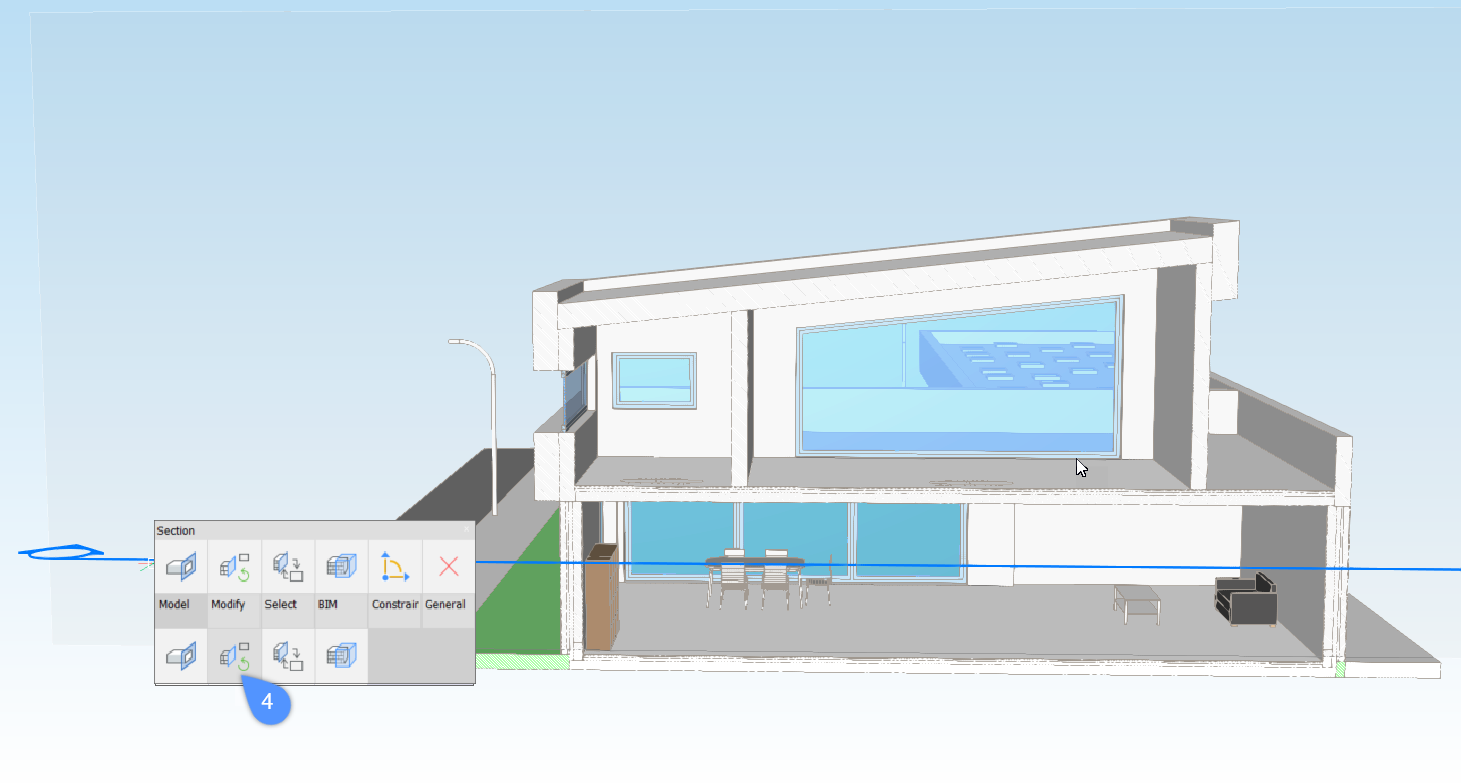
- Utwórz przekrój przez region (za pomocą polecenia BIMPRZEKRÓJ) i wybierz Generuj przekrój(4) (
 ) z Quad:
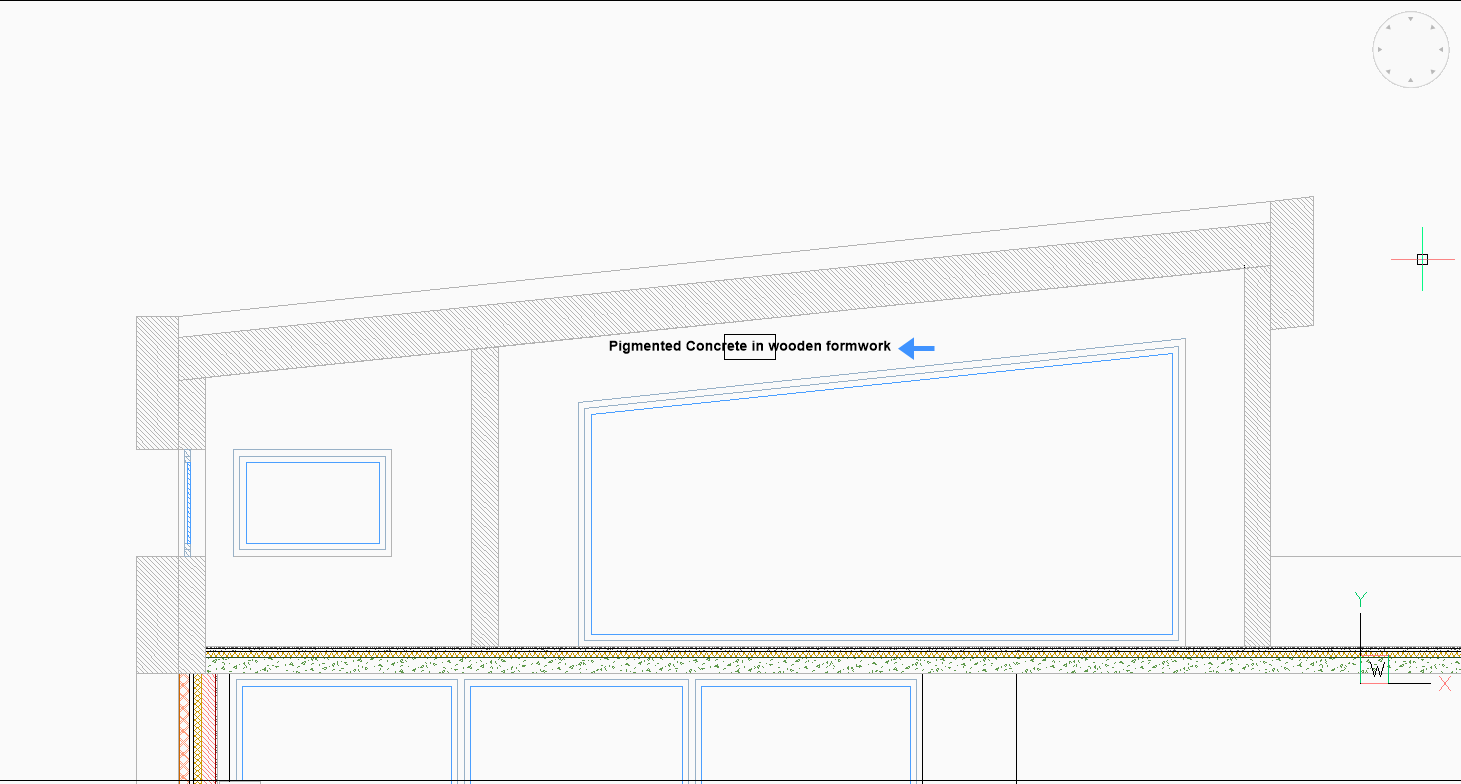
- Otwórz wygenerowany rysunek przekroju.
- Wpisz BIMTAG w wierszu poleceń lub wybierz Oznacz automatycznie w zakładce Adnotacje na Wstążce.
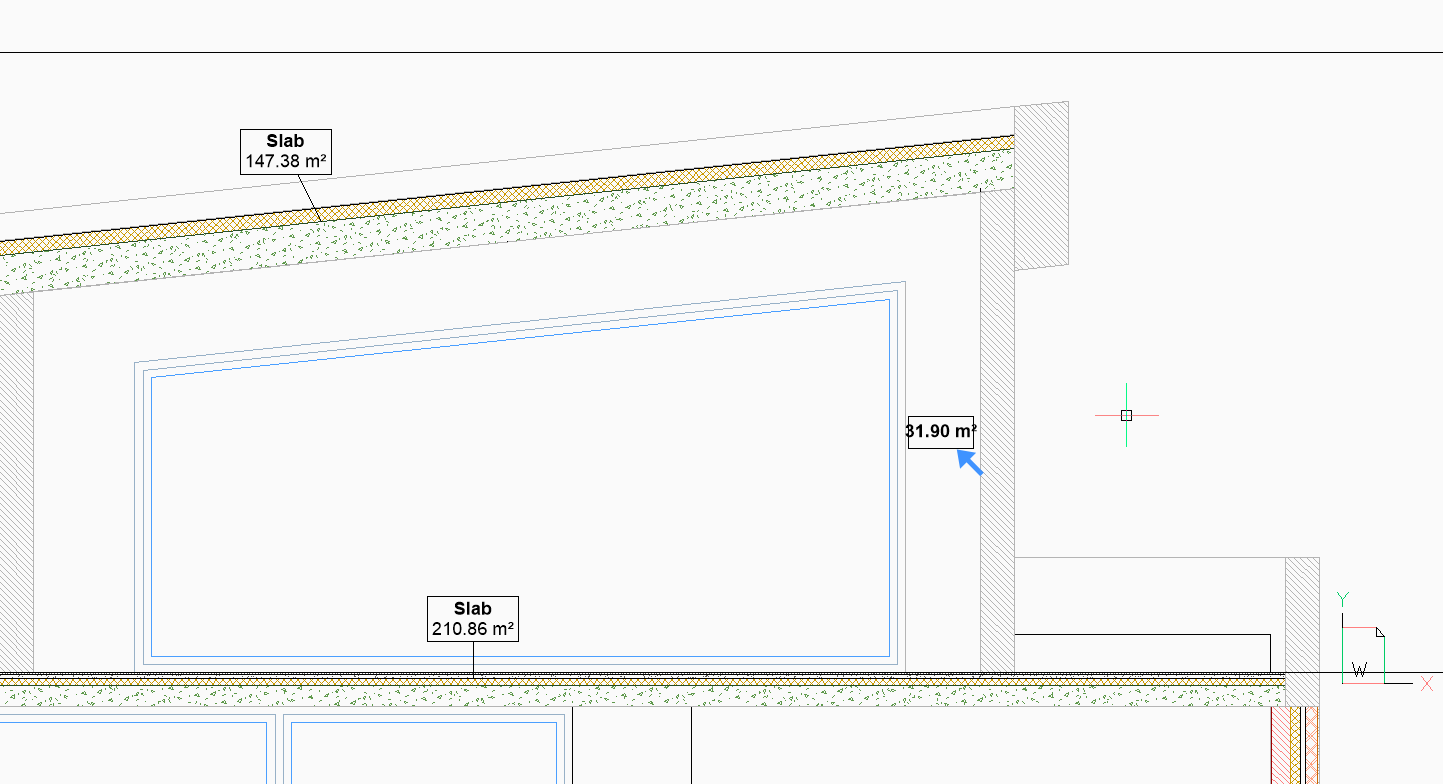
Dodany tekst znajduje się teraz na rysunku 2D:
Pokaż pole powierzchni wyodrębnionej powierzchni
Ta procedura uczy, jak wyświetlać inne właściwości jednostki sklasyfikowanej jako obiekt Adnotacje.
Uwaga: Znacznik adnotacji domyślnie pobiera informacje z właściwości Opis.
Więcej informacji na temat tagowania można znaleźć w artykule Korzystanie z tagów BIM.
- Wybierz twarz, z której chcesz wyodrębnić informacje.
- Wybierz Wyodrębnij Powierzchnie(5) z Quad. Region został utworzony.
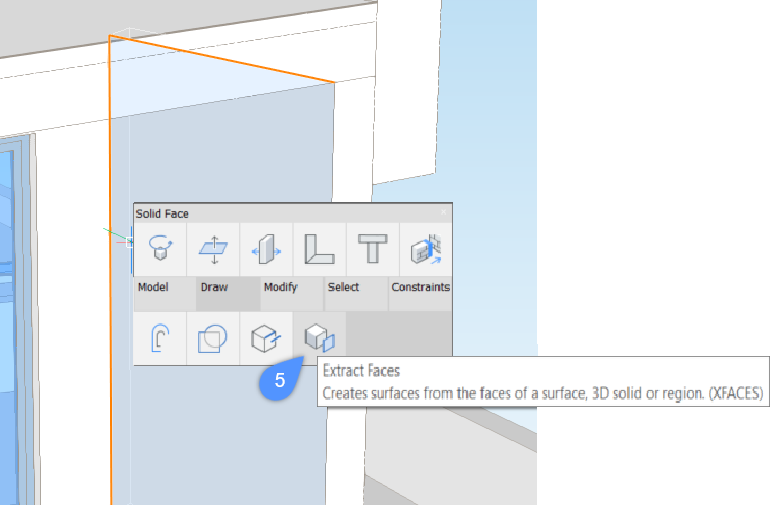
- Sklasyfikuj region jako Adnotacja jak powyżej.
- Utwórz przekrój przez bryłę (za pomocą polecenia BIMPRZEKRÓJ) i wybierz Generuj przekrój (
 ) z Quad.
 - Otwórz wygenerowany rysunek przekroju.
- Wpisz BIMTAG w wierszu poleceń lub wybierz Oznacz automatycznie w zakładce Adnotacje na Wstążce.Uwaga: Znacznik wydaje się pusty, ponieważ domyślnie odnosi się do właściwości Opis.
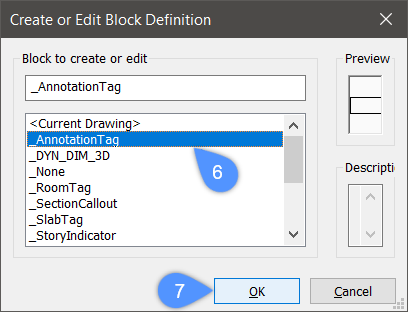
- Uruchom polecenie BEDYCJA.
- Wybierz _AnnotationTag (6) i kliknij OK (7) .
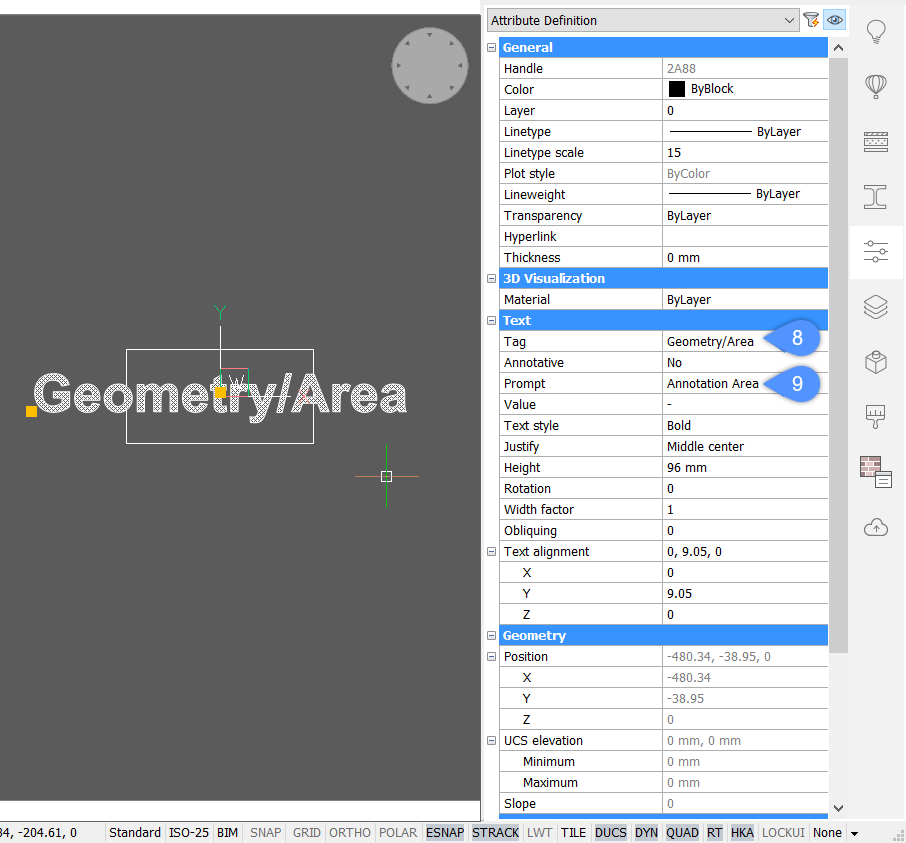
- Wybierz definicję atrybutu w panelu Właściwości.
- Edytuj właściwość Tag i zmień ją na Geometry/Area (8).
- (Opcjonalnie) Można również zmienić właściwość Prompt (9).
- Wpisz BZAMKNIJ w wierszu poleceń i kliknij Zapisz.
- Zaznacz rzutnię i wybierz Wygeneruj przekrój (
 ) z Quad. Obszar regionu jest teraz wyświetlany w znaczniku.