Korzystanie z przeglądarki projektów BIM
Panel Przeglądarki Projektów
Panel Przeglądarka projektu BIM znajduje się po lewej stronie ekranu.
Utwórz projekt BIM
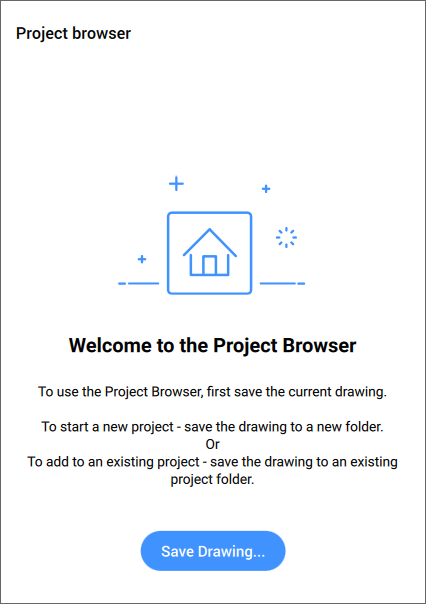
Aby utworzyć projekt BIM, należy zapisać rysunek modelu, a następnie:
- Kliknij przycisk Utwórz projekt w Przeglądarka projektu BIM.
Wszystkie zewnętrzne pliki referencyjne urządzenia nadrzędnego są zawarte w projekcie.
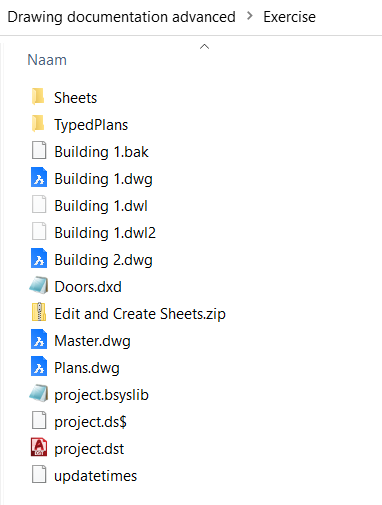
Inne rysunki można dodać do projektu, po prostu zapisując je w folderze projektu, a następnie klikając Dodaj do Projektu.
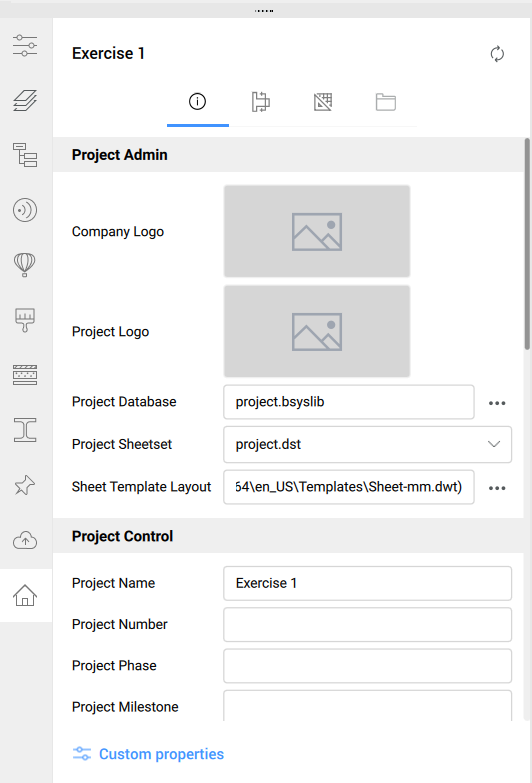
- Zostanie otwarta zakładka Info w panelu Przeglądarka projektu BIM:
- Zostanie utworzona Baza Danych Projektu. Okno dialogowe Baza Danych Projektu otwiera się po naciśnięciu przycisku Przeglądaj (
 ) po prawej stronie pola Baza Danych Projektu.
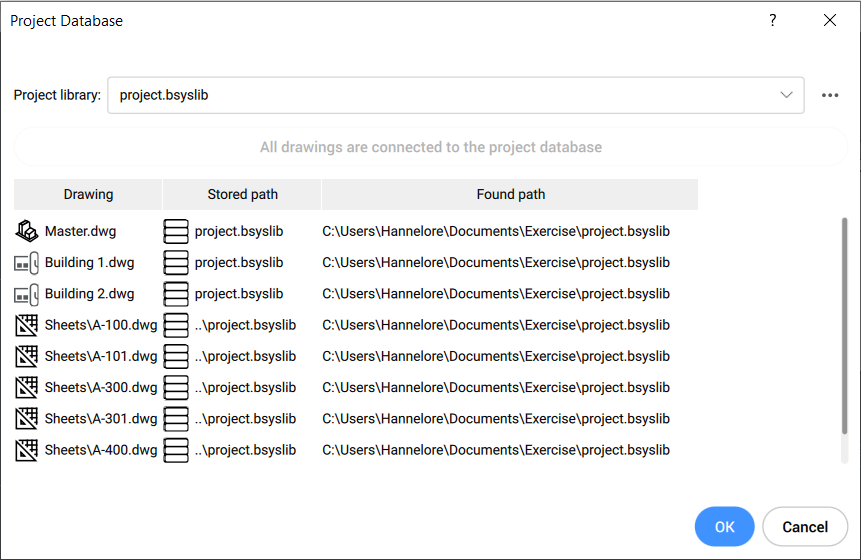
Upewnij się, że wszystkie rysunki są połączone z tą samą bazą danych projektu. Oznacza to, że wszystkie modele odnoszą się do tej samej definicji materiałów, kompozycji, profili, historii i budynku.
Uwaga: Aby uzyskać więcej informacji o bazie danych projektu, uruchom polecenie BIMPROJECTINFO, które otwiera okno dialogowe BIM Projekt Info. - Pole Zestaw Arkuszy Projektu wskazuje używany zestaw arkuszy. Można otworzyć menu rozwijane, aby wybrać inny zestaw arkuszy znajdujący się w folderze projektu.
- Układ szablonu arkusza pokazuje ścieżkę bieżącego szablonu. Kliknij przycisk Przeglądaj (), aby zmienić szablon.
- (Opcjonalnie) Ustaw informacje o projekcie w sekcji Kontrola projektu:
Wybierz plik Logo Firmy z okna dialogowego Wybierz Logo Firmy, które zostanie otwarte po kliknięciu pola obrazka.
Wybierz plik Logo Projektu w oknie dialogowym Wybierz Logo Projektu, które zostanie otwarte po kliknięciu pola obrazka.
Wpisz nazwę w polu Nazwa Projektu (domyślną nazwą projektu jest nazwa folderu nadrzędnego).
Właściwości Niestandardowe Zestawu Arkuszy i Domyślne Właściwości Arkusza Niestandardowego pojawią się w blokach tytułowych arkuszy.
Odśwież projekt
Kliknij przycisk Odśwież ( ). Przeglądarka projektów BIM jest odświeżana w celu dopasowania do zmian w modelu.
Utwórz arkusze
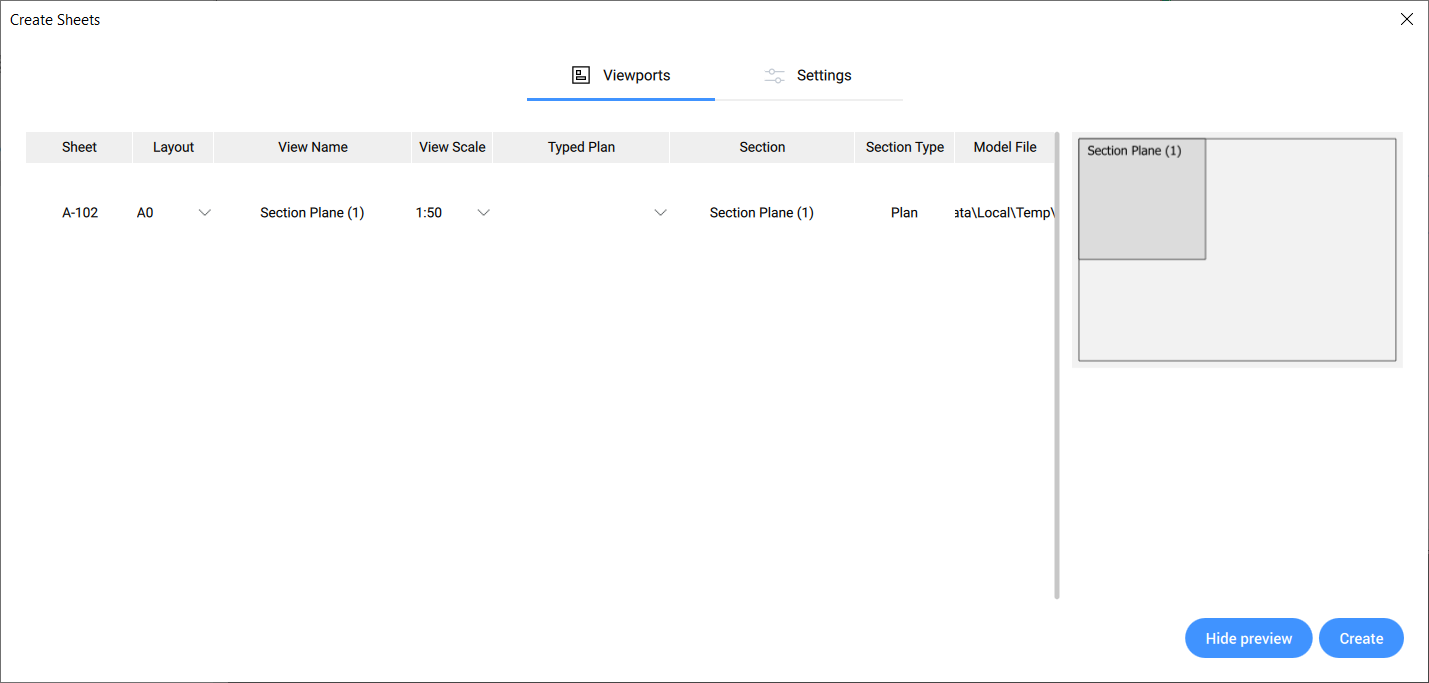
Przejdź do zakładki Sekcje i widoki w panelu Przeglądarka projektu BIM i kliknij sekcję prawym przyciskiem myszy. Wybierz Utwórz arkusz, aby otworzyć okno dialogowe Utwórz arkusz.
- Zakładka Rzutnie zawiera listę wszystkich arkuszy, które zostaną utworzone wraz z ich nazwą, układem, nazwą widoku, skalą widoku, wpisanym planem, nazwą i typem przekroju oraz nazwą pliku modelu.
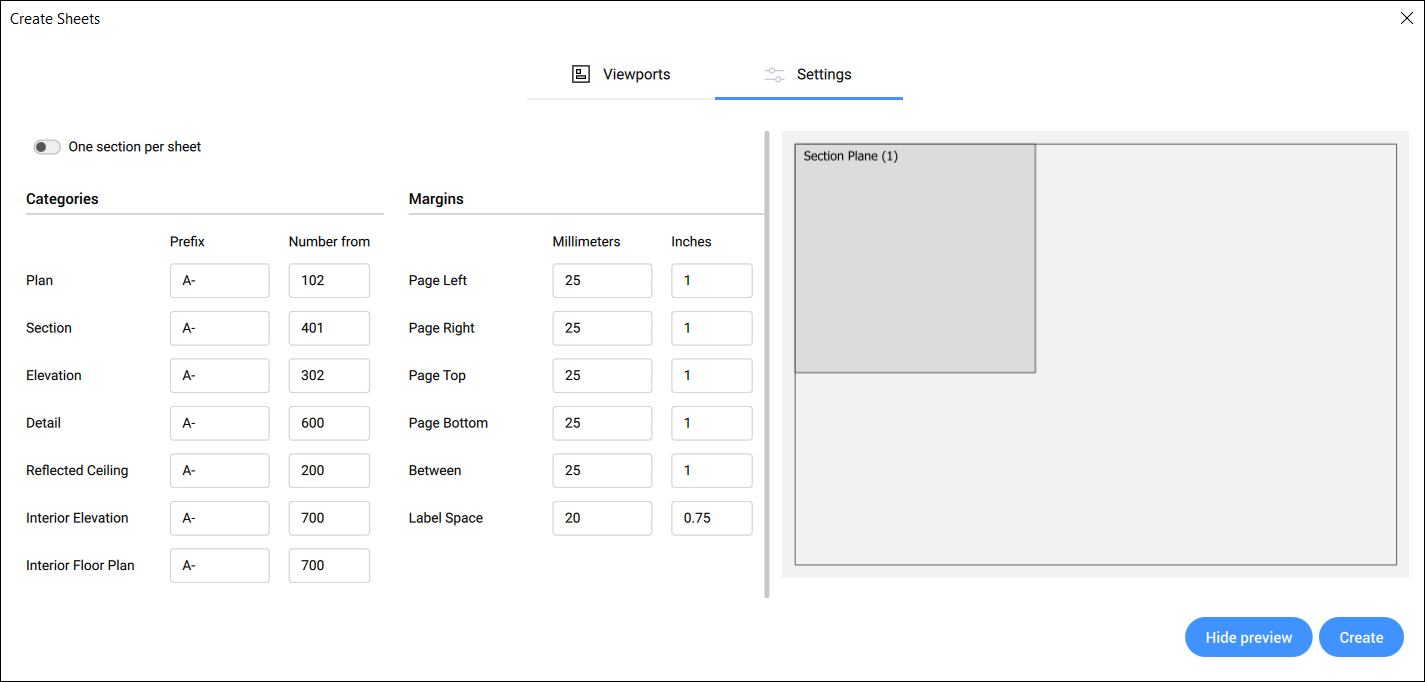
- Zakładka Ustawienia zawiera ustawienia arkuszy, które zostaną utworzone. Nazewnictwo arkuszy można zmienić w zakładce Kategorie. Marginesy arkuszy można ustawić w zakładce Marginesy. Można także włączać i wyłączać opcję Jedna przekrój na arkusz, aby zezwolić na wiele przekrojów na arkusz.
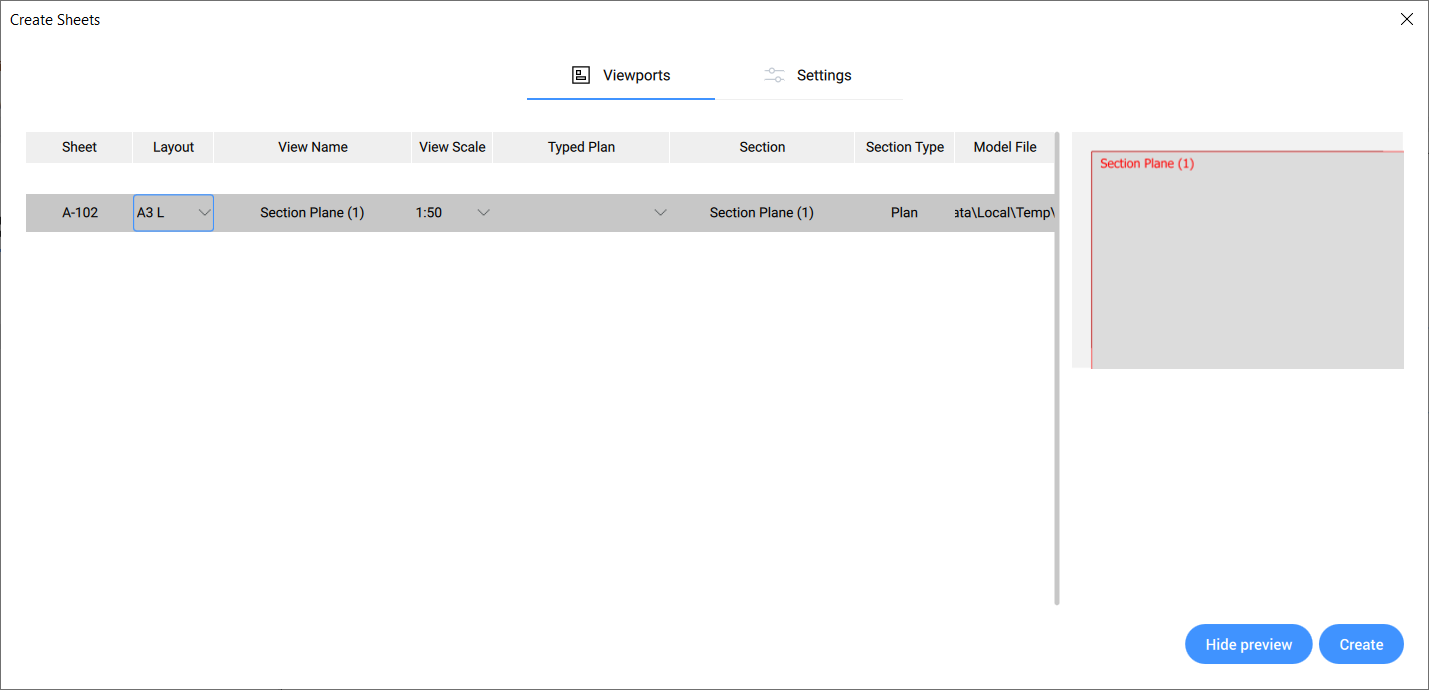
- Podgląd utworzonego arkusza jest wyświetlany po prawej stronie okna dialogowego. Kliknij ukryj podgląd, aby wyłączyć podgląd.Uwaga: Gdy rzutnia jest większa niż arkusz, podgląd jest wyświetlany na czerwono.
- Kliknij Utwórz, aby utworzyć arkusze. Arkusze są następnie widoczne w zakładce Arkusz w panelu Przeglądarka projektu BIM.
Edytuj Arkusze
Przejdź do zakładki Arkusze panelu Przeglądarka projektów i kliknij prawym przyciskiem myszy arkusz/widok arkusza. Wybierz Utwórz arkusz, aby otworzyć okno dialogowe Utwórz arkusz.
- Karta Widoki zawiera listę wszystkich widoków wybranego arkusza. Można edytować skalę i wybrać wpisany plan dla wybranego widoku arkusza.Uwaga: Położenia widoku arkusza w układzie nie można zmienić w oknie dialogowym Edytuj arkusze. Aby to zrobić, przejdź do zakładki Arkusze i kliknij dwukrotnie nazwę arkusza, aby otworzyć jego rysunek.
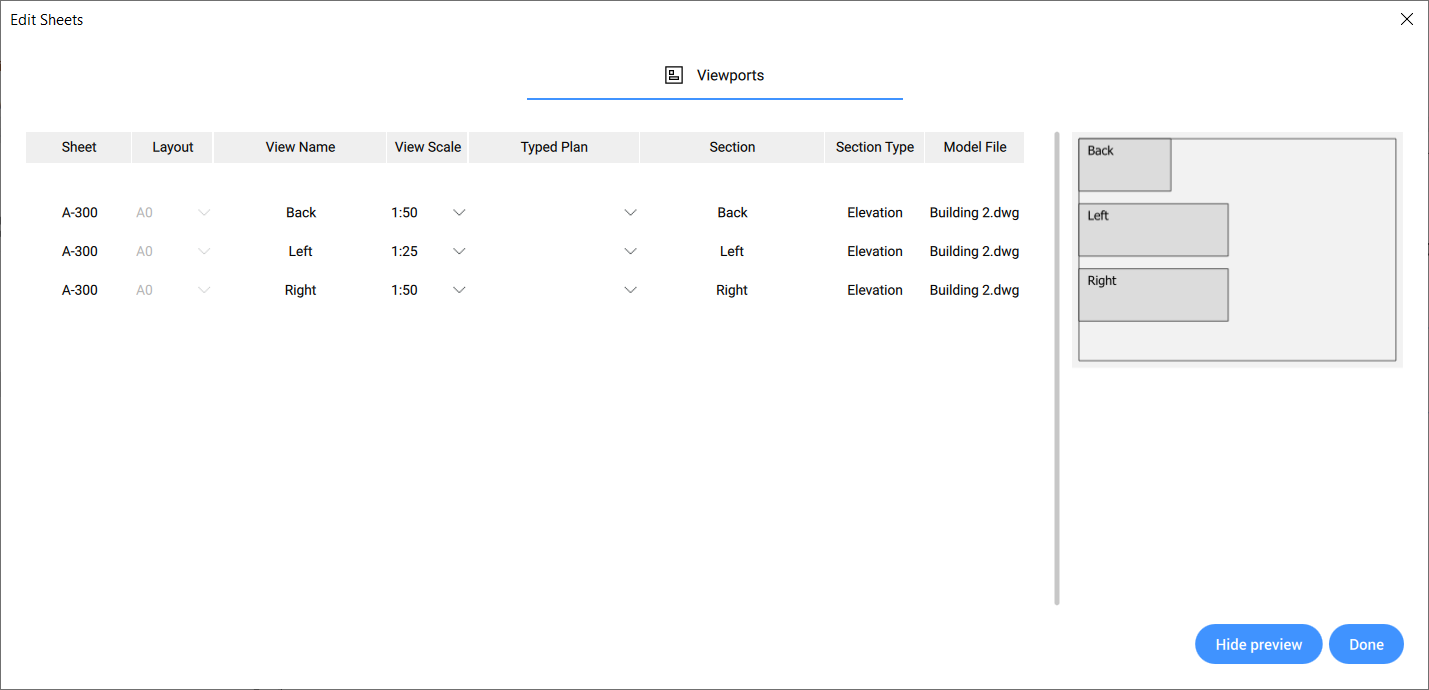
- Podgląd arkusza jest wyświetlany po prawej stronie okna dialogowego. Kliknij przycisk Ukryj podgląd, aby wyłączyć podgląd. Gdy rozmiar widoku arkusza jest większy niż układ arkusza, podgląd układu jest wyświetlany na czerwono. W takim przypadku można dostosować skalę widoku do układu.Uwaga: Rozmiaru układu istniejącego arkusza nie można zmienić w oknie dialogowym Edycja arkuszy. Aby uzyskać inny rozmiar układu, należy utworzyć nowy arkusz o żądanym rozmiarze.
- Kliknij Gotowe, aby zapisać zmiany.
Automatyczne aktualizowanie w tle
Przejdź do zakładki Arkusze w Przeglądarka Projektu. W dolnej części ekranu można włączyć lub wyłączyć opcję Automatyczna aktualizacja w tle. Po włączeniu tej opcji wyniki przekrojów są obliczane automatycznie bez przerywania pracy użytkownika.
Tworzenie zestawienia materiałów (BOM)
W panelu Przeglądarka projektu BIM przejdź do zakładki Plik i kliknij przycisk Dodaj. Wybierz opcję Nowy BOM, aby utworzyć nową listę materiałów lub opcję Importuj BOM, aby dodać istniejącą. Pliki BOM znajdują się w folderze Zestawienia.
Aby umieścić BOM na otwartym arkuszu, przejdź do drzewa zakładek Pliki i znajdź plik BOM w folderze Zestawienia. Przeciągnij i upuść go stąd na obszar Przestrzeni Papieru arkusza. Spowoduje to wygenerowanie tabeli z łączem danych do pliku BOM.
Aby edytować plik BOM, należy użyć polecenia BMBOMEDYCJASZABLONU i zaktualizować odpowiednie harmonogramy za pomocą polecenia AKTUALIZUJŁĄCZE.