Point cloud manager panel
To open the Point Cloud Manager panel:
- Run the POINTCLOUDMANAGERPANELOPEN command.
- Right-click a ribbon panel or toolbar and choose Point Cloud Manager from the Panels list.
The Point Cloud Manager panel creates and manages regions in a point cloud and controls the display of point clouds based on scans or waypoints, classification and regions.
Note: Scan information will only be available if the point cloud is preprocessed in HSPC format. Only structured point clouds contain scan information. Classification information will be available if the point cloud data source contains classification information (some *.LAS and *.LAZ files) and it is preprocessed in HSPC, or if the point cloud is classified using the Hexagon point cloud classifier (POINTCLOUDCLASSIFY command).
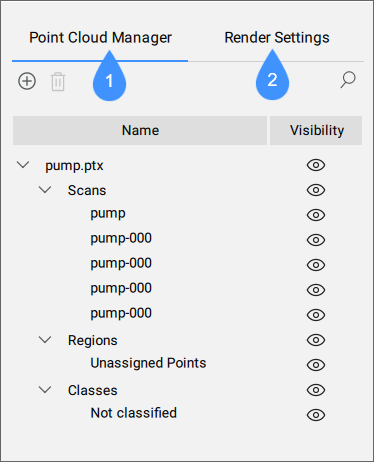
- Point Cloud Manager tab
- Render Settings tab
Point Cloud Manager tab
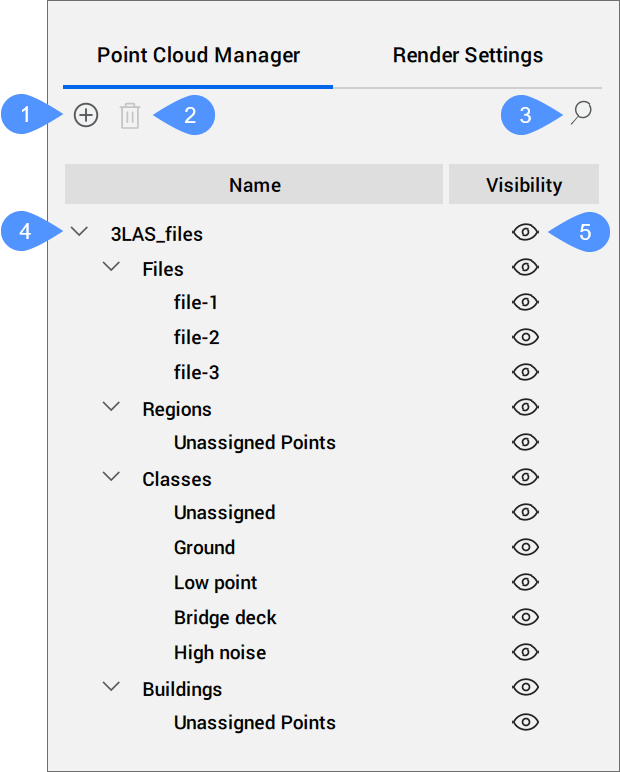
- New region
- Remove region
- Search
- List of point clouds and their scans, regions, classes, and building information
- Visibility
- New region
- Allows you to create a region by running the POINTCLOUDREGION command.
- Draw region
- Runs the Draw option of the POINTCLOUDREGION command.
- Convert crop solids to region
- Runs the Convert option of the POINTCLOUDREGION command.
- Remove region
- Removes the selected region.Note: The Unassigned Points region cannot be removed.
- Search
- Allows you to search for a specific scan, class or region name. The list is shortened and only shows the items that contain the entered sequence of characters, regardless of where they are located in the item's name.
- List of point clouds and their scans, regions, classes, and building information
- Displays a tree view list of point clouds with their scans, regions, and classes. Building information (building, floor, room) is also displayed after the POINTCLOUDDETECTFLOORS and POINTCLOUDDETECTROOMS commands (BricsCAD BIM only) have been used.
- Visibility
- Displays the current visibility state of listed items. Click the icon to switch on or off the visibility of the selected items.
Render Settings tab
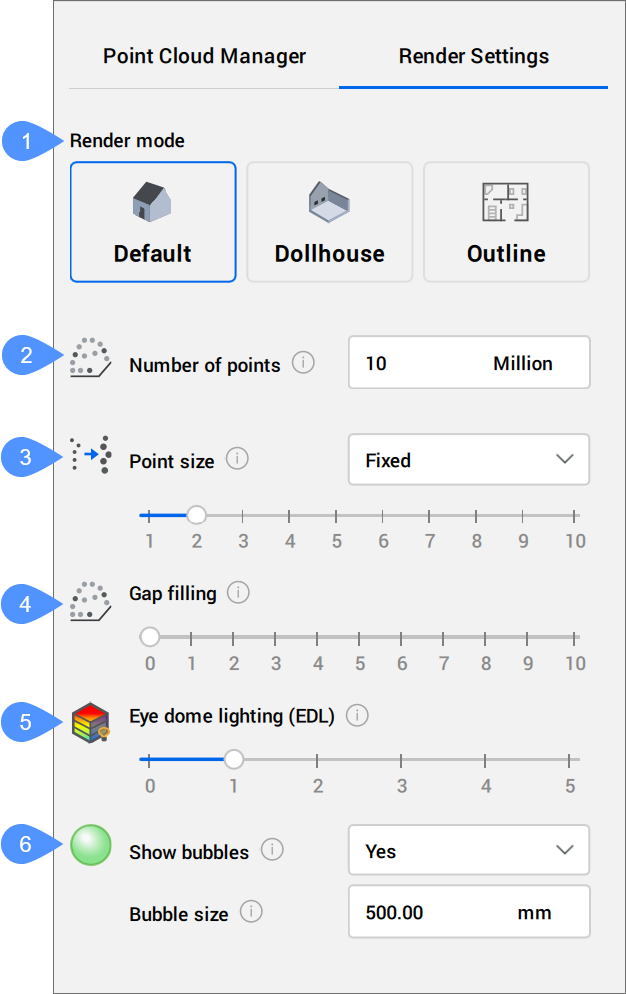
- Render mode
- Number of points
- Point size
- Gap filling
- Eye dome lighting (EDL)
- Bubbles settings
- Render mode
-
- Default (
 )
) - Renders all visible points.
- Dollhouse (
 )
) - Hides points with normal direction away from the camera.Note: Only works when signed normals are available.
- Outline (
 )
) - Shows points with normal perpendicular to camera view direction only.Note:
- Only works when normals are available.
- Works best with orthographic views.
Note: This setting can also be controlled by the POINTCLOUDRENDERMODE system variable. - Default (
- Number of points (
 )
) - Sets the maximum number of points displayed on screen, in millions of points (POINTCLOUDPOINTMAX system variable).
- Point size (
 )
) - Sets the size of points displayed (POINTCLOUDADAPTIVEDISPLAY system variable).
- Fixed
- Uses fixed point sizes.
- Adaptive
- Adjusts point sizes according to local point density and distance from the camera to the position of the scanned points.Note: Available for Windows and Linux, only for structured point clouds.
- Gap filling ()
- Fills gaps between points on surfaces.Note: Only works in perspective view, not in orthogonal view.
- Eye dome lighting (
 )
) - Allows you to set the non-photo-realistic shading to improve depth perception.
- Bubbles settings
-
- Show bubbles (
 )
) - Allows you to set the visibility of scan bubbles in Model space and Bubble viewer:
No: hides all bubbles in the point cloud.
Yes: displays all bubbles in the point cloud.
Visible Only: displays non-cropped bubbles only.
Note:- This setting applies to all point clouds inserted in the drawing.
- This setting can also be controlled by the POINTCLOUDSHOWBUBBLES system variable.
- Show bubbles (